Step 5: Match Your Brand's Styling
We want Pages to blend into your website naturally, using the same primary brand colors and basic styling. In this step, we’ll walk you through how to update these in the Pages Design tab as well as in the modules themselves.
This can be done in a couple of different ways. One way is to leverage the point-and-click options, which allow you to select colors from a color picker, or select from a list of fonts. Or, you can customize the HTML and CSS of a specific module or the global theme.
Navigate to Pages > Sites and click “Edit” on the “Locations Template”. You will see three tabs on your Page Template. Click on the “Design” tab:

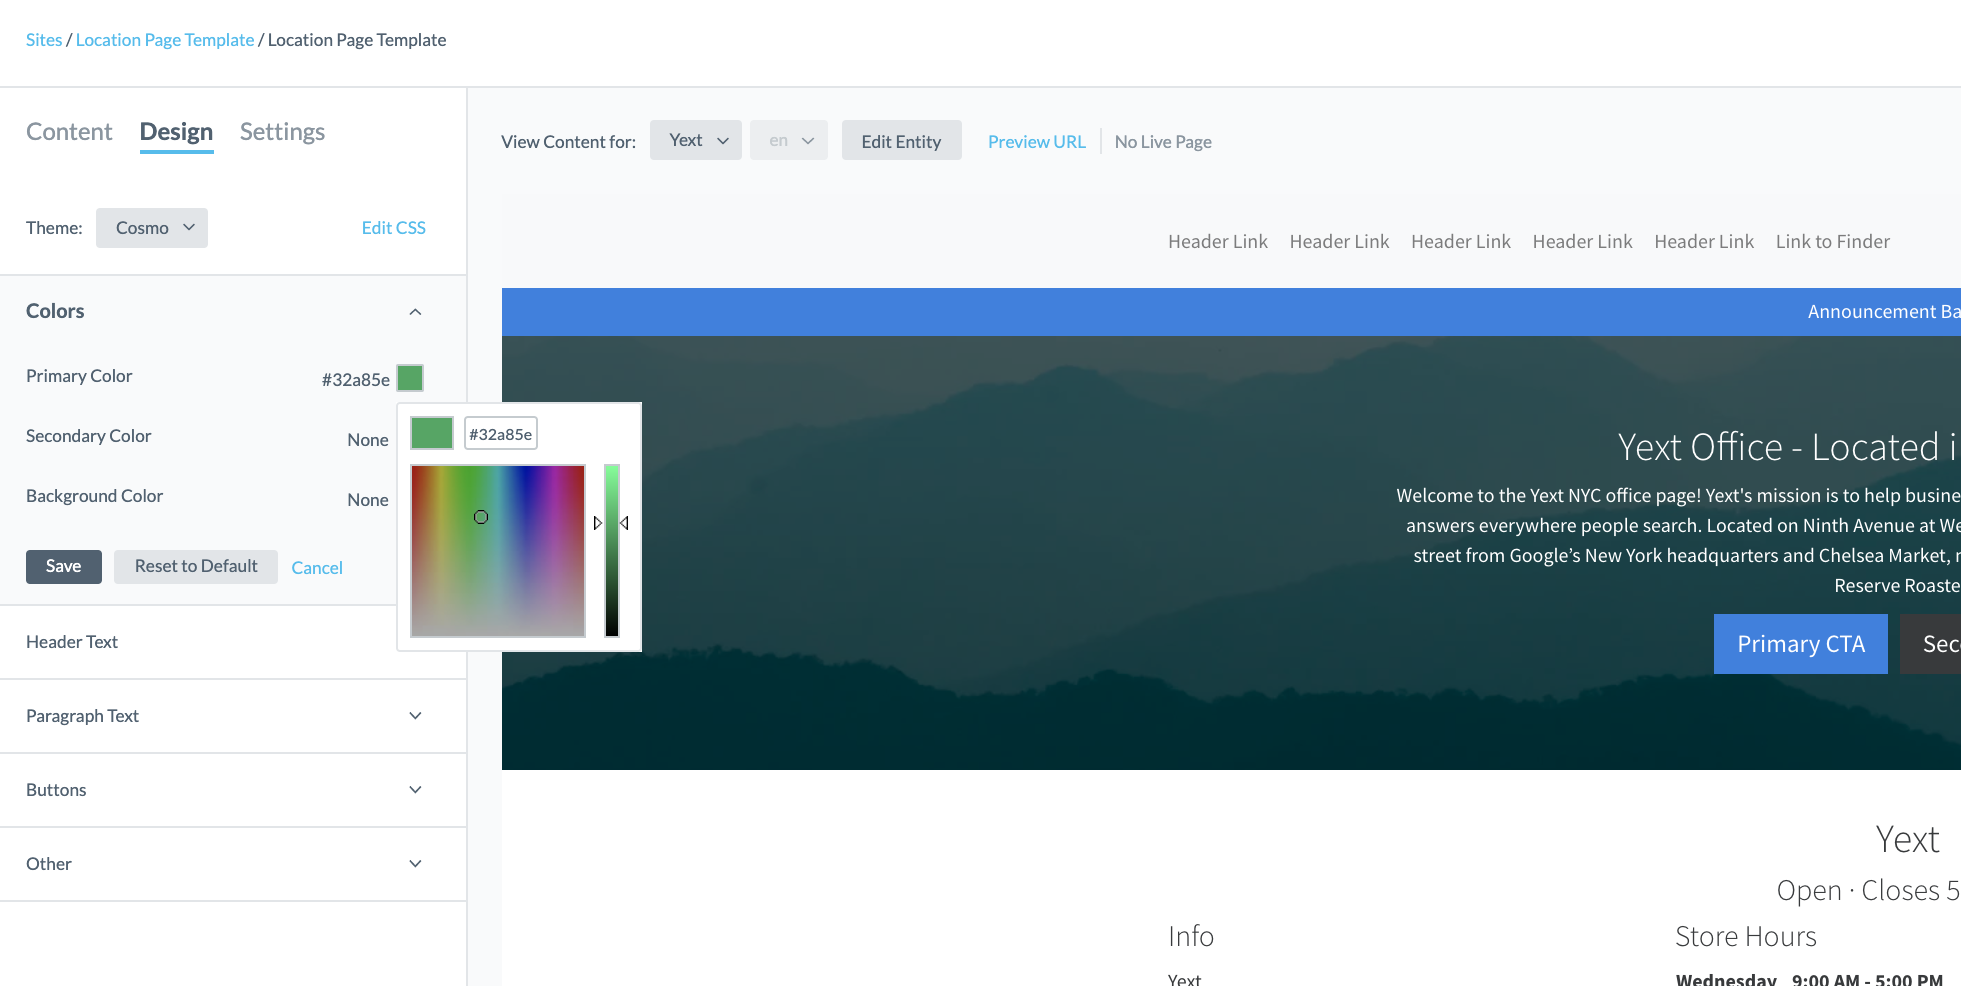
In the Design tab, you can modify variables that will make updates across several classes. Think of this like your overarching stylesheet. Click “Colors” and you’ll see it drop down with three options.
Select the square of your “Primary Color” and “Background Color” variable. We’ll want these to match the colors of your brand. You can type in a hex-value (like #0f70f0) or drag the cursor to choose the color you want.
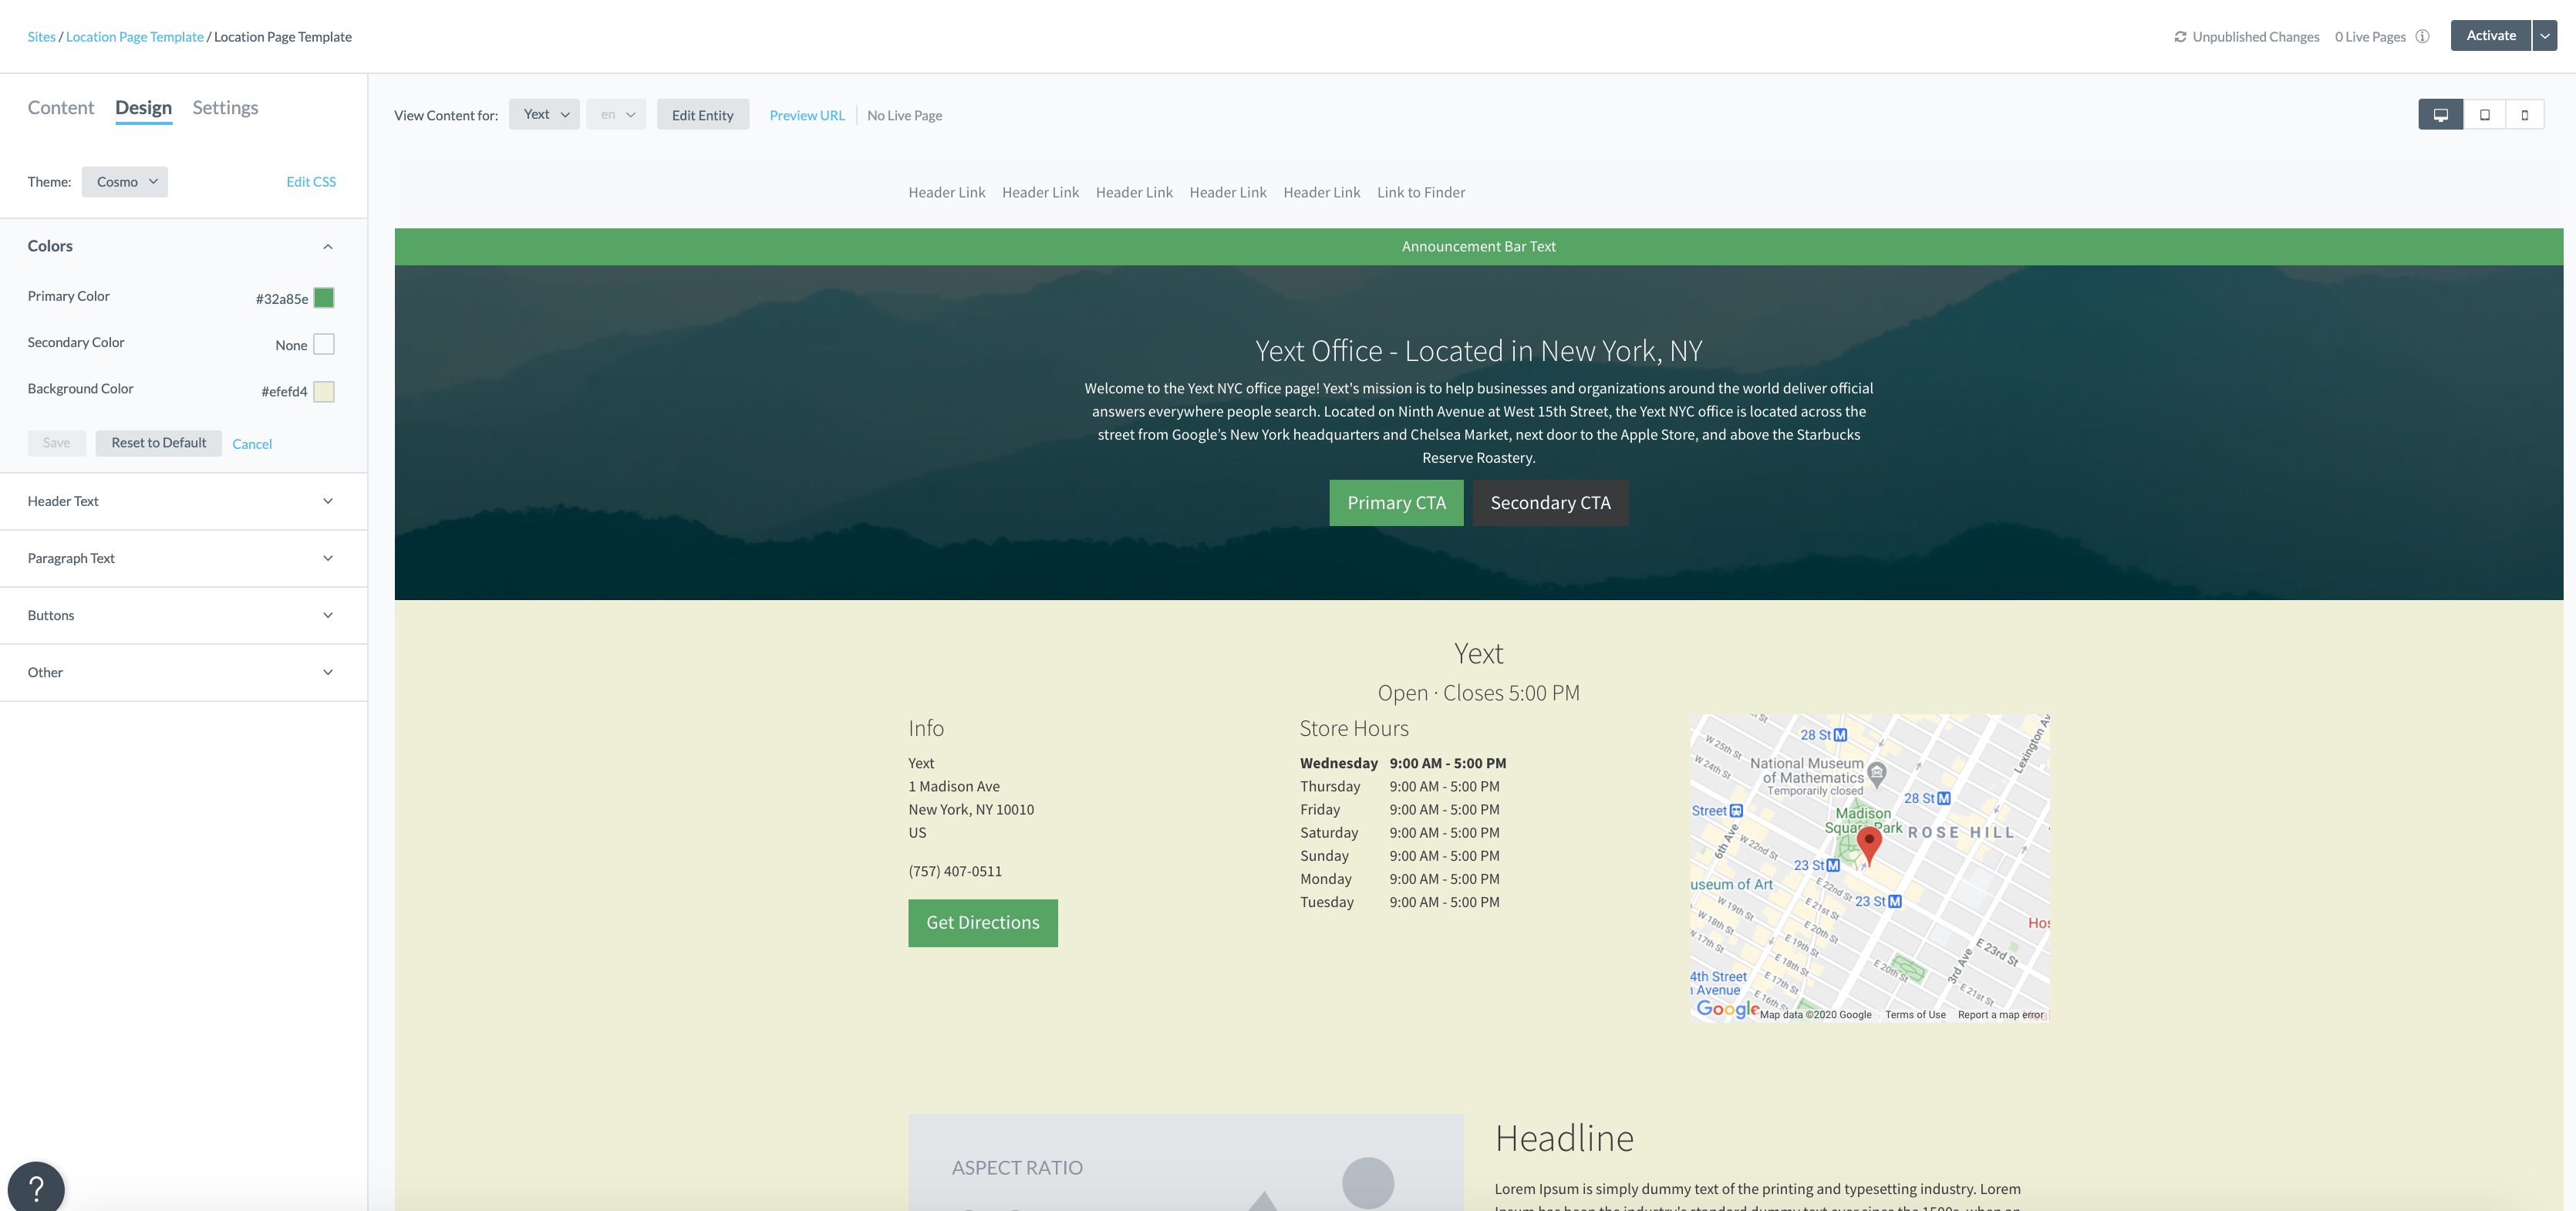
Build with Turtlehead TacosWant to follow along with Turtlehead Tacos colors? Use#32a85efor the primary color and#efefd4for the background color.Notice how the colors update across the page:

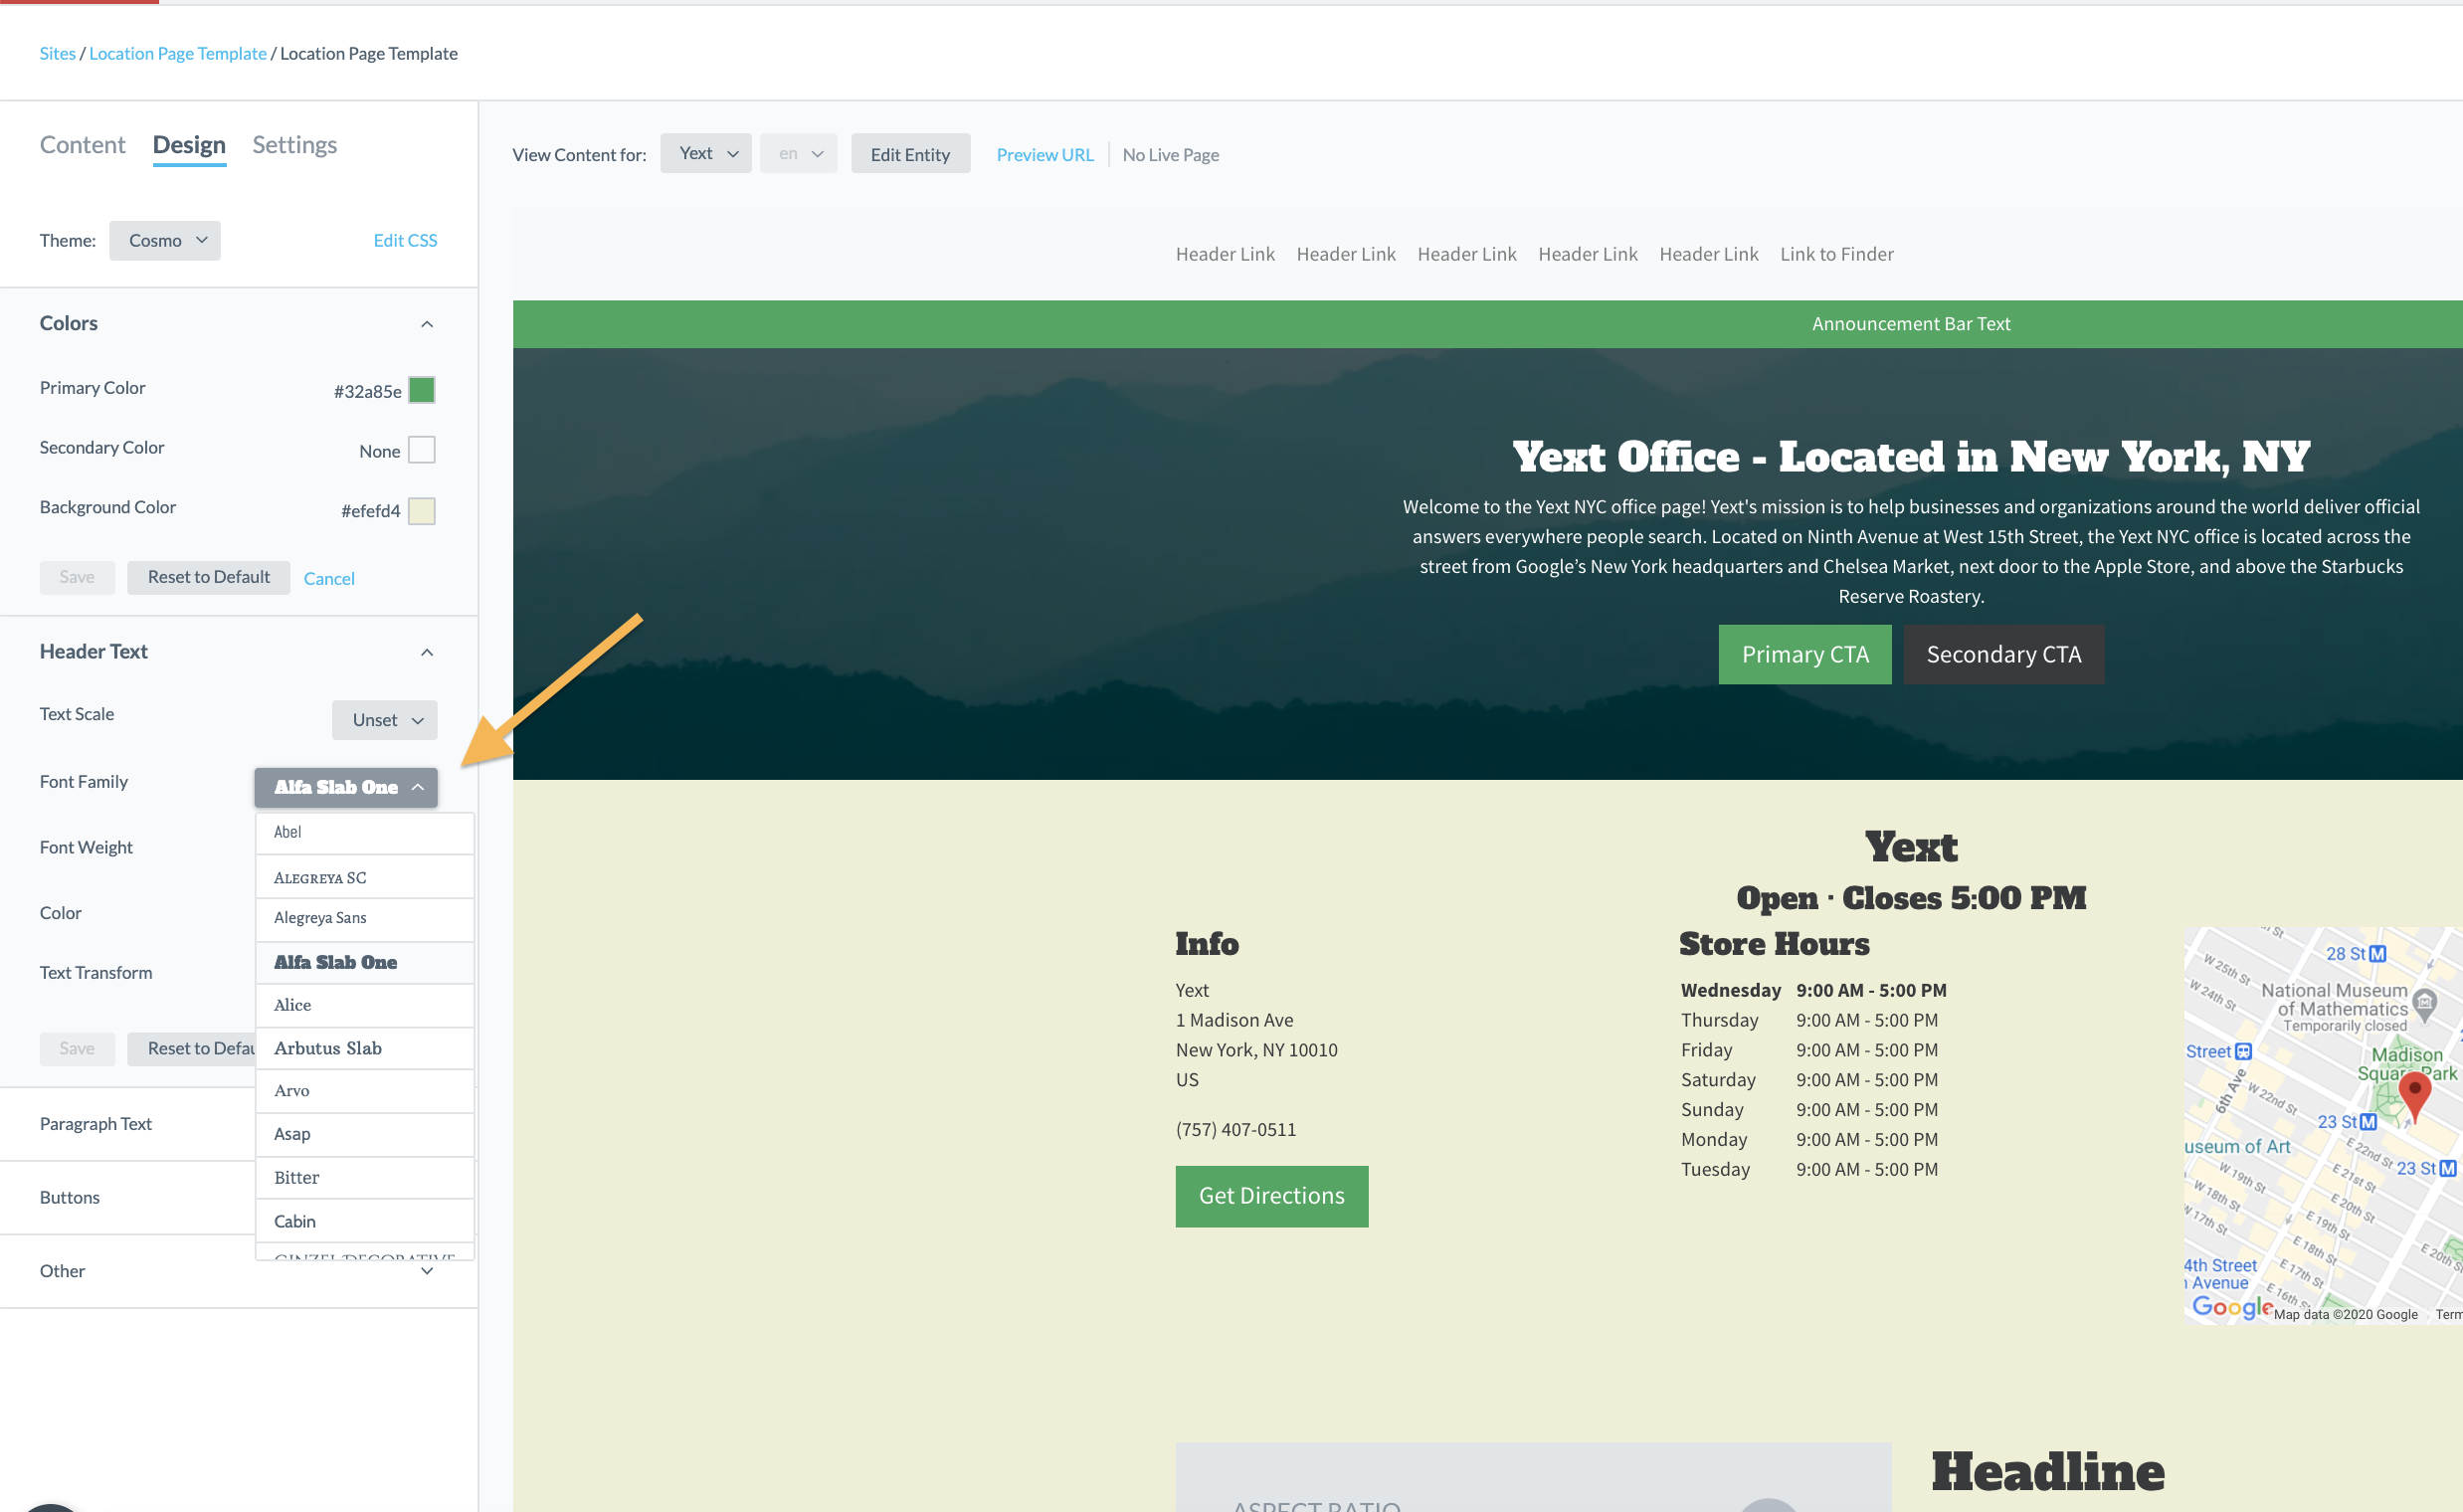
Next, let’s update the Font for the Header Text. Click on “Header Text”, select “Font Family” and change it to your brand’s font.

Notice that when you make this change all Headers on the page update but the font of the paragraphs or buttons do not. To update those, you can select Paragraph Text or Buttons dropdowns.
In addition to the styling that can be done via the point-and-click settings for the colors, text, and buttons, there are a few advanced styling options where you can add CSS to your page. At the top of each module under the Knowledge Graph tab you will see an “Edit CSS” button where you can add advanced styling.

