

Step 1: Create a Branch
It is best practice to create a separate branch in case things go wrong and it takes a while to debug the issue. It is much easier to debug or redo the theme upgrade if it’s not on the master branch!
Note: You may also use another branch (that’s not master) as the starting point if you’d like. We recommend the master branch because all your latest changes should be on there.
In the Code Editor screen, hover over the master branch, click the three dots, and select Create new branch.
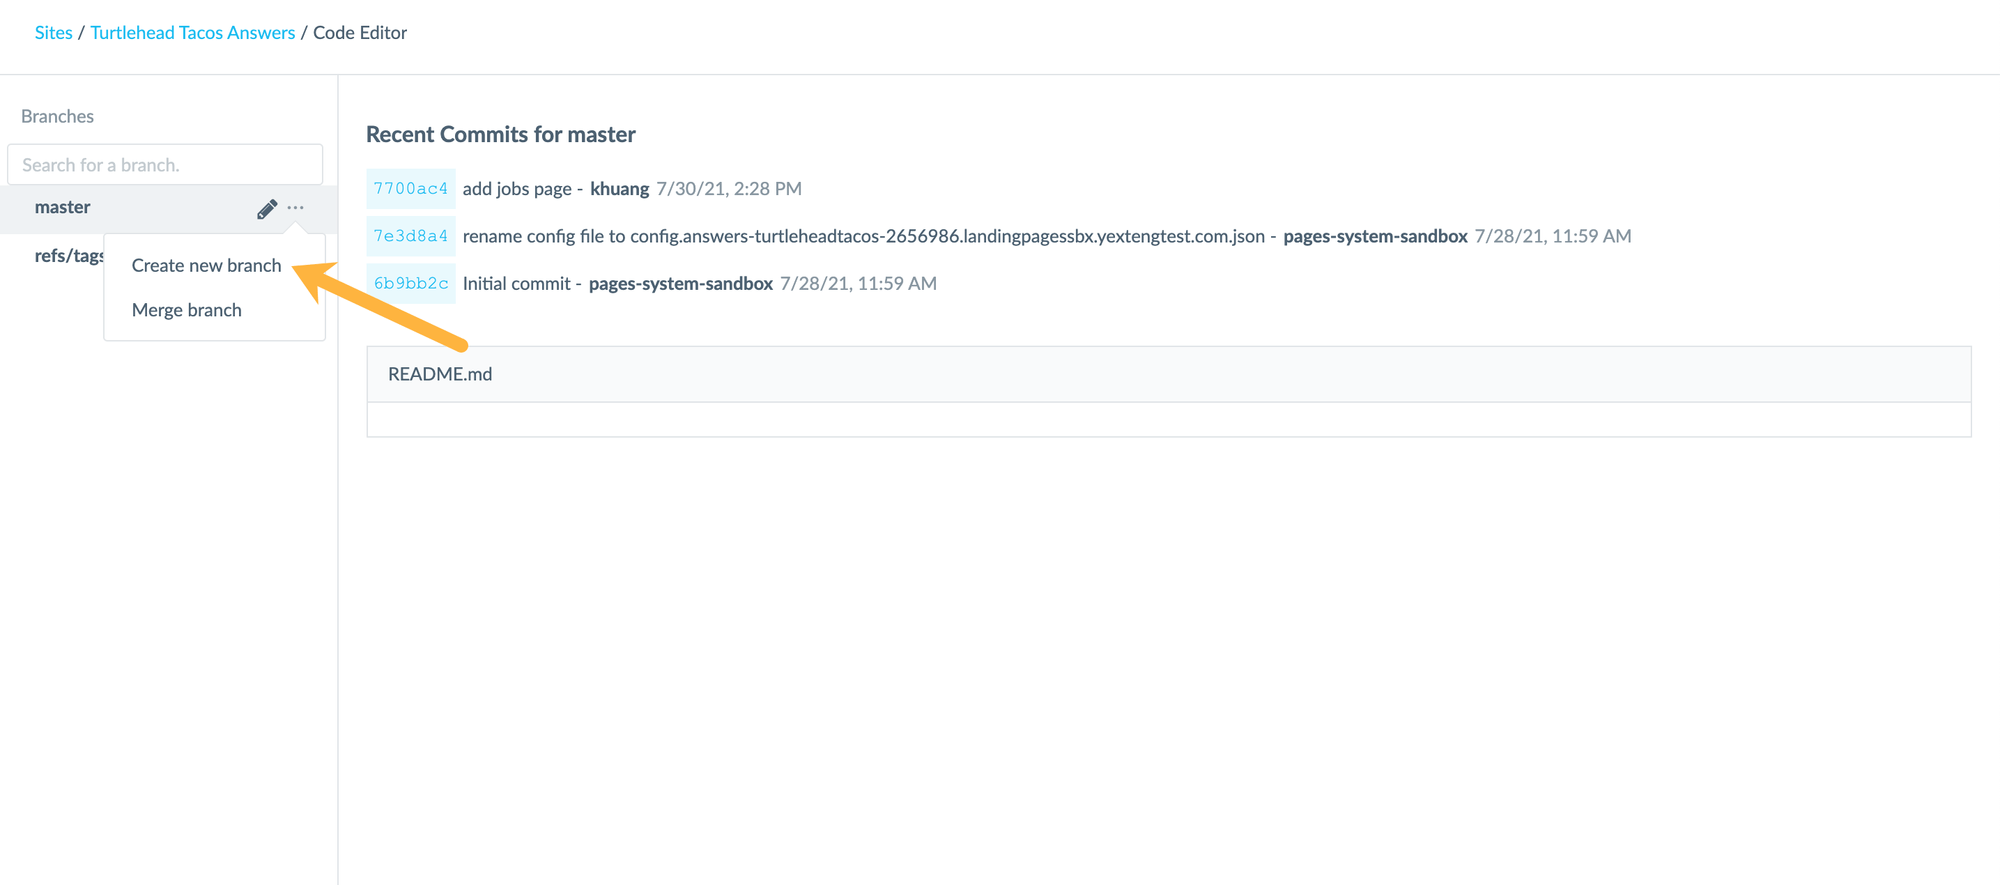
Name it something intuitive like “theme-upgrade-1.25” using the latest theme version number. You won’t be able to rename or delete branches.
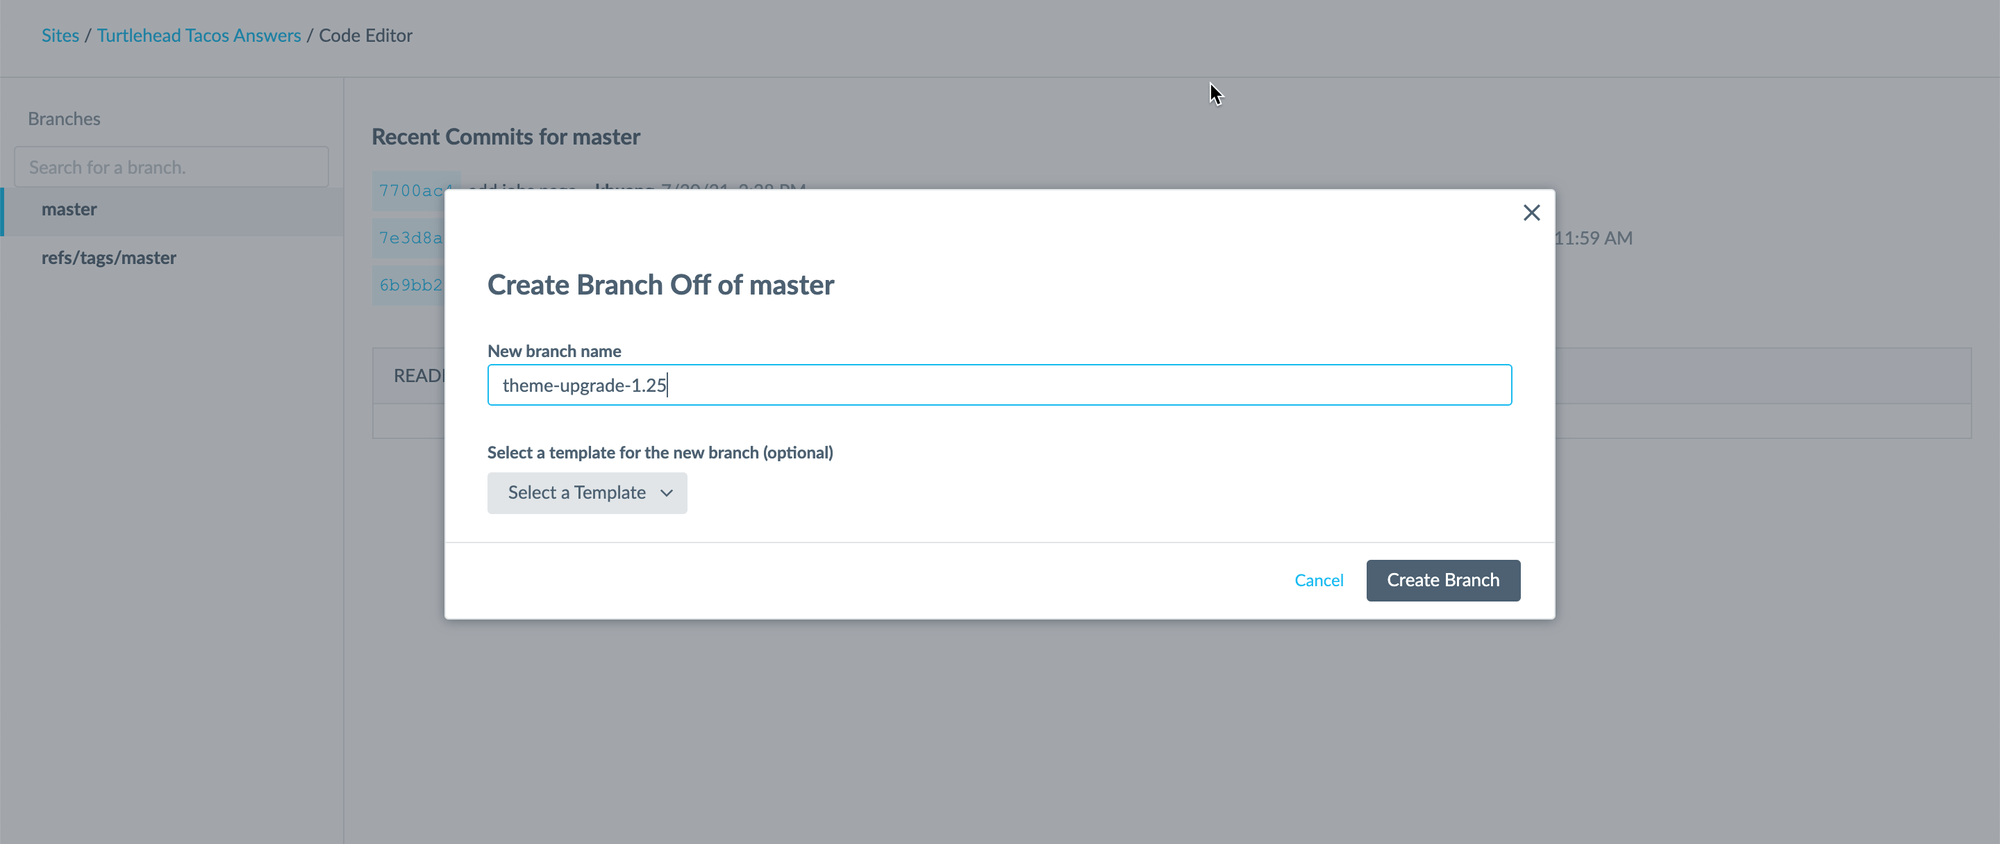
Do not select a template for the new branch. Doing this would start the branch from a fresh template, but you want to pull from this site’s master branch. If you would like to create a branch from a fresh template, check out the Rebuild Your Site step.
Click Create Branch and then click the into the newly created branch to open the Code Editor.