
Sending Review Generation Invitations | Yext Hitchhikers Platform
What You’ll Learn
In this section, you will learn:
- How to send a review generation invites using various methods
- How to schedule sending review generation invites
- About using the Review Generation URL directly to request reviews
Overview
Once you set up your review generation templates (or decide on a built-in one to use), you need to decide how you want to send review generation invitations. At a high level, the ways you can send review generation invitations are:
- Send email/text invites in the platform
- Send a single invite
- Send invites in bulk via file upload
- Send invites in bulk via SFTP connection
- Send a single invite
- Send email/text invites via API
- Use the Review Balancing URL directly: include the link in emails, receipts, etc. (Note: These reviews will not be attributed to an invitation and will not count as a “generated” review.)
- Use a QR code: display the QR code in stores or on receipts
Single invitations are sent immediately upon submission, but you can schedule to send invites via file upload, SFTP connection, and API.
Review Generation Invite Limitations
Yext limits the number of invites (email or text) that can get sent from an account per day. If you go over the limit, we will hold the invite until the following day. To track your account’s SMS capacity usage, follow the View Your Account’s Platform Usage help article. You will learn more about the Review Generation settings in the next unit.
Check out the Review Generation SMS Availability doc for the list of countries we support text messages in.
Note: You must provide a privacy policy in order to send review invitations. Please fill out your privacy policy in Review Generation Account Settings.
Schedule Invitations for a Specific Time
The ability to schedule when to send review invitations allows users to create integrations that upload invites immediately following a customer interaction but appear less automated or less like spam by delaying the invitation’s send time. This can be done via file upload, SFTP, or API, by passing parameter(s) when submitting the invitation, such as a column in the file upload or SFTP connection.
There are two formats to specify when to send invitations: delay and send time. You can specify delayTime, the amount of time to wait before sending the invitation after the upload is processed, with delayTimeUnit in either hours or days. Alternatively, you can provide a SPECIFIC date and time, using the sendTime parameter, as an ISO formatted date/time value, e.g., 2024-09-04T12:00:00.
To see scheduled invitations, navigate to Reviews > Generation > View Invites and click on the Pending Invites tab. From here, you can view the planned send time or cancel invitations.
Upload Opt-Out Lists
You can add email addresses and phone numbers to your opt-out list, ensuring those contacts won’t receive future review generation requests. This is especially helpful when migrating data or managing lists from external sources.
To upload an opt-out list, navigate to the Review Generation View Invites screen. Click on the More Actions dropdown and select Upload Opt-Outs. Input a comma-separated list of email addresses and phone numbers, and we’ll handle the rest.
Methods of Sending Invites
To send invites from the Yext platform, navigate to Reviews > Generation and click on Send Invites in the navigation bar. From here you can select the way in which you would like to send your review invites.
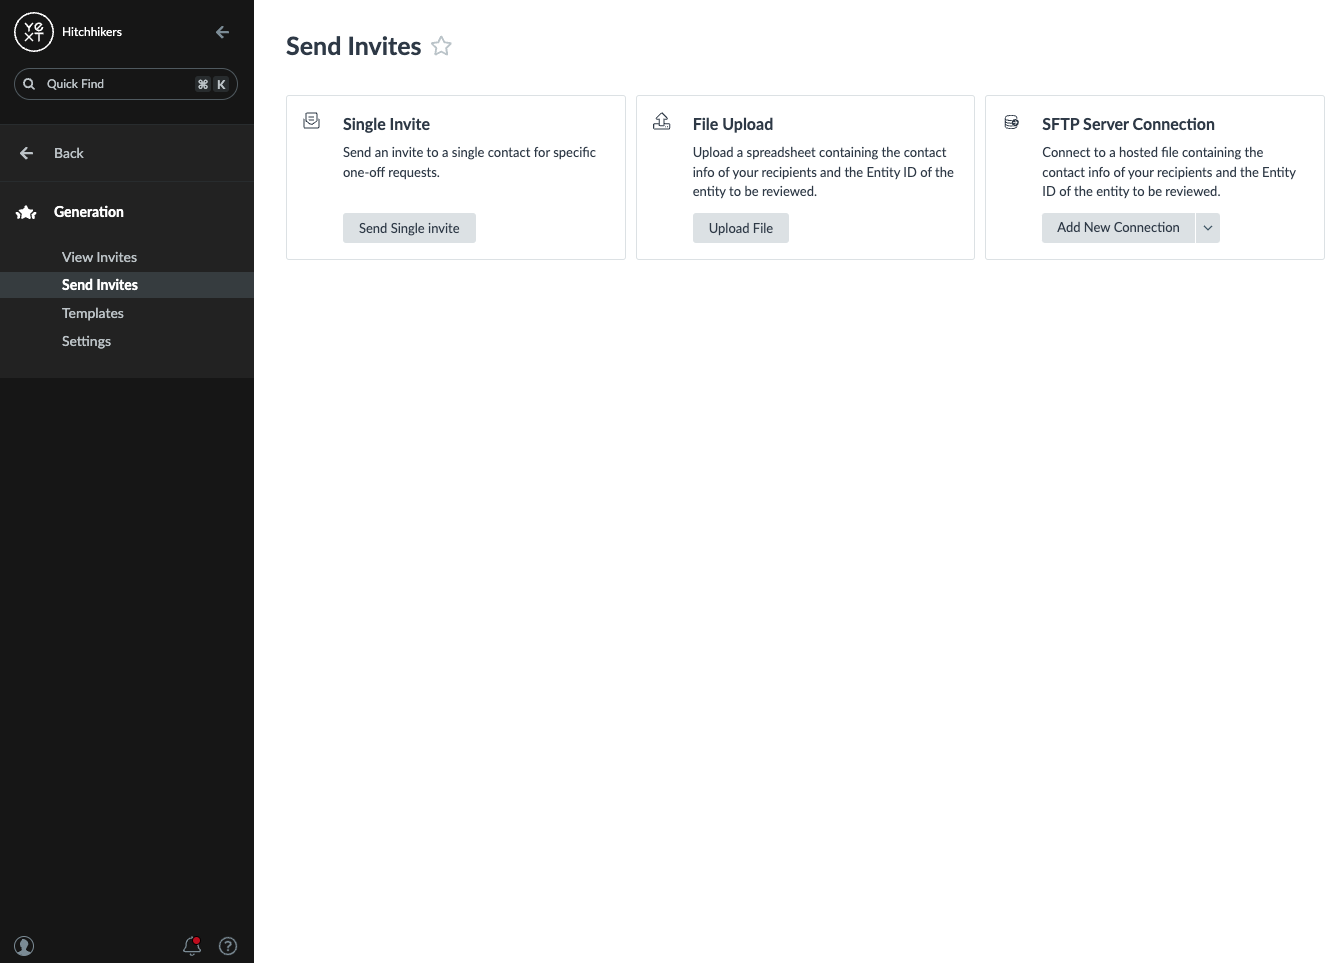
Send a Single Invite
Send one-off invites through the platform. Select Send Single Invite on the Send Invites page. Check out the Send a Single Review Invite help article for instructions.
Send in Bulk via File Upload
Upload a spreadsheet containing the contact information of your recipients and the entity to be reviewed. You can send invites via email and text message in the same upload.
The File Upload page on the Send Invites tab shows the columns needed for the spreadsheet. You can also download a sample template by clicking Download Template at the bottom of the page.
Check out the Send Multiple Review Invites help article for instructions.
Send in Bulk via SFTP
Using an SFTP (Secure File Transfer Protocol) Server Connection for Review Generation, you can send review invitations from files hosted on your server over a secure connection. You must have a file on your server that follows the same template as the File Upload, including required columns for entityId, firstName, lastName, and contact.
Check out the Add and Manage an SFTP Server Connection for Review Generation help article for instructions.
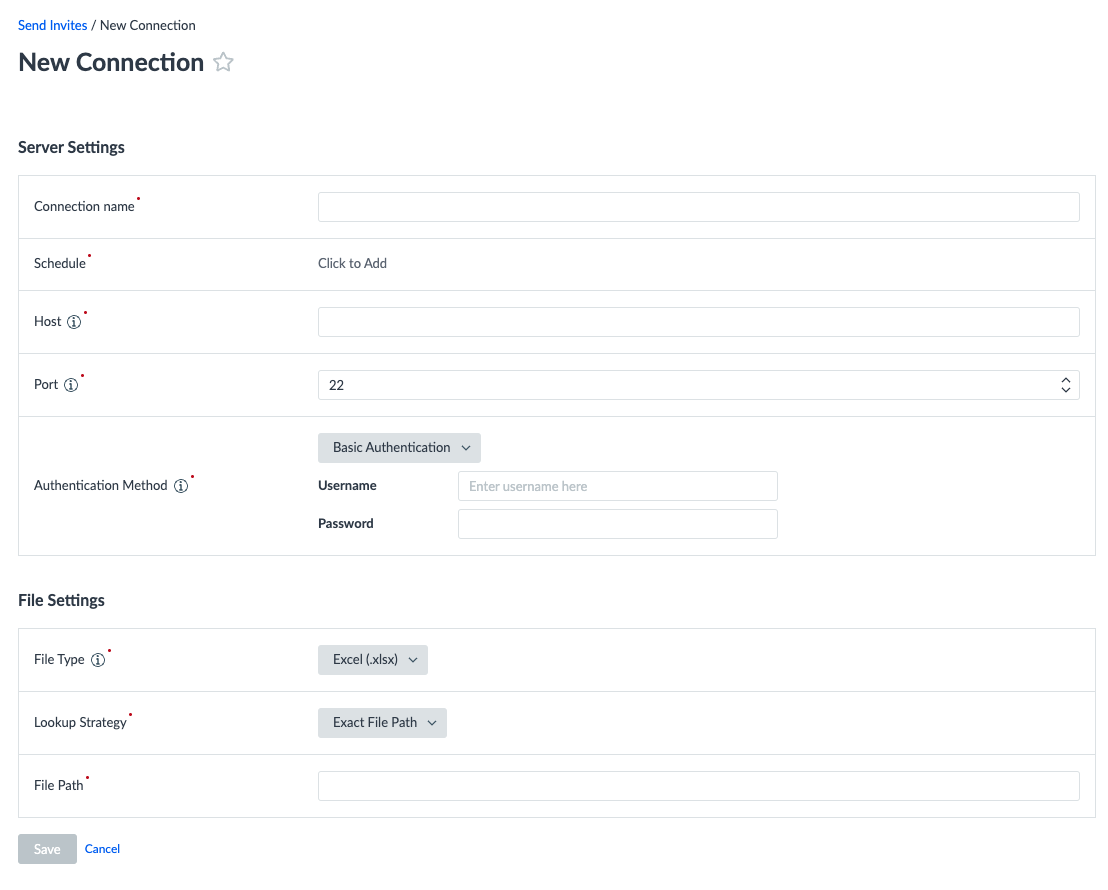
To set up a new connection, click Add New Connection under SFTP Server Connection on the Send Invites page. If you don’t see the SFTP Server Connection option, you may not have the required permissions.
On the configuration screen, you will set a schedule, input the server connection settings, and specify what file to pick up. When setting a schedule, ensure that your set cadence will capture any updates provided to your file. Input your credentials for connecting to your server, including the domain, port, and authentication, and then specify what file to pick up. You can either specify the exact file path, or by set criteria for finding the file. Please note that we only support a comma-delimited CSV file.
Manage Existing Connections
Once you’ve saved a connection, you will be dropped into an overview page, which shows you any existing connections in your account. You can also navigate to this page using the Manage Connections option under SFTP Server Connections on the Send Invites page.
Each connection will have its own row, and display information such as the status and schedule. Each connection also has a button that allows you to View the configuration settings and connection logs, Run Now to trigger a run, Enable or Disable the connection, or Delete the connection.
When viewing any existing connection, you will see two tabs. One tab allows you to view and edit any existing configuration settings, and the other allows you to see the connection logs. Connection logs will be provided for each run, with the ability to download the details of a run to see what invites were sent, and any errors that were returned. To satisfy GDPR security requirements, logs will be deleted after 60 days.
Maximum Contact Frequency
Maximum Contact Frequency is a setting in your Configuration Settings, which prevents contacts from receiving duplicate review generation invites.
It is a required setting for any SFTP Server Connections, in order to prevent scheduled runs from sending out duplicate invites to your contacts. If the Maximum Contact Frequency setting is not enabled, you will be able to create a new connection, however, it will save in a disabled state, and you will not be able to run it until Maximum Contact Frequency has been enabled.
If you have active SFTP Server Connections and would like to disable the Maximum Contact Frequency setting in order to send a single invite or perform a file upload, you will need to disable all configured SFTP Server Connections in your account before you are able to disable the Maximum Contact Frequency setting.
For more information about adding and managing an SFTP Server Connection for Review Generation, see this help article .
Send via API
Many brands choose to leverage Yext review generation by integrating with another system, such as a Point-of-Sale system which tracks the contact info of customers. In this scenario, some time after a customer transacts with a business, the business wants to automatically send a review invitation. Rather than exporting the customer data and uploading it through the Yext UI, the business could send a request to the Review Invitations: Create endpoint, which will trigger an invitation to be sent.
Use the Review Balancing URL Directly
You can also distribute the Review Balancing URL directly, outside of the Yext review generation templates. Keep in mind that reviews left by users using this link directly will not be attributed to an invitation. In other words, this will not count as a “generated” review as the user left the review of their own accord.
Each entity that is configured to generate reviews has this unique review balancing URL that customers can visit to leave a review. The next unit will walk through how to set up the distribution of sites the URL directs users to.
The Review Balancing URL is distributed through our built-in email and text messaging system in Review Generation, but we encourage you to share this URL with customers in more ways in order to generate even more reviews. For example, this link can be used in other email communications, on receipts, etc.
Locating the Review Balancing URL
To use the review balancing URL directly, you’ll need to retrieve the URLs. You can either pull this by entity or in bulk. Keep in mind that this URL is unique per entity. Check out the Locate the Link to Generate Reviews help article for instructions on how to retrieve the URLs.
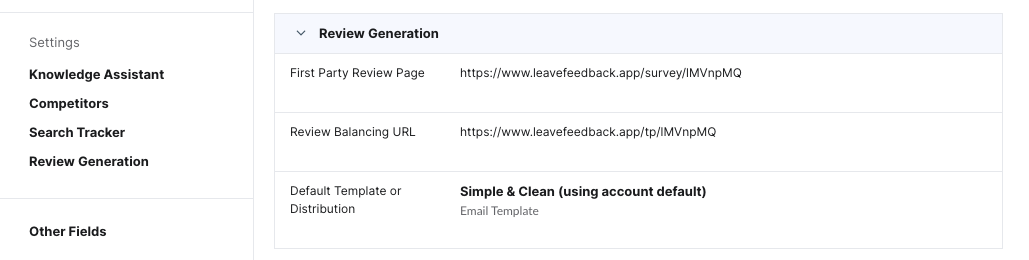
The review balancing URL is found on your entities in the Knowledge Graph under the Review Balancing URL field. You can view these URLs in Entity Edit directly, pull it via the API, or export from the Knowledge Graph using Entity Export.
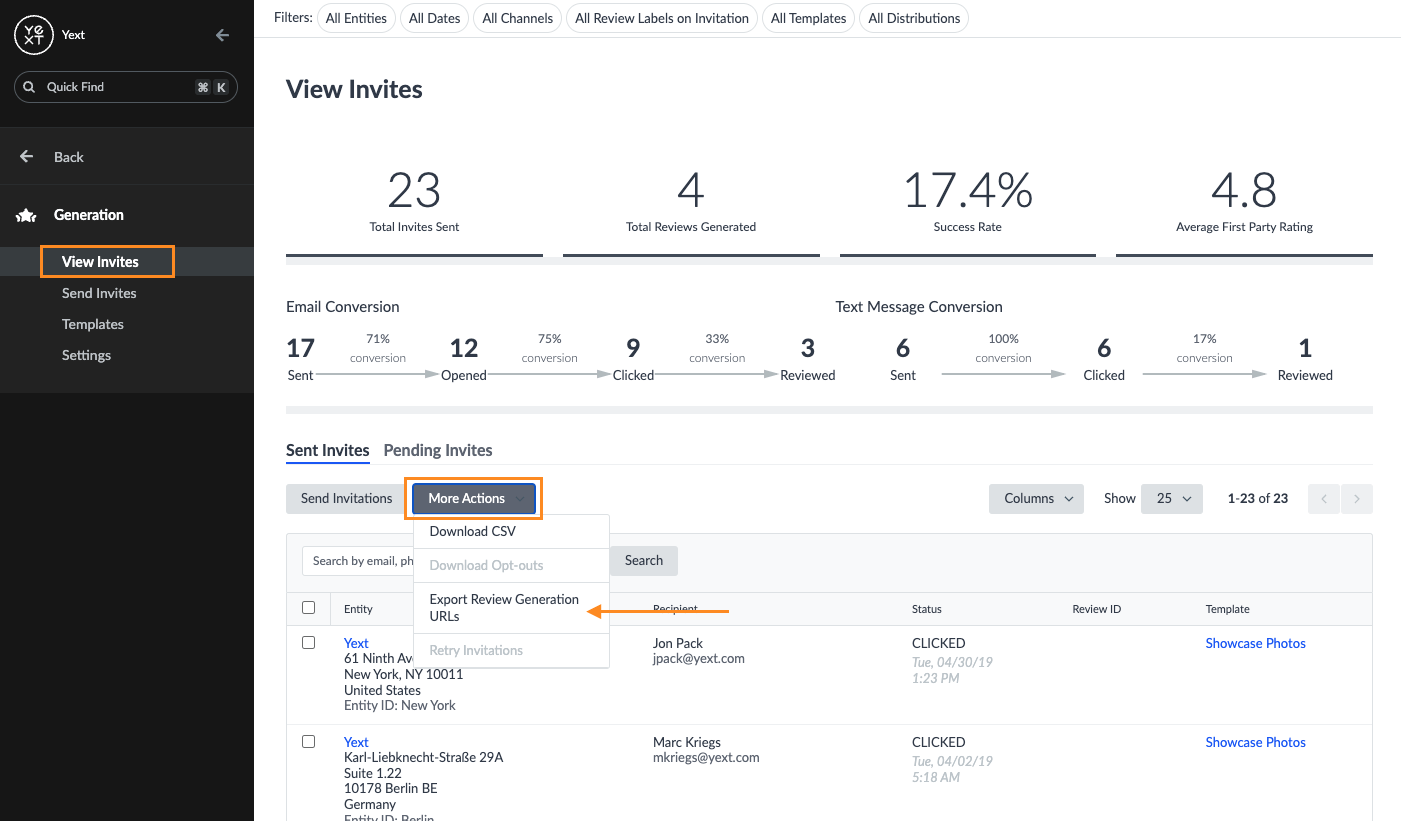
You can also export the Review Balancing URL for a specific set of reviews from Reviews > Generation > View Invites. Click the More Actions dropdown and select Export Review Generation URLs.
Display QR Codes
QR codes allow users to display review invitation links in stores or on receipts, allowing customers to generate more reviews without a contact list or creating an integration. You can generate and download QR code image URLs for review invitation links.
To download QR codes, navigate to Reviews > Generation > Send Invites and click on Download QR Codes. From here, you can choose the entities and publishers you want QR codes for. Download the QR codes as a CSV and share the image URLs with location managers, who can then display the images.
QR codes do not regenerate each time you download them. They will always be the same for each entity-publisher combo.
When selecting the publishers you want to create QR codes for, you have the option to select the Review Balancing URL, which routes users to different publishers using the distribution you set of publishers from which you’d like reviews generated. This works the same way as if you use the direct link as we walked through above.
QR code downloads are only available to download in the platform and are not accessible via API.
True or False: To send Review Generation invitations you must upload a spreadsheet.
Which of the following are methods to generate reviews using Yext? (select all that apply)
Which of the following is not REQUIRED information, when sending multiple invitations from the Yext platform?
Soon you'll be your brand's hero! 🎓
