Advanced Review Monitoring | Yext Hitchhikers Platform
What You’ll Learn
In this section, you will learn:
- How to apply an advanced filter
- How to create a review notification
- Common filtering and notification use cases
- How to manage third-party reviews that have been removed from publishers
How to Apply an Advanced Filter
Like the basic filtering options in the last unit, advanced filters are a way to easily view a subset of reviews that match specific criteria. Advanced filter options allow for filtering based on more in-depth information than the basic filtering options.
There are a number of advanced filters to choose from:
- Author Email: The email address of the person who left the review
- Author Name: The name of the person who left the review
- Awaiting Response: Whether or not the review has been responded to in Yext, which you’ll learn about in the Review Response unit
- Date: The date the review or one of its comments was last updated
- External ID A unique external identification number for each review
- Flagged: Whether the review has been flagged as inappropriate, which you’ll learn about in the Common Review Label Use Cases module
- Generated: Whether the review came from the Review Generation functionality in Yext, which you’ll learn about in the Review Generation module
- Languages: The language the review is in, determined by Sentiment Analysis
- Recommendation: “Recommended” or “Not Recommended” (this only applies to Facebook Recommendations)
- Responses: The number of responses to the review
- Review Content: Specific words or phrases included in the review, empty reviews, or reviews with content
- Review ID: A unique identification number for each review
- Sentiment Keywords: Whether a review contains keywords in a Sentiment Analysis collection, which you’ll learn about in the Sentiment Analysis module
- Sentiment Modifiers: Another part of Sentiment Analysis collections
- Update Status: Whether or not a review has ever been updated, or updated since its last response
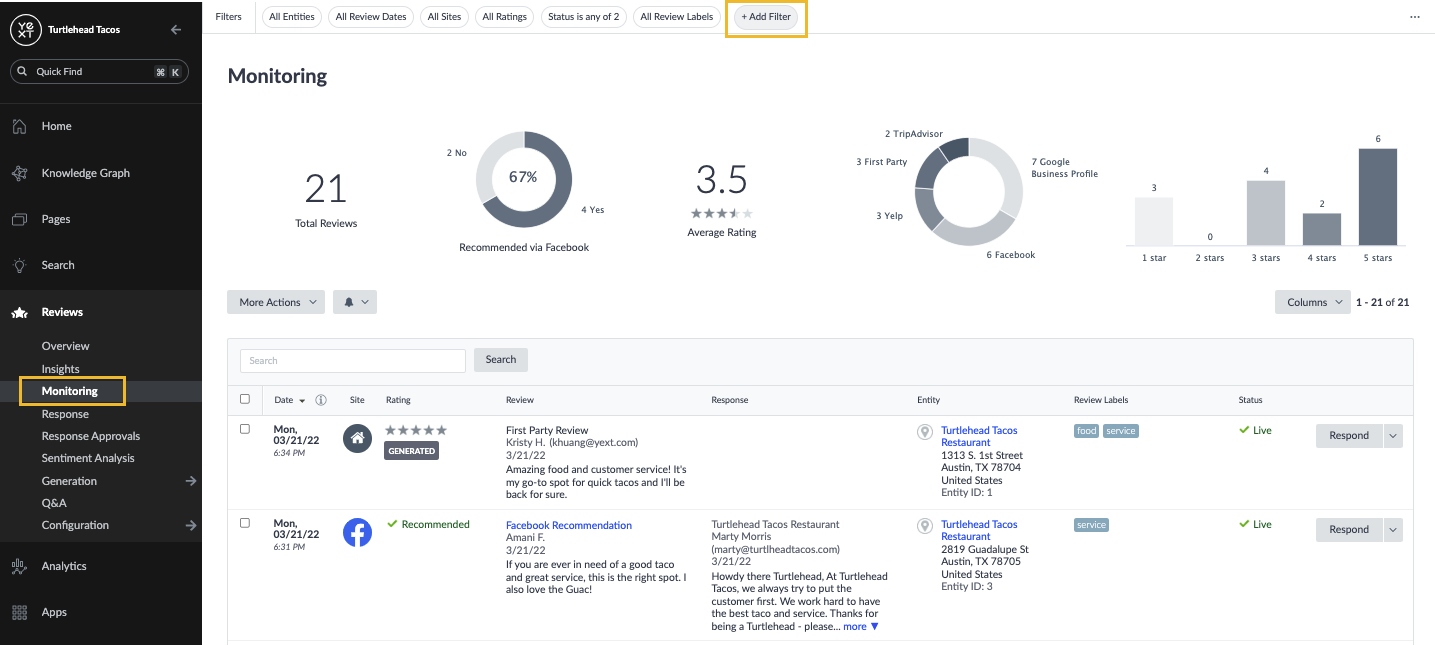
To begin using advanced filters, navigate to Reviews > Monitoring in the navigation bar, and click the Add Filter button at the top of the page.
- A menu will expand with the available filters. At the top will be Default Filters (the basic filters covered in the last unit). Below that, click on the + Add Filter drop-down menu and select the advanced filters you would like to apply.
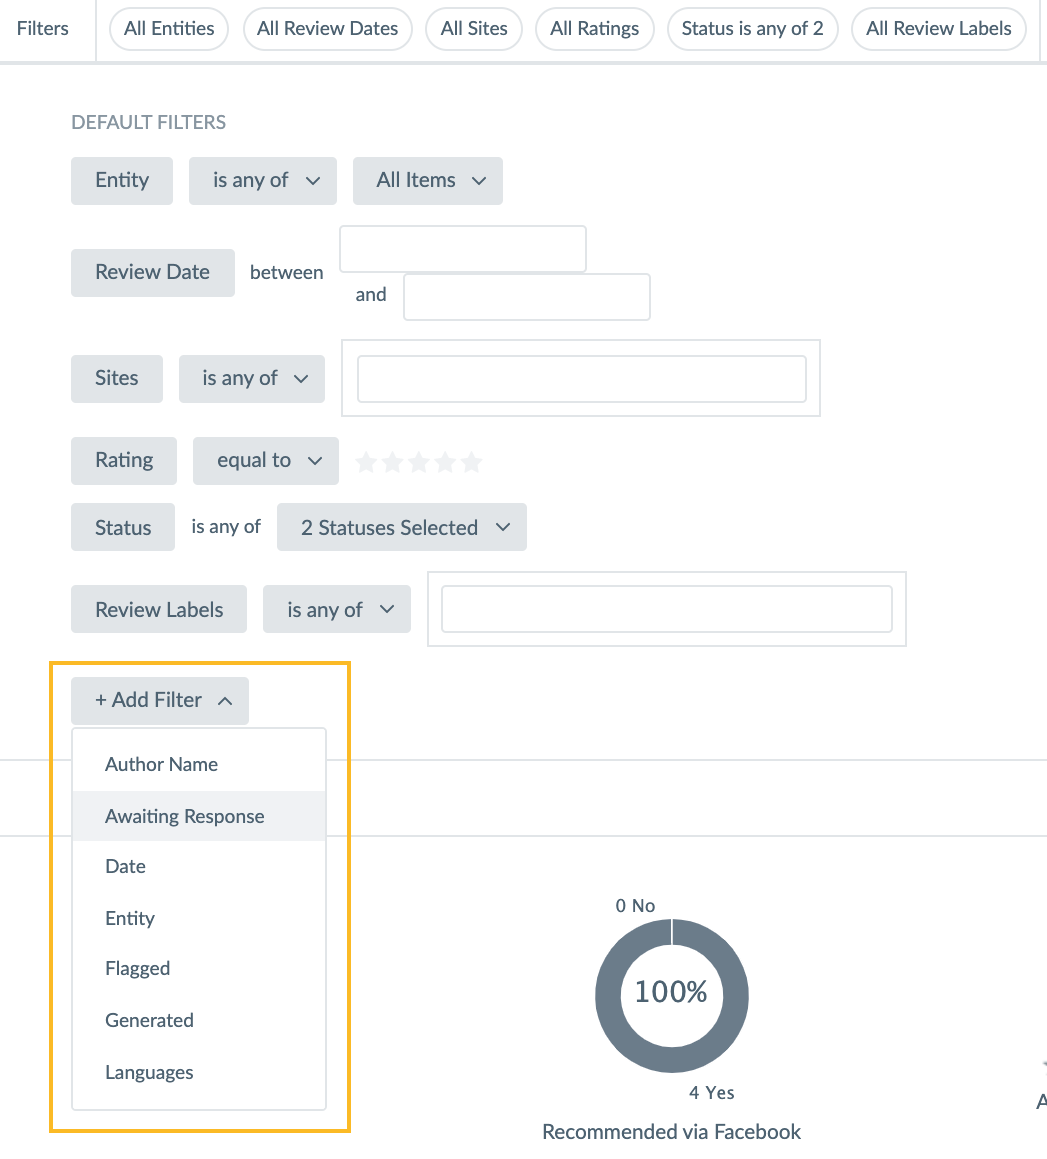
- Enter any additional selectors based on your chosen filter (e.g. “contains”/“does not contain”, specific keywords or options that you’d like to filter for, etc.)
- To add additional filters, click the + Add Filter drop-down again. (Remember, applying multiple filters will only show reviews that satisfy all criteria).
- Click Apply Filter.
How to Create a Review Notification
Review Notifications are used to notify you (and other Yext users or collaborators) of reviews that have been pulled into the Yext platform and satisfy specific criteria.
There are two ways to create a review notification:
Option 1: Manage Notifications
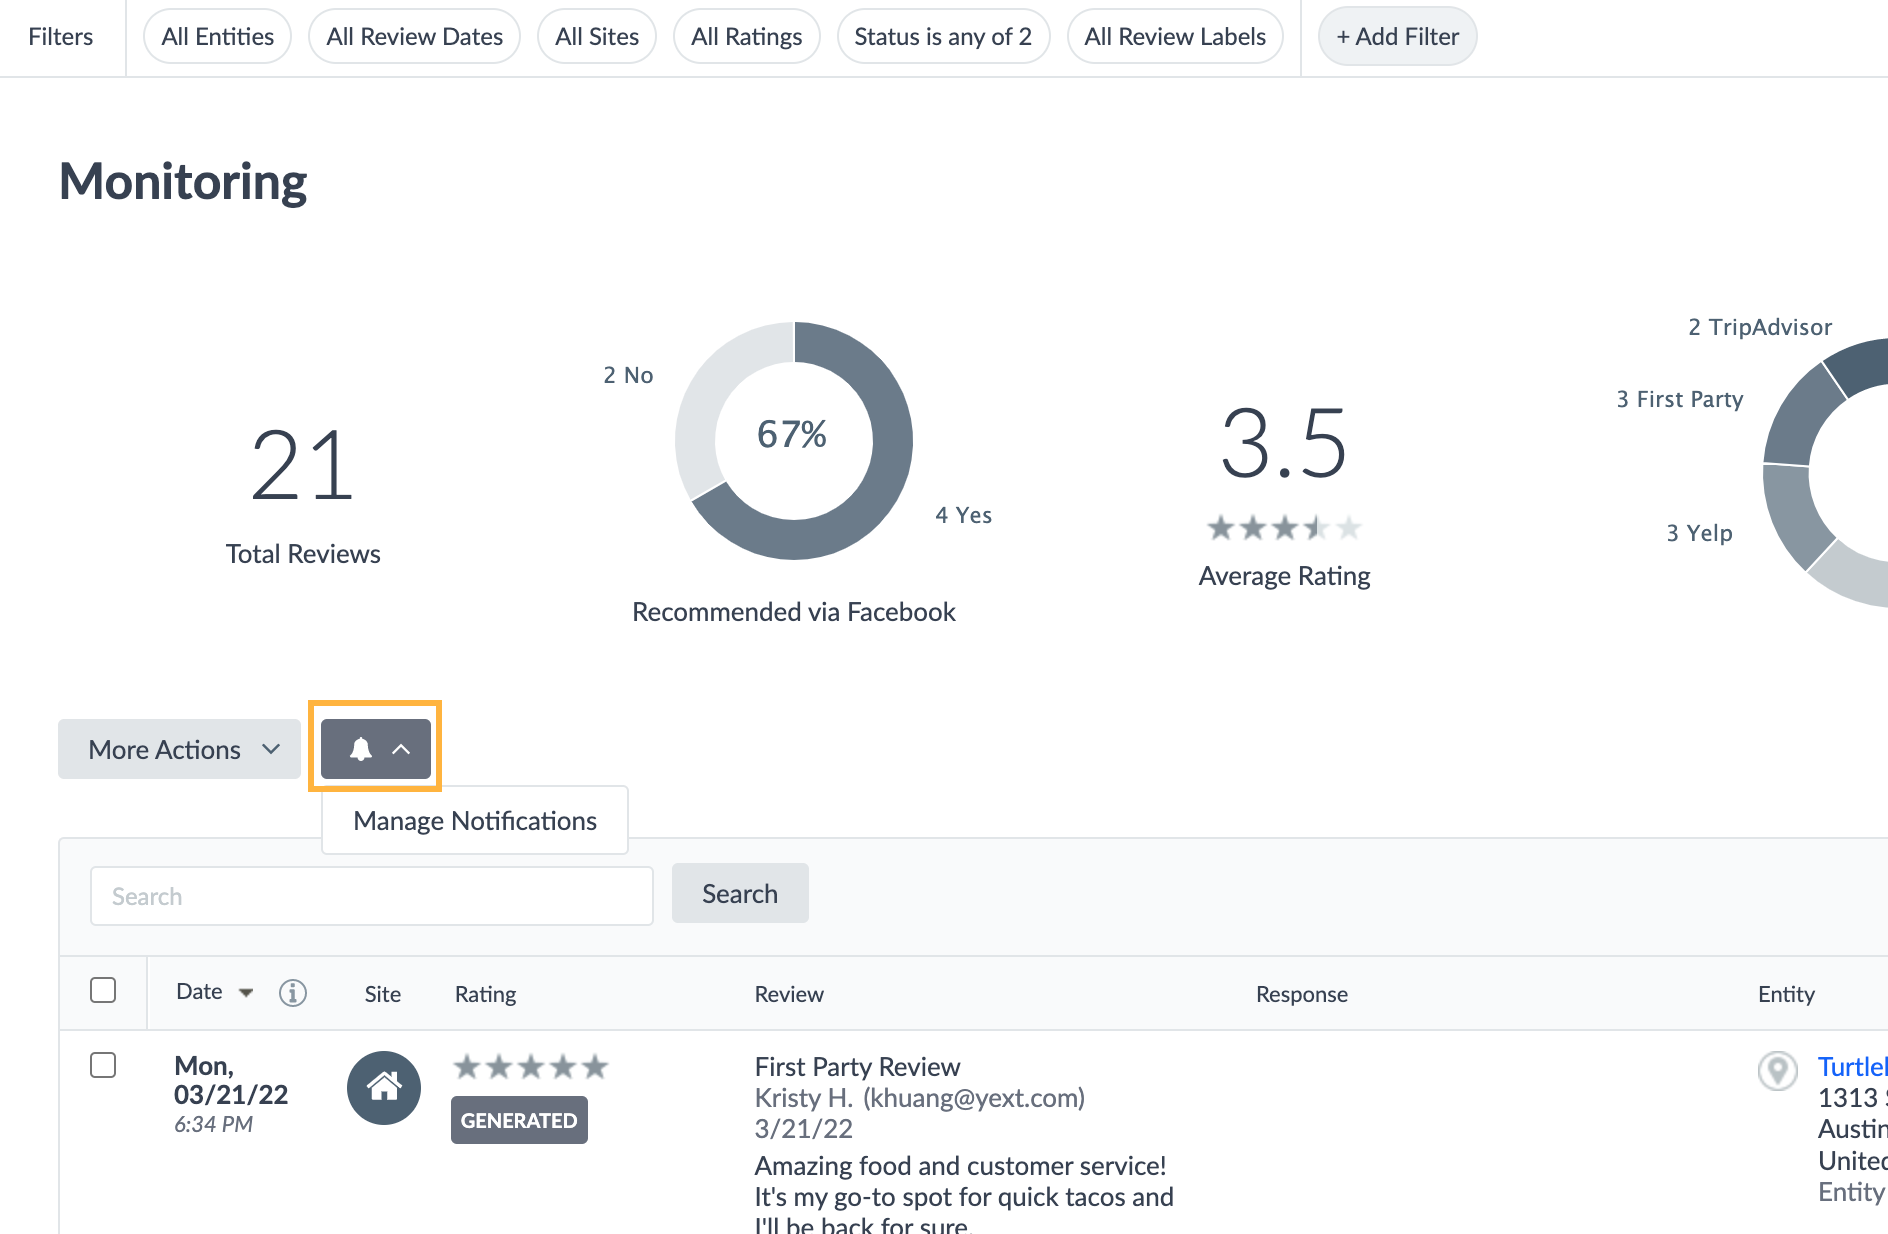
- Navigate to Account Settings or click on the bell button above the reviews section and select Manage Notifications.
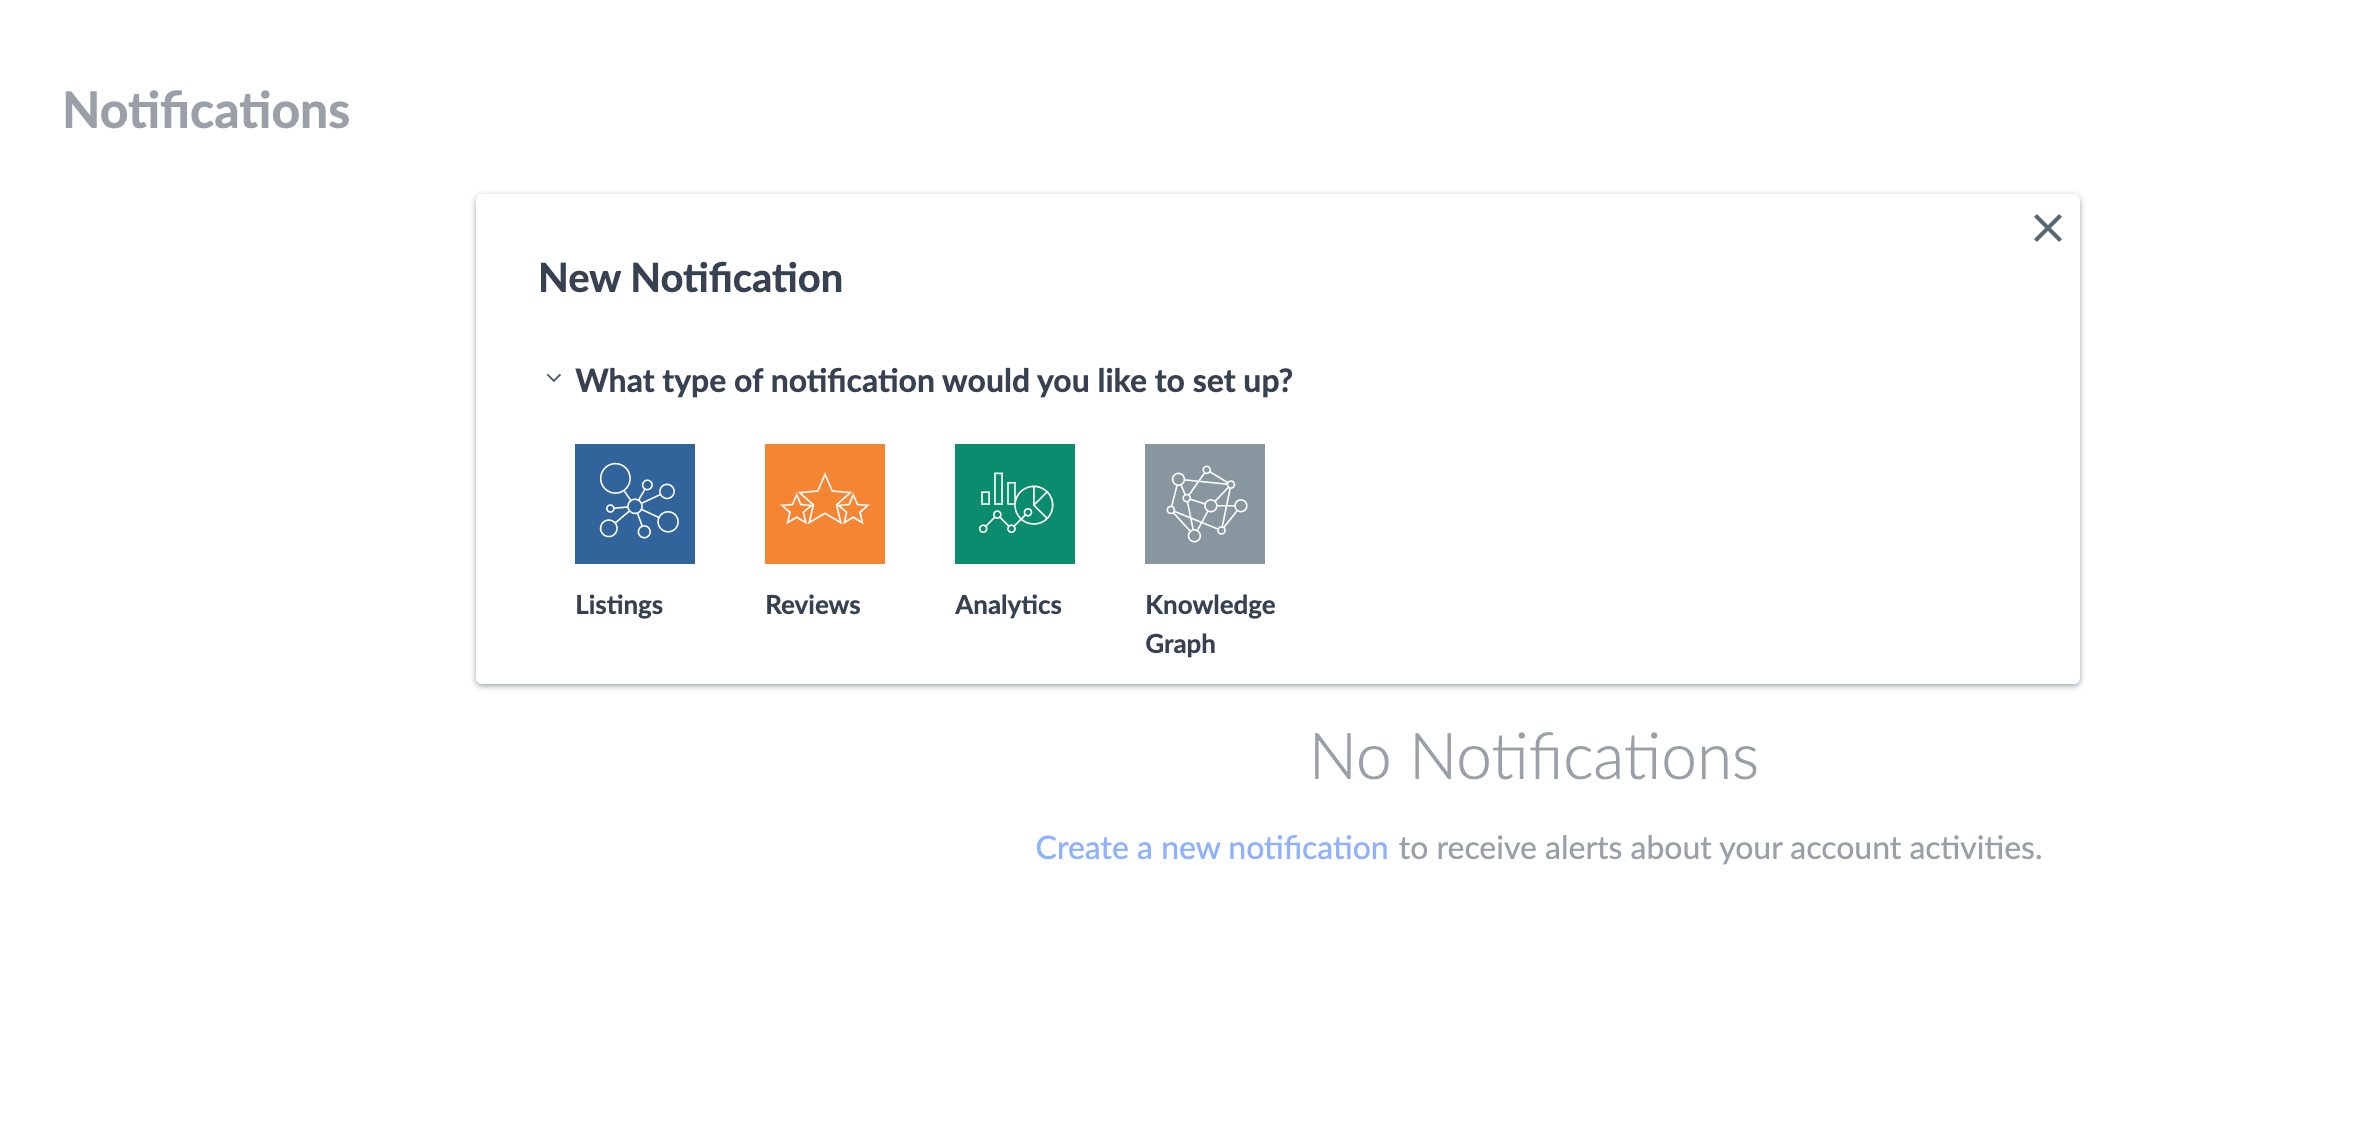
- If you do not yet have any notifications created, click on Create a new notification in the middle of the screen. If you have already created notifications, you’ll see a Add Custom Notification button in the upper right corner.
- Select Reviews.
- Select whether you would like this notification to apply to only new reviews matching your chosen criteria, or if you would also like it to apply to new updates on existing reviews, or new or updated Facebook comments.
- Add criteria using the same steps above that you would to apply an advanced filter. Click the Add Filter drop-down that appears and select your filters. Next, choose any additional selectors (e.g., contains, is equal to, etc.), and enter any specific search criteria.
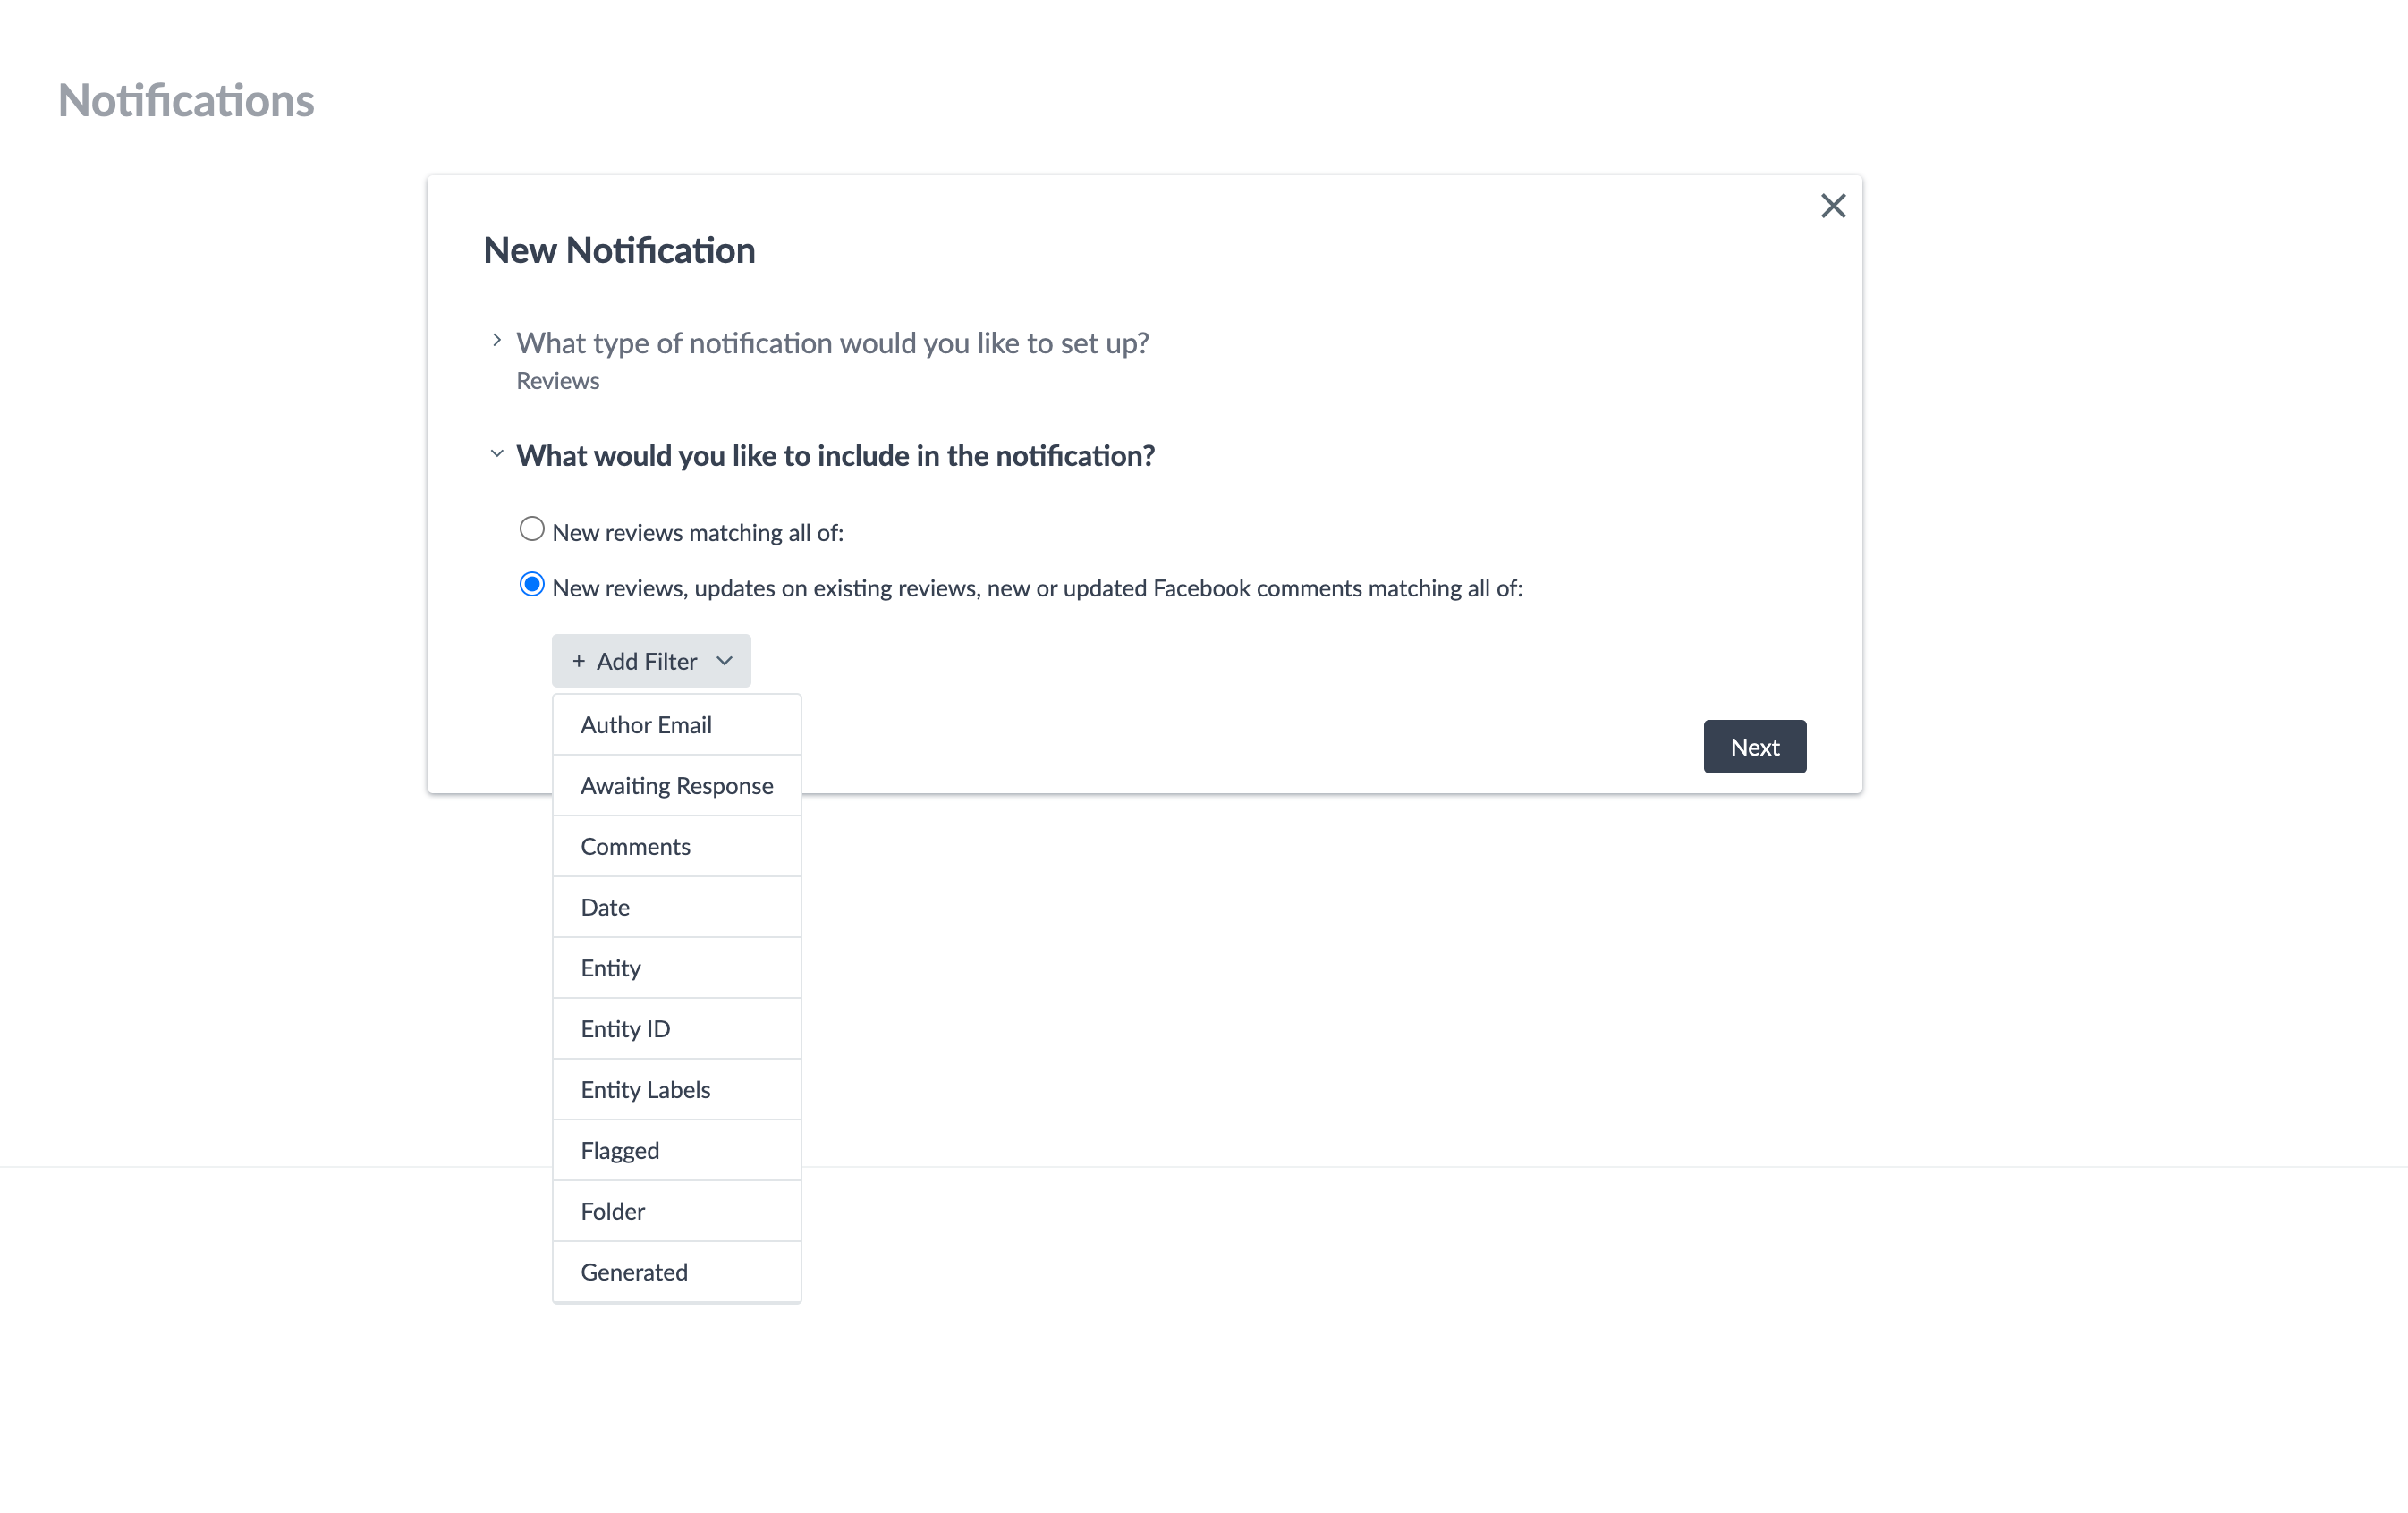
- Select the recipients of the notification. You can choose: Owner, All Users, Specific User Roles, or Specific Users and/or Email Addresses.
- Select the delivery method for the notification. You can choose to have the reviews delivered directly in-platform or in an email.
- Configure the email settings:
- Choose the frequency you would like to receive the notification emails. You can choose: Event Triggered (as the reviews or updates come), Daily, Weekly, Bi-Weekly, or Monthly. If you choose Weekly, Bi-Weekly, or Monthly, select the day of the week or month you would like to receive the notifications.
- Review the notification email content. You can choose to keep the default content or customize it. (Note that the default email content will be automatically translated to the recipient’s language, but custom email content will not.)
- Set the content format, whether the reviews should be included directly in the email or attached as a spreadsheet. You can also choose to have the reviews put directly into the email if there are fewer than a certain number of reviews in a notification (choose from 25, 50, or 100), but have them put into a spreadsheet if there are more than that number of reviews.
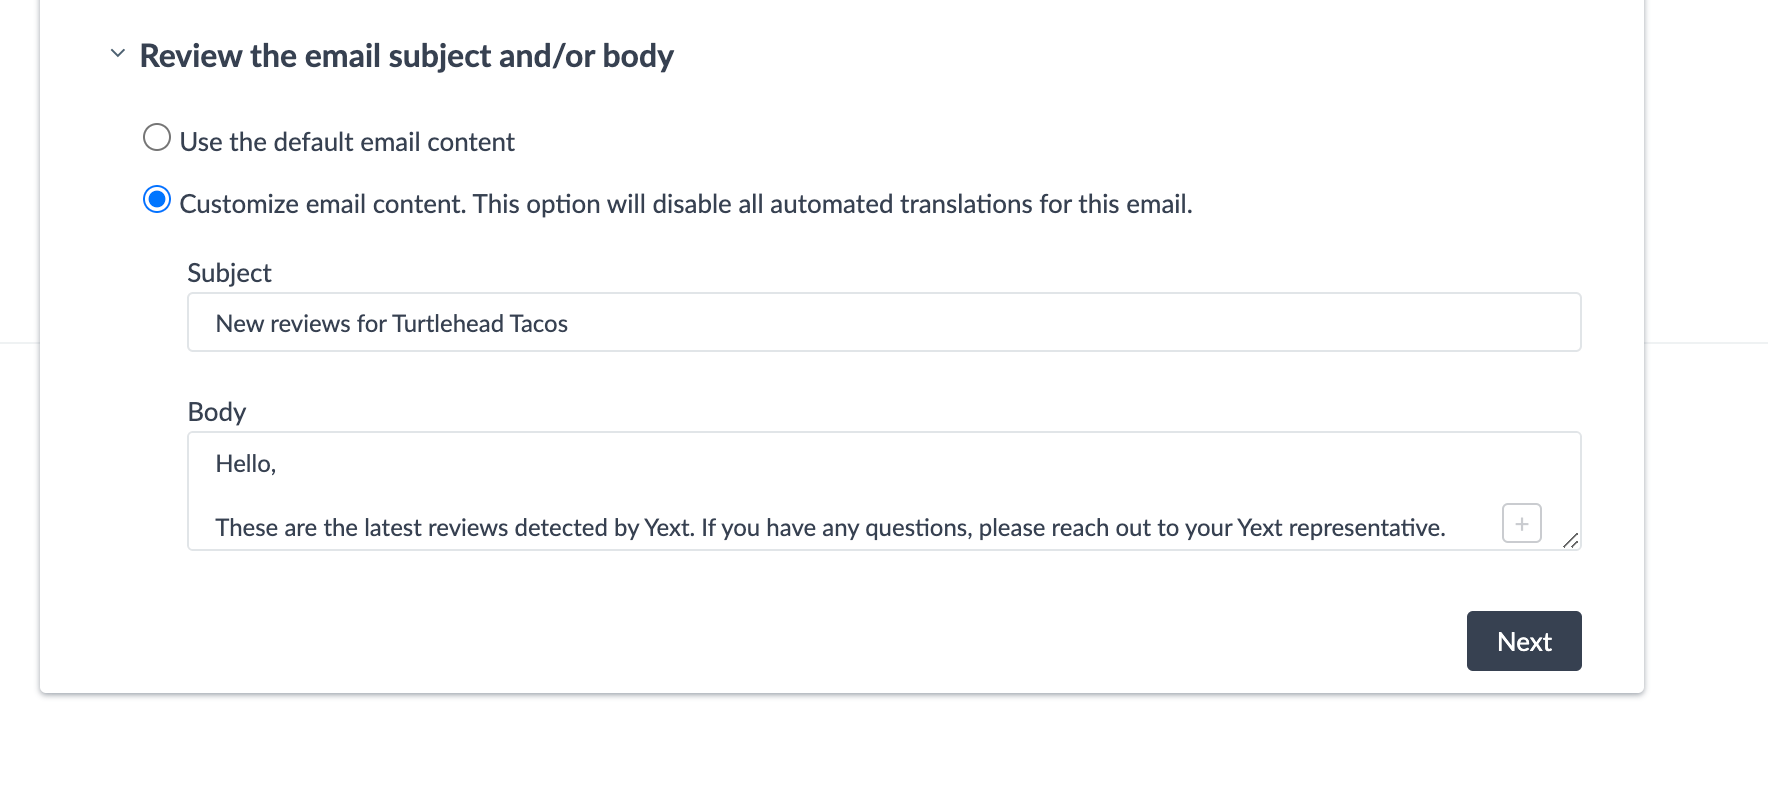
- Set an internal name for the notification.
- Click Save.
Option 2: Create a Notification from an Advanced Filter
- Create an advanced filter using the steps at the beginning of the unit.
- After applying the filter, click the three dots on the far right of the filter bar at the top of the screen. Then, click Notify me of all reviews like these.

- You’ll be redirected to the Add Custom Notification screen. Follow the same steps as Option 1 above to complete the notification. You’ll notice that there are filters pre-added.
Common Review Filtering and Notification Use Cases
Review filters and notifications will vary depending on your organization’s goals. Below are some examples of common use cases to start with:
- Reviews with ratings less than or equal to three stars
- Reviews with Review Content that contains [Keyword]
- Reviews without content (Review Content is empty)
- Reviews with content (Review Content is not empty)
- Reviews are on any Sites of Google, Facebook, or Yelp
- Reviews Awaiting Response
- Reviews Awaiting Response where Date is on or before [Date]
- Reviews with ratings less than or equal to 3 stars AND Sentiment Keywords contain [Keywords]
- Reviews that have been Updated Since Last Response
- New Generated Reviews
More Actions
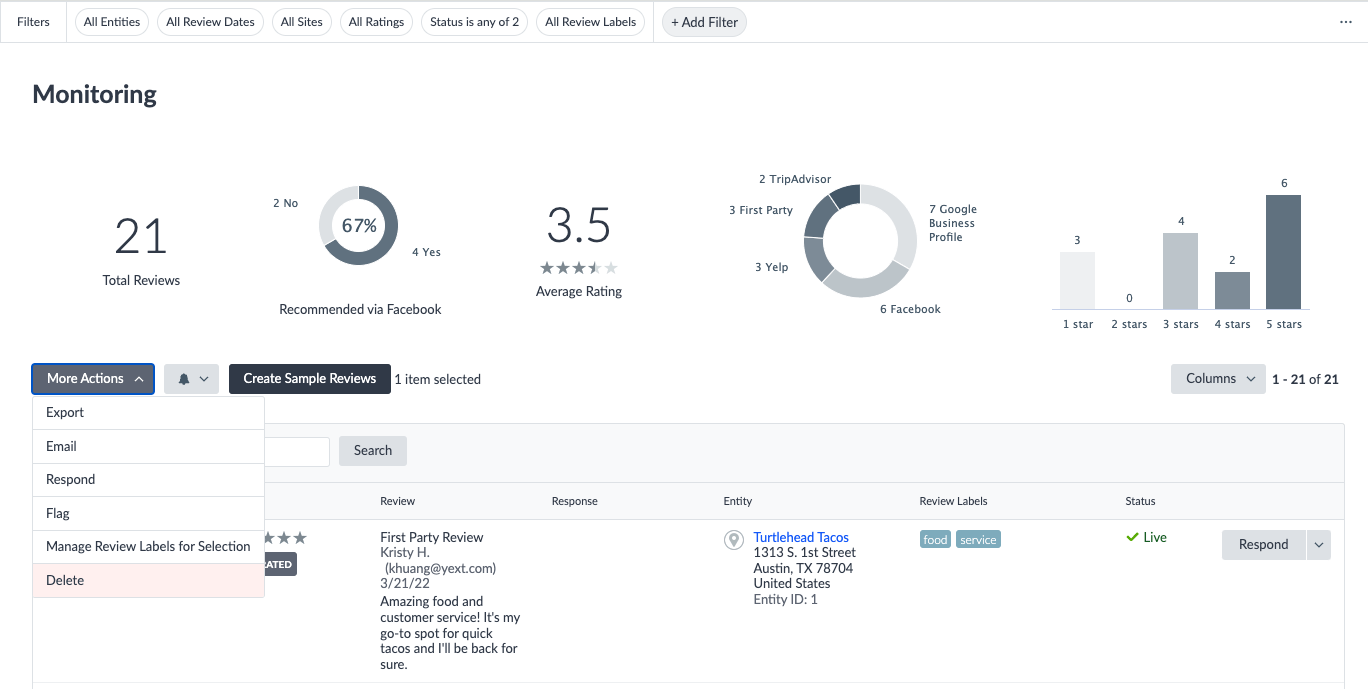
Clicking on the More Actions button above the reviews table reveals a few additional options:
- Export: Export reviews as a CSV or Excel file (Note: Some publishers are not supported)
- Email: Email selected reviews to any email address (Note: Must select one or more review from the table using the checkboxes)
- Respond: Respond to the selected review (Note: Must select one review from the table using the checkboxes)
- Flag for Removal: Flag first-party reviews (more on this in the Review Generation module )
- Remove: If you have permissions to remove a review, you can do so here (more on this in the Review Generation module )
- Manage Review Labels: Manage review labels in bulk (more on this in the Review Labels module )
- Delete: Delete the review from the Yext platform. Note this is irreversible. However if the review is not deleted on the publisher site, it will get pulled again (resulting in another notification).
- Note: Individual third-party reviews cannot be deleted from the Yext platform. If you would like to delete a review, you must reach out to the publisher specifically. However, you can manage what happens to reviews in the platform that are removed from a publisher, also known as Removed Review Behavior.
Removed Review Behavior
Consumers often delete reviews that they had previously posted on a publisher listing. Yext can automatically determine which reviews have been deleted from publishers and mark the Status of those reviews as “Removed” in the platform. You can then determine whether you would like to keep deleted reviews in Yext with a “Removed” status, or have them permanently deleted from the platform.
To manage behavior of deleted reviews, go to Account Settings at the bottom of the sidebar and click Compliance.
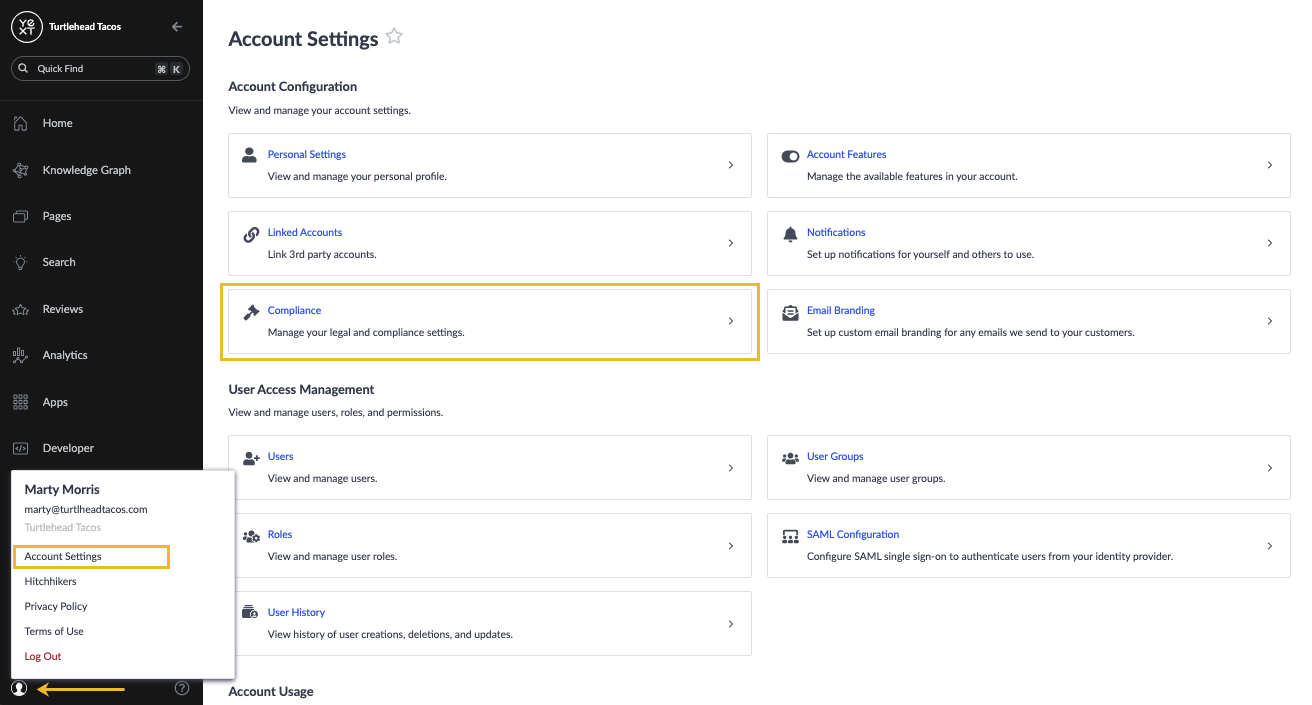
On the Compliance screen, hover over the Removed Review Behavior section, click the pencil icon, and choose from the available options.

Flagging and Removing Reviews First-Party Reviews
Conversely, there may be times you will want to remove reviews that are unrelated to the location or contain inappropriate content or spam. Publisher sites will have their own screening processes and any third-party reviews that should be removed will need to be flagged directly to them.
First-party reviews may be removed by the brand itself. Yext also has a screening process for your first-party reviews that checks for inappropriate words. These will appear in the Review Monitoring table with a status of “Removed” with a descriptor “Banned Word”. This way, you can easily tell which first-party reviews were automatically removed due to using a banned word.
Additionally, based on your user permissions, you may also have the ability to remove the review directly. If not, you can flag it for removal. This will raise it to your account admins and someone who does have permission to remove reviews will decide whether to keep or remove it.
When you are removing or flagging a review, you’ll select from a list of guidelines that the review has violated. This will look slightly different based on whether you are removing or flagging a review, but the possible reasons you can select are the same.
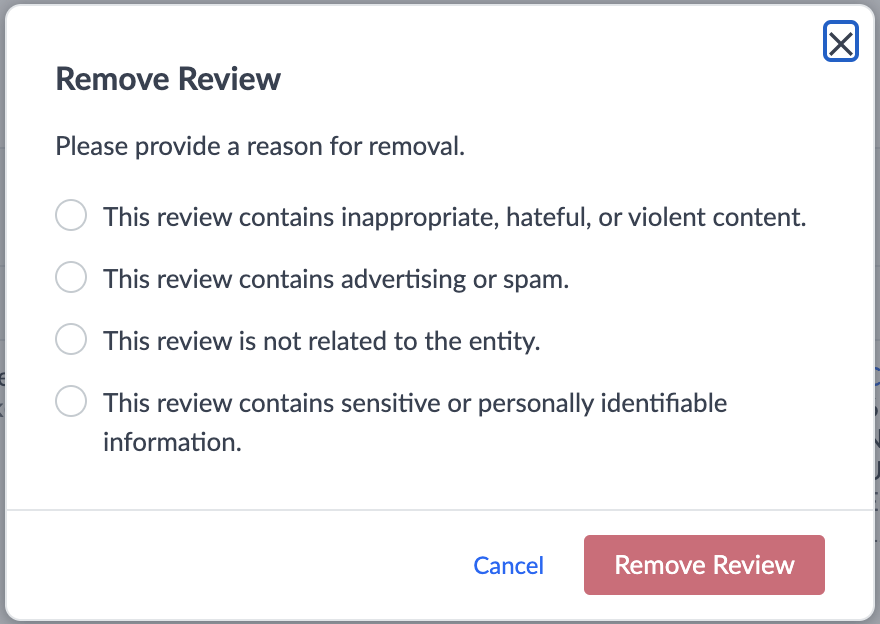
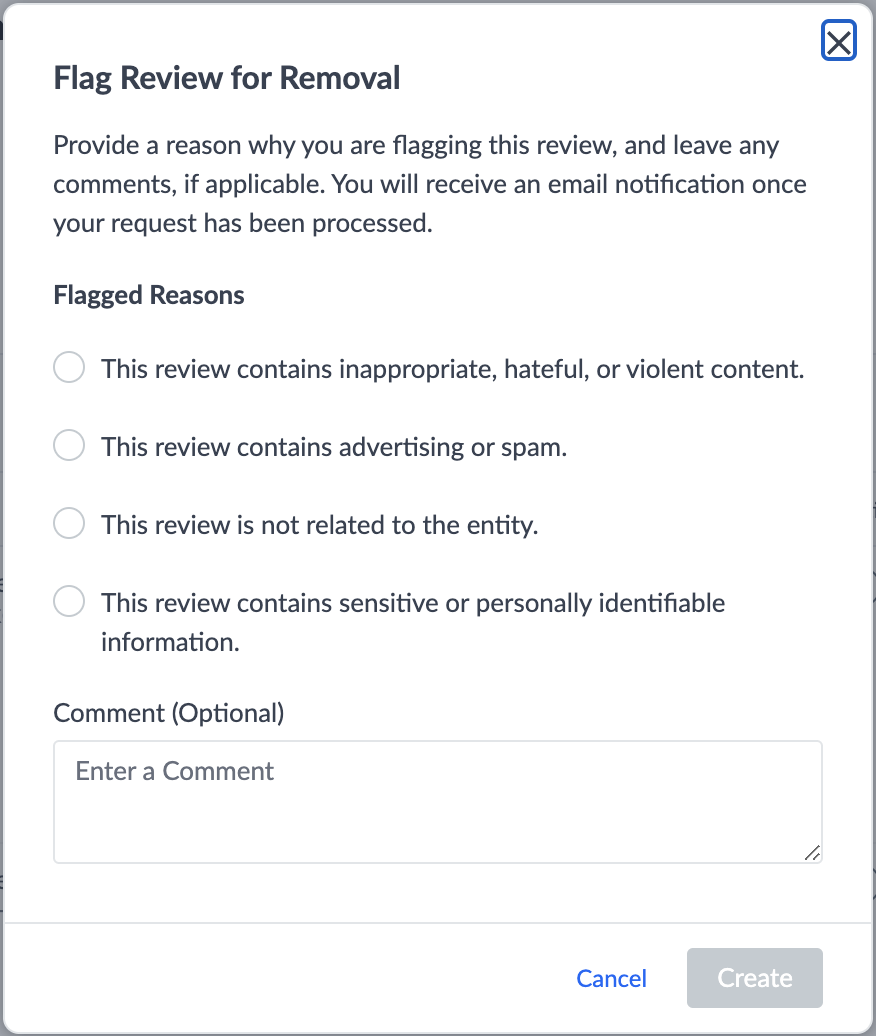
Reviews can be removed or flagged during the quarantine period so that they never make it to your website. However, if you do not catch a review during the quarantine period, they can still be removed or flagged at any point in their lifecycle. If the review is flagged during quarantine it will remain in that state until the flag request has been reviewed.
Once a review is removed or flagged it will be unpublished immediately.
Flagged reviews will appear in the Tasks Inbox of the user it is assigned to or of all users with review removal permission if it is unassigned. They can then decide to keep or remove the review. If they keep it, the review will be reinstated to its pre-flagged status.
Quarantine New First Party Reviews
To further help you monitor first-party reviews, new first-party reviews will enter a quarantine period. The “Quarantine New First Party Reviews” setting allows you to choose a 0-120 day review quarantine period for all newly generated reviews, giving you and your team time to view or escalate a review internally before it is published to your website. Check out the Review Generation Settings unit for details on how to enable this.
A quarantine period is particularly important because first-party reviews do not go through the same screening process as third-party reviews on a publisher site.
New first-party reviews will be marked with a Quarantined status for the duration of the quarantine period you select and show the number of quarantine days left. There are several actions you can take on quarantined reviews in the dropdown:
- Respond: Respond to the review if you want to engage with the customer
- Change Status to Live: If no action is needed, you can choose to publish a review sooner by manually changing the status to live. The status will automatically change to live once the quarantine expires.
- Email: Share the review with others via email
- Remove: If you have permissions to remove a review, you can do so here.
- Flag for Removal: If you don’t have permission to remove a review directly, you can still flag a review to be removed by the Yext team.

True or False: Advanced filters are used to easily view a subset of reviews that match specific criteria.
Who can you create and send review notifications to? (Select all that apply)
True or False: If you apply multiple criteria to a filter, a review only has to satisfy one of those criteria to be included in the filtered results.
Which of the following is NOT a review deletion option?
Soon you'll be your brand's hero! 🎓

