Step 3: Add to your Help Center
As a next step, we recommend that you integrate your Search experience into your Zendesk Help Center to deliver better answers for your customers. There are two main steps to this process:
- Update the Search Results page to return Yext Search experience
- Add the Yext Search Bar to the Help Center homepage
We’ll walk you through how to do both below using the Zendesk Standard theme, also known as the Copenhagen theme.
Note: Depending on the theme you use, these instructions may vary slightly. To understand more about Zendesk themes visit Using themes and customizing your Help Center .
Create a Search Results page for your Help Center
Most websites have search results live on a specific page. In this step, we will walk through how to embed the Yext Search results into the Zendesk Search Results page. If you would like to host the Search Results page using Yext, a CMS or different system, you can certainly do so.
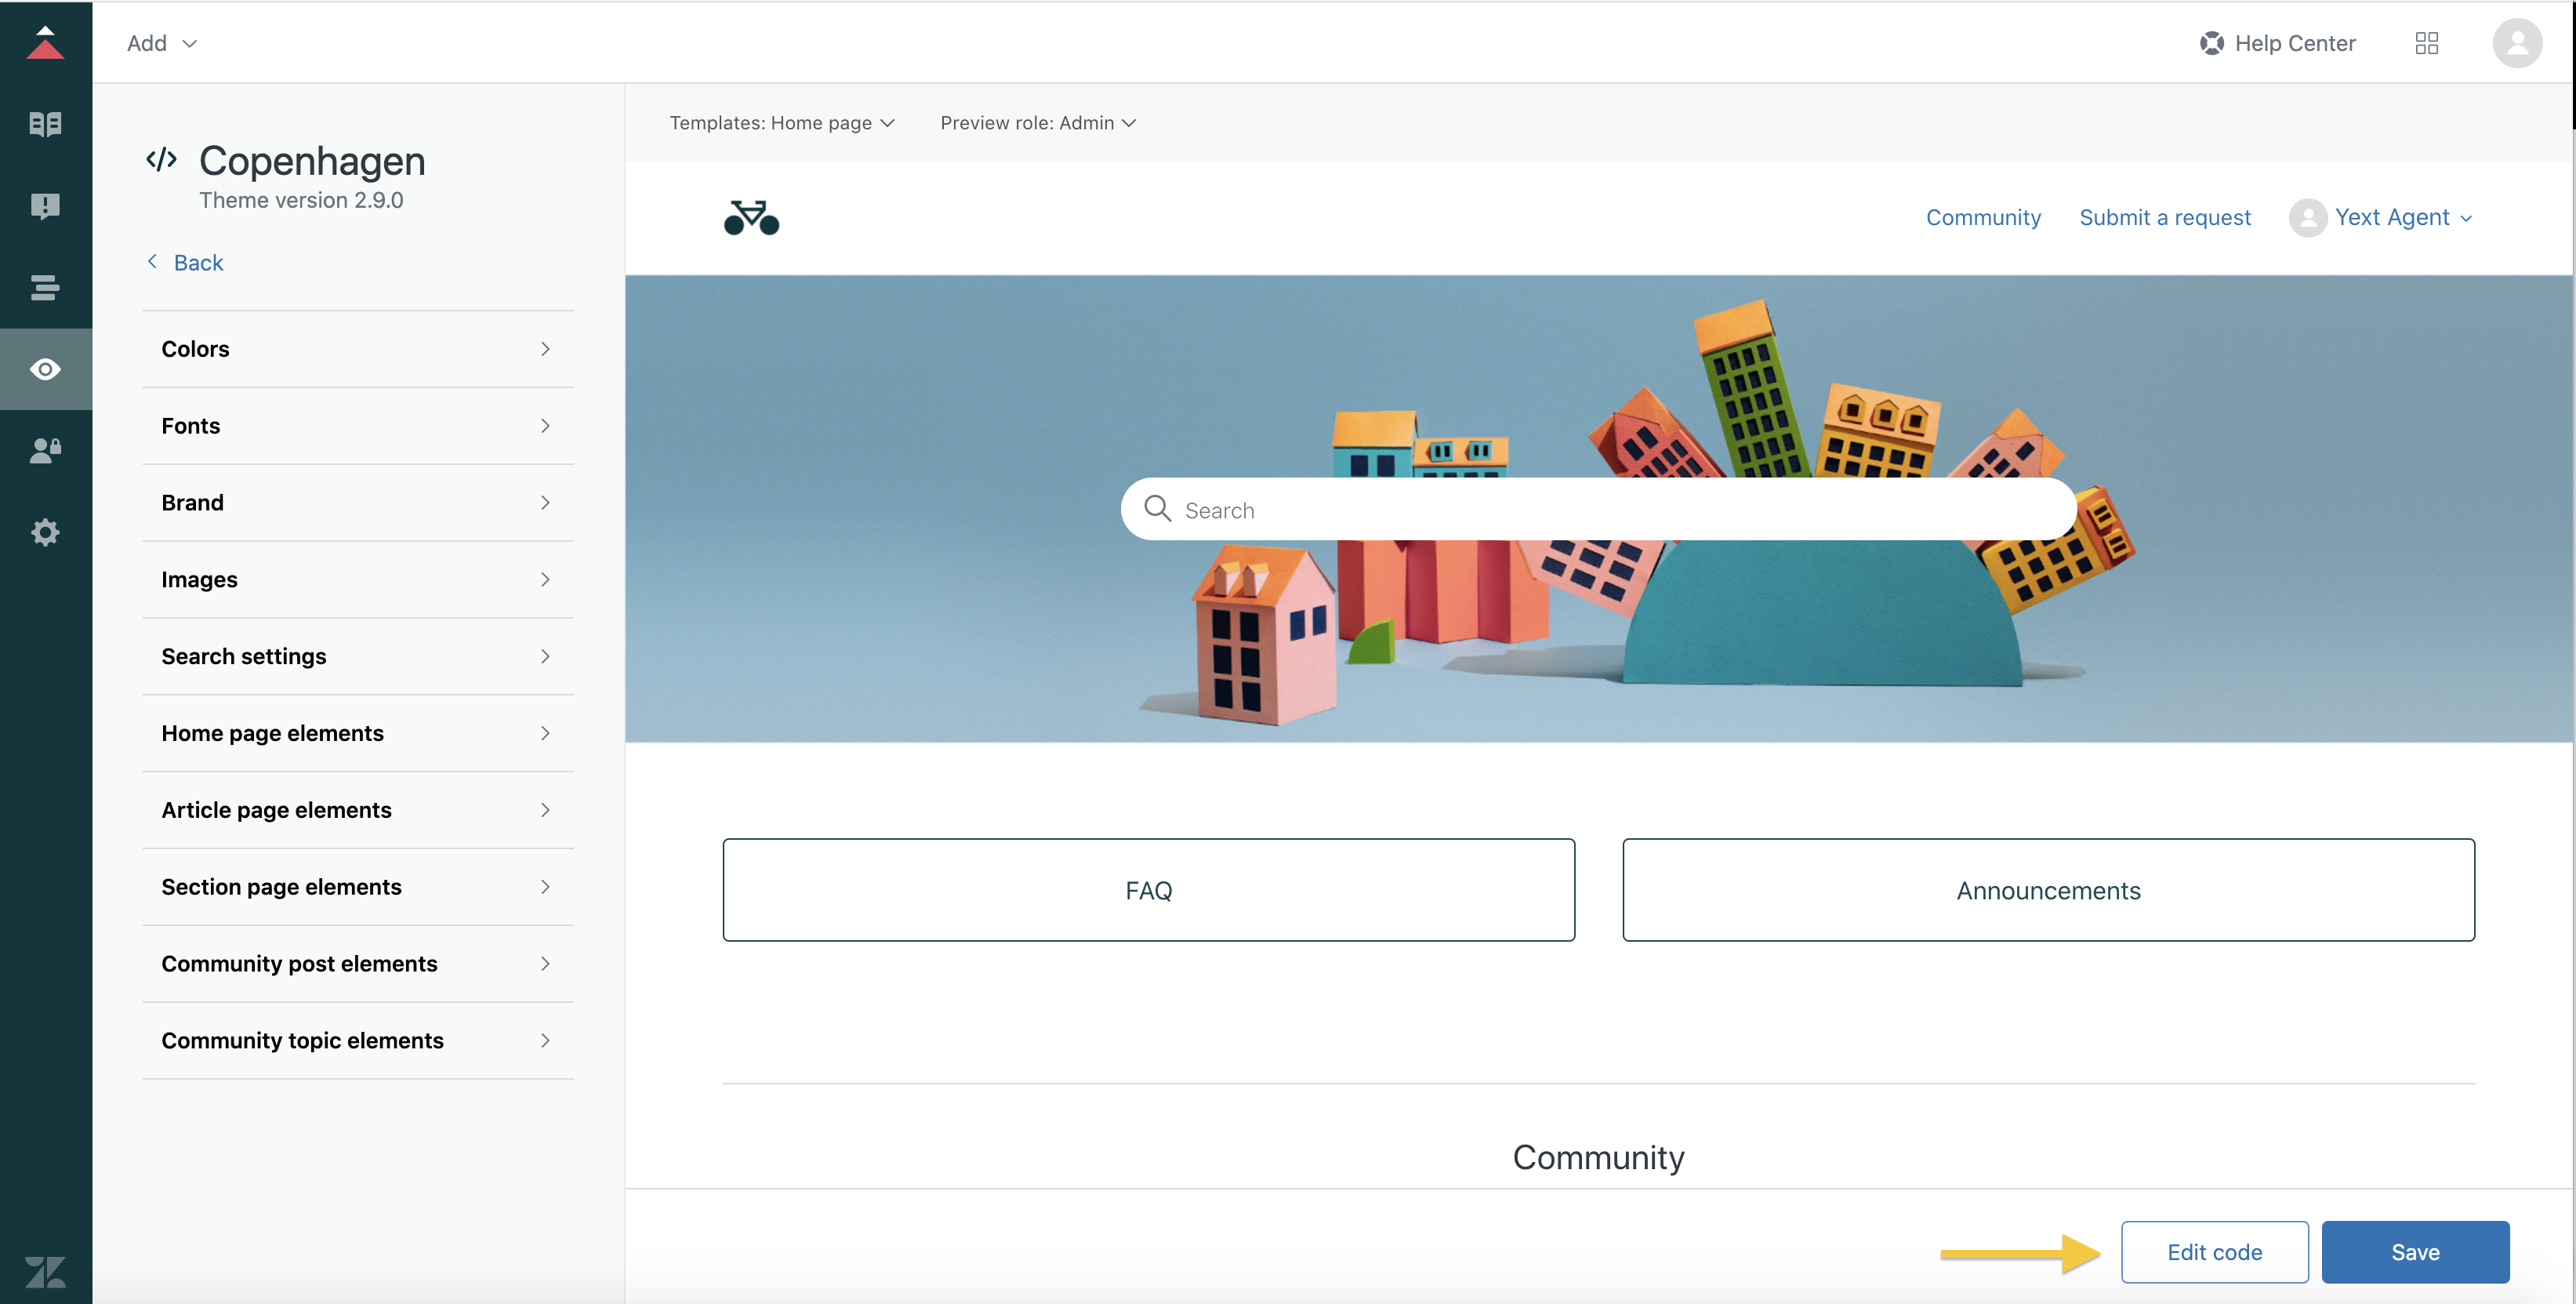
Navigate to the Customize Design tab in the Help Center. This can be found under Zendesk Guide > Guide Admin > Customize design.
Edit your theme. You can either add a new theme by selecting “Add theme”, make a copy of your Live theme by selecting the three dots > Copy. If you would you like to edit your existing theme, click on Customize under your Live theme.
 NoteIf your help center is already live on your site, we recommend making a copy of the Live theme in order to test this out in a sandbox environment first. Under your Live theme, select the three vertical dots and click Copy.
In order to replace the search bar with your Yext search bar, you will need to edit the code. Click Edit Code in the bottom right corner:
Navigate to the search_results.hbs. In the same editor, on the left hand side panel, click on
search_results.hbs. This controls the search results page.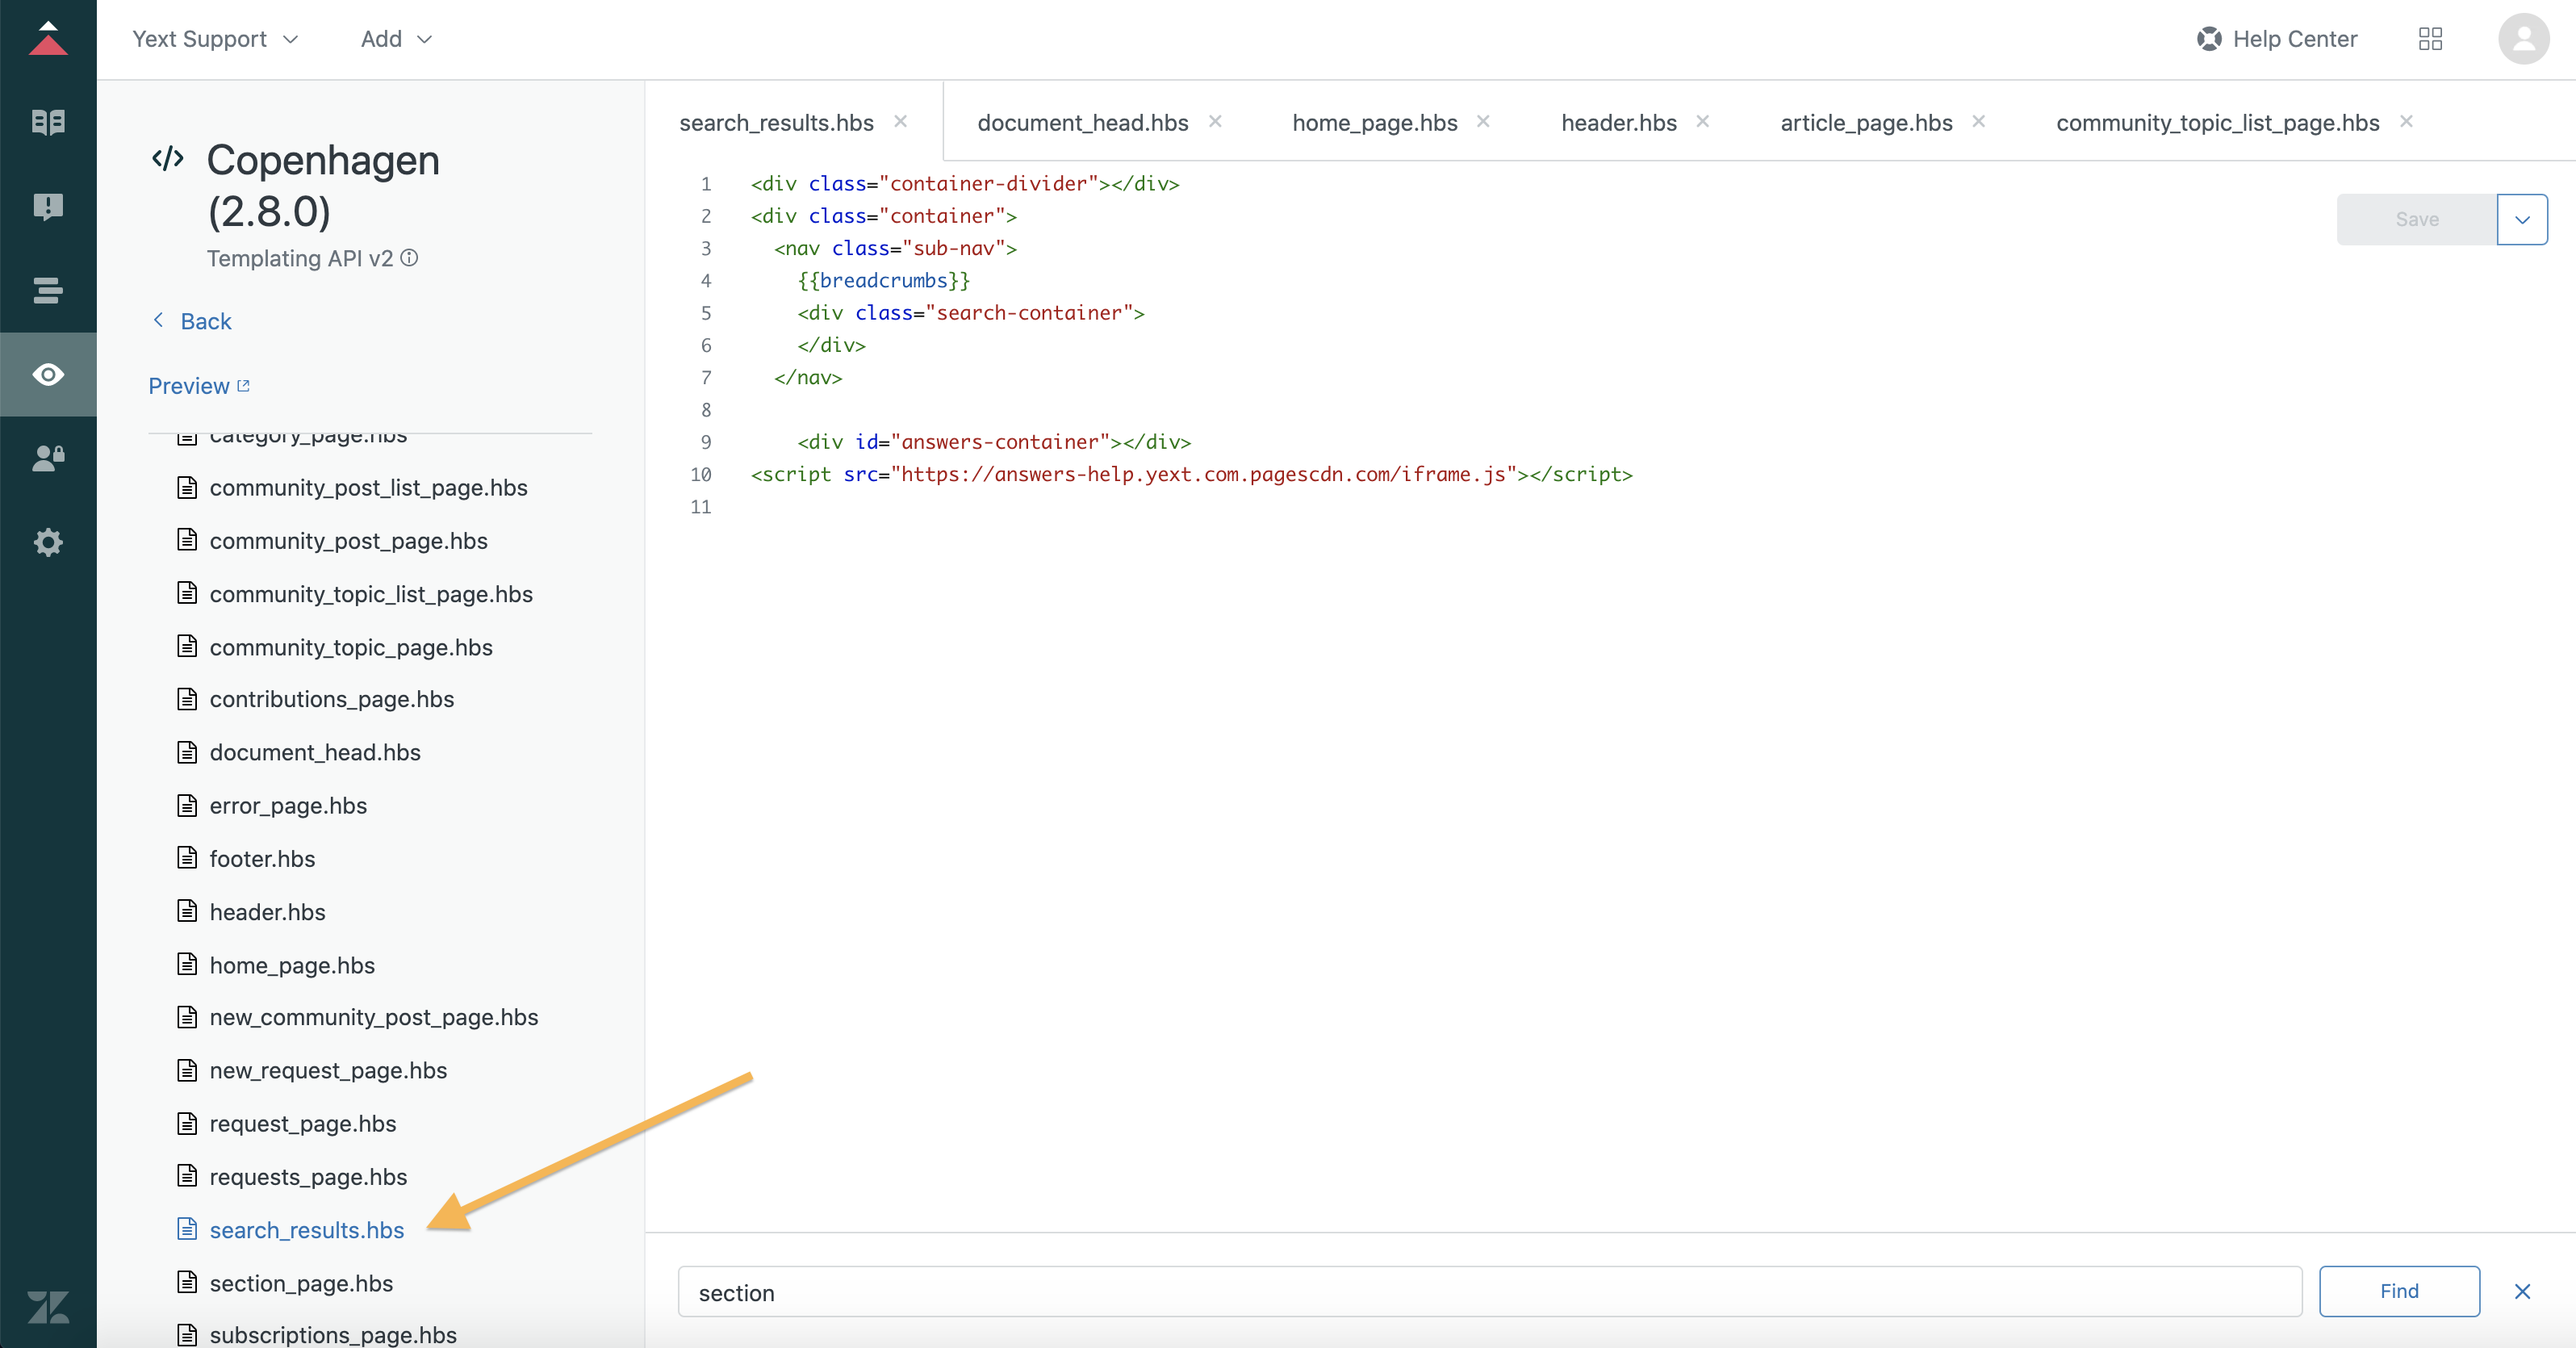
In the
search_results.hbs, insert the following code. Add the below code snippet into the template after the page header. You will most likely want to remove the prior search results div if present.<div id="answers-container"></div> <script src="REPLACE_ME_PRODUCTION_URL/iframe.js"></script> <script> window.addEventListener('DOMContentLoaded', (event) => { AnswersExperienceFrame.runtimeConfig.set('querySource', 'HELP_SITE'); if (HelpCenter.user.email != null) { const visitor = { id: HelpCenter.user.email, idMethod: "ZD_EMAIL" }; AnswersExperienceFrame.runtimeConfig.set("visitor", visitor); } AnswersExperienceFrame.init({}); }) </script>Note: Insert the production URL from when you published to production in step 2.
Assuming you removed the default Zendesk search bar from the template, your hbs file may look like this with the page header div followed by the Search JS snippet:
<div class="container-divider"></div>
<div class="container">
<nav class="sub-nav">
  {{breadcrumbs}}
  <div class="search-container">
  </div>
</nav>
<div id="answers-container"></div>
<script src="REPLACE_ME_PRODUCTION_URL/iframe.js"></script>
<script>
  window.addEventListener('DOMContentLoaded', (event) => {
    AnswersExperienceFrame.runtimeConfig.set('querySource', 'HELP_SITE');
    if (HelpCenter.user.email != null) {
      const visitor = {
        id: HelpCenter.user.email,
        idMethod: "ZD_EMAIL"
      };
      AnswersExperienceFrame.runtimeConfig.set("visitor", visitor);
    }
    AnswersExperienceFrame.init({});
  })
</script>
Save your work. Click Save. If you are using a Live theme, you can choose to publish your work.
Click Preview to see how the search results page looks.
To change the preview from the Home Page to the Search Results page, click on “Templates” in the top left corner to toggle to different page previews.
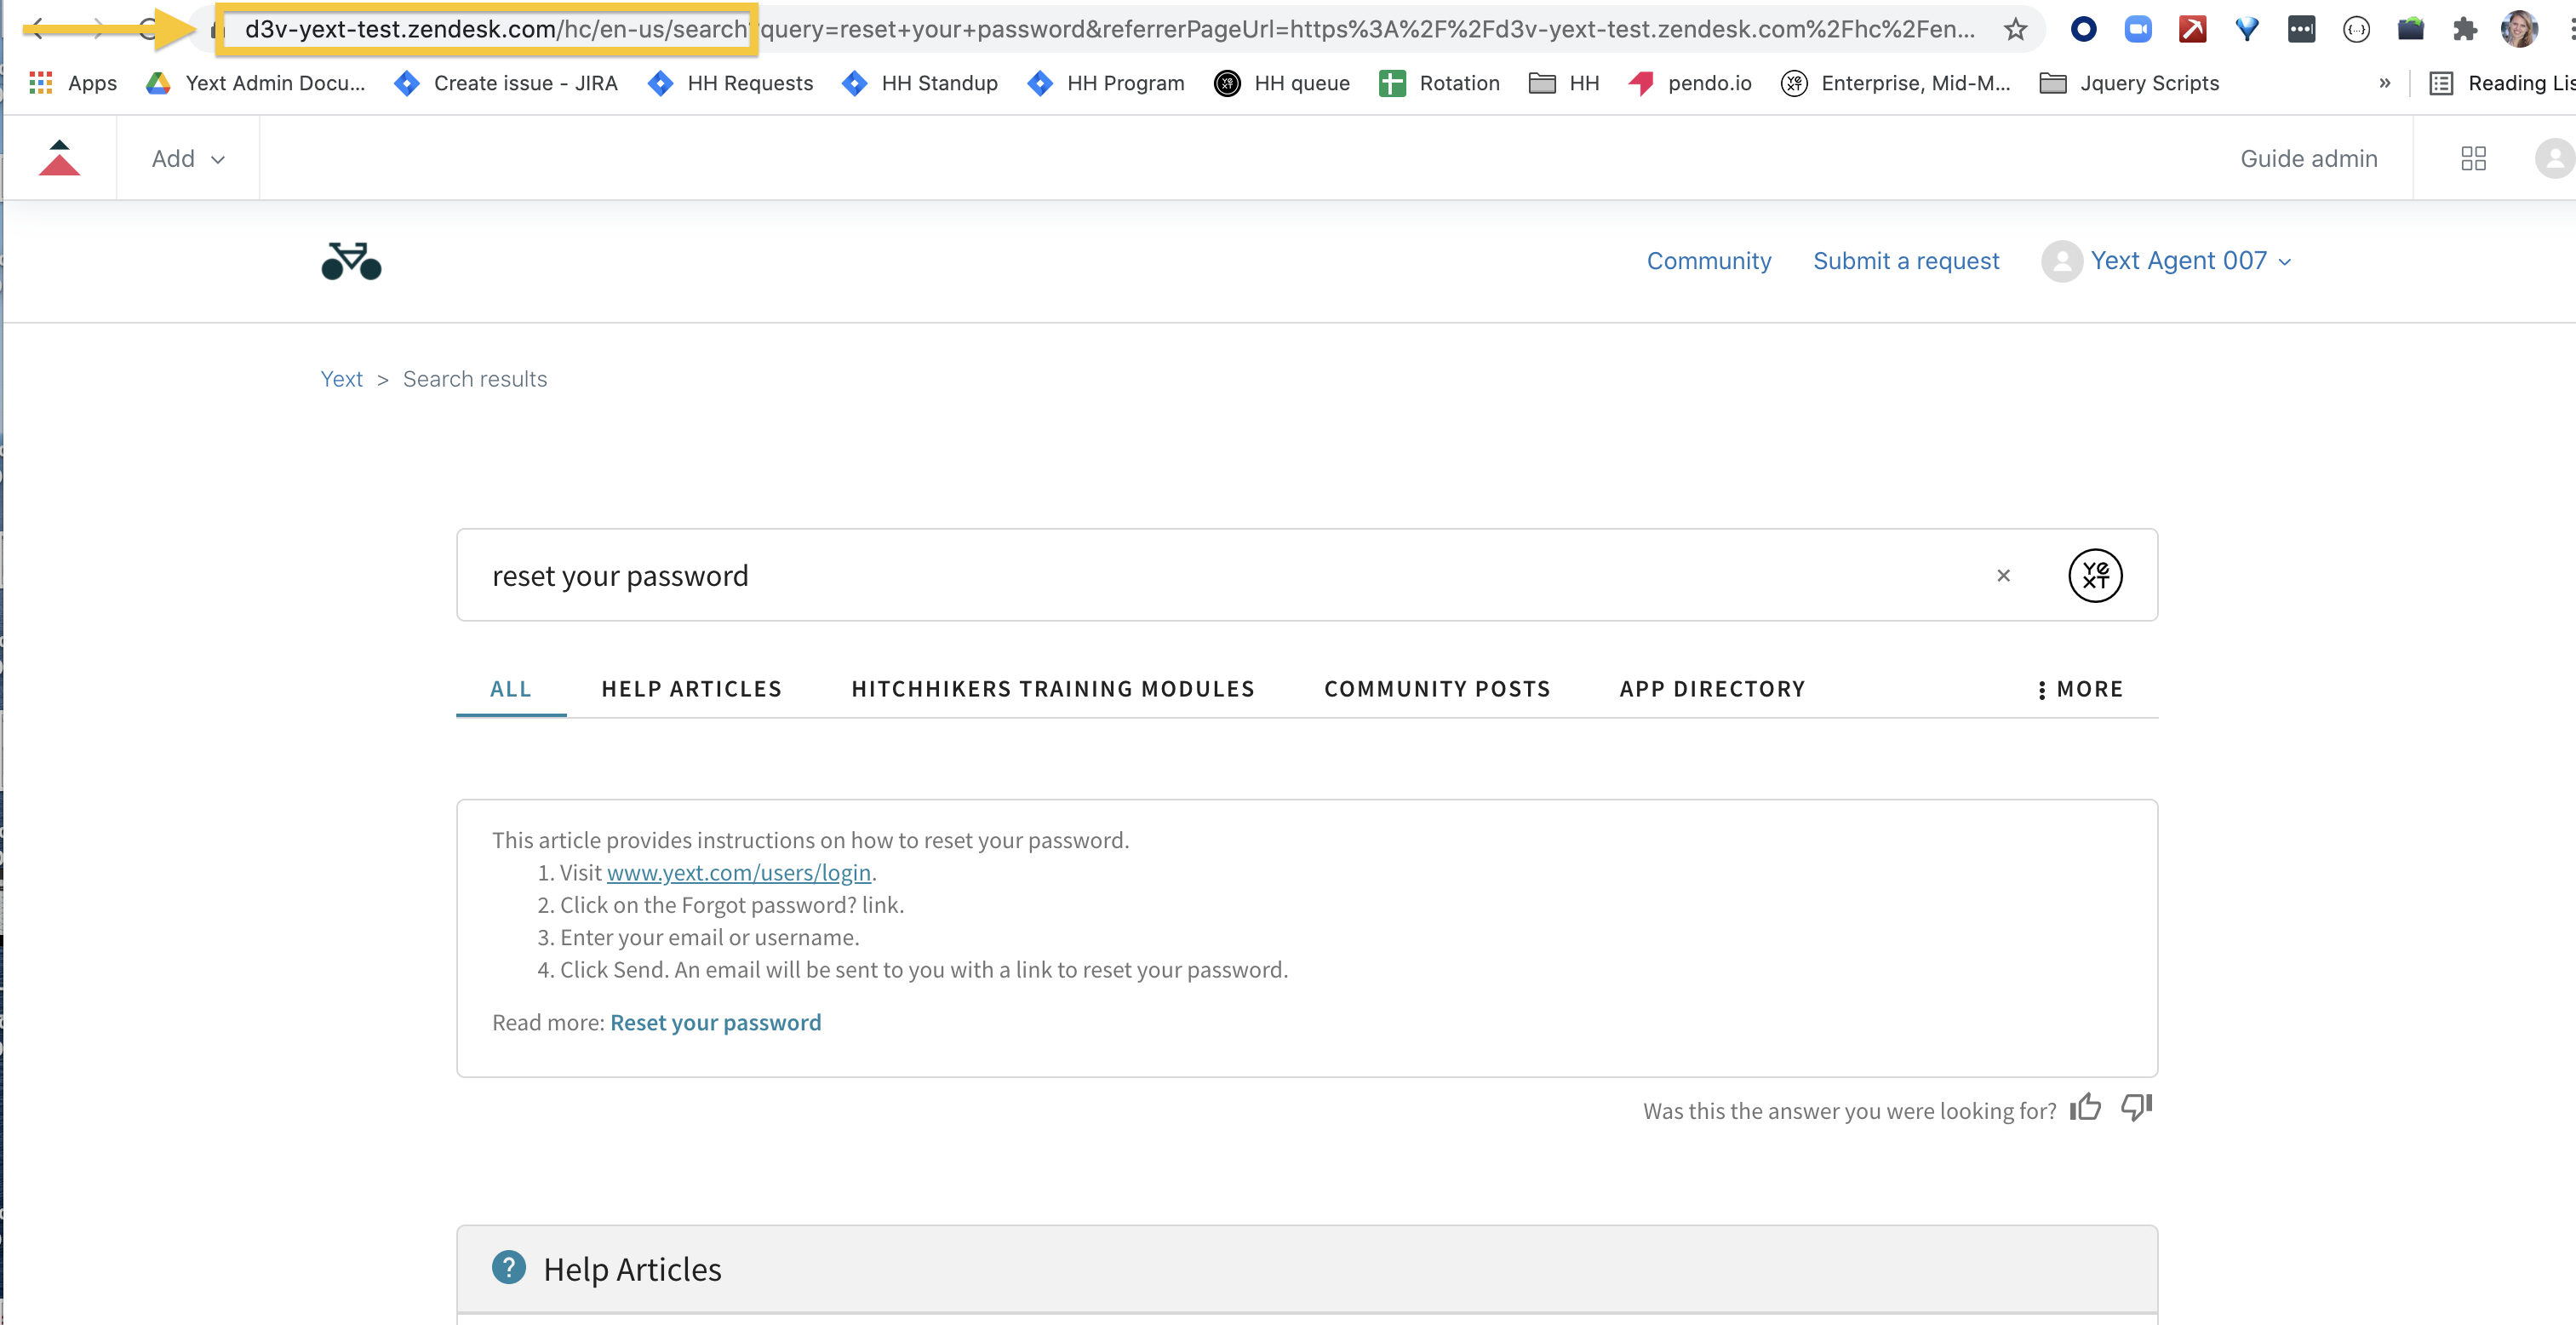
Your Search Results page may look like this:
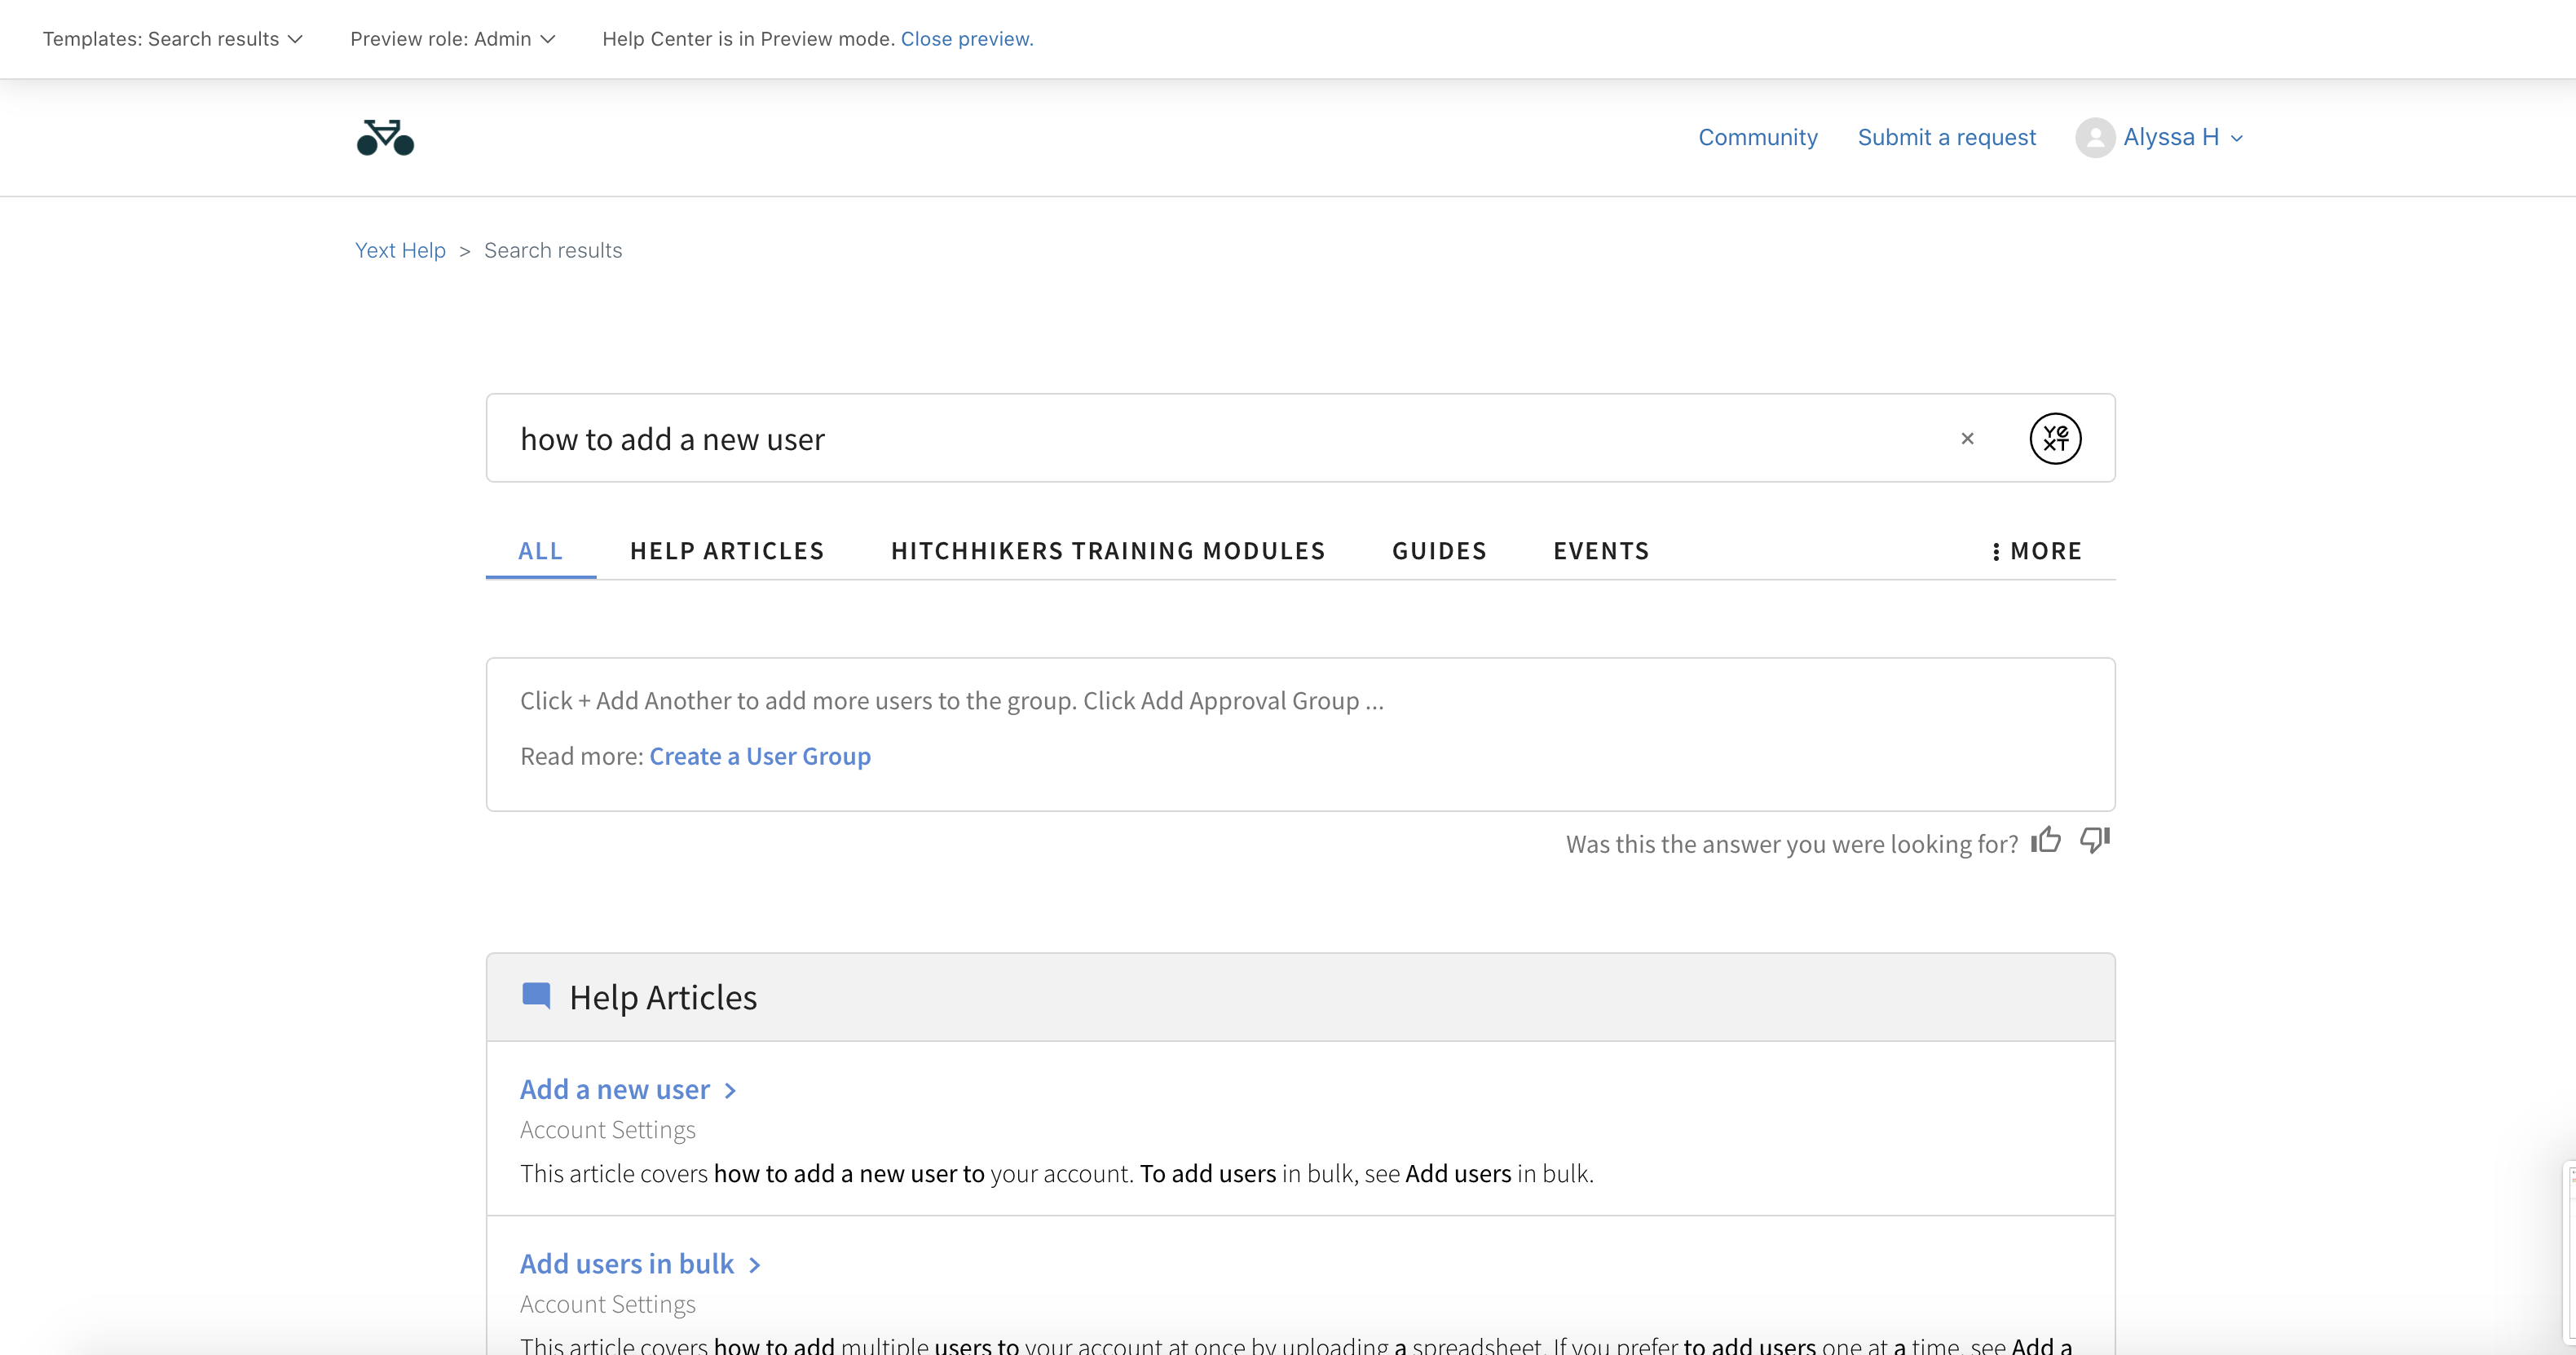
You now have a fully functioning Yext Search Bar embedded directly above the search results. If you are still seeing the default Zendesk search bar as well, make sure to delete the following block of code from the page template and click “Publish”.

The URL of this Search Results page will be your redirectUrl when you initialize Search in the next step. When previewing the page in Zendesk, you will be able to pull the URL from the address bar and it will likely follow this format: https://[domain].zendesk.com/hc/en-us/search.
If you choose to not host the Search Results page in Zendesk, make sure you use that alternate URL for redirectUrl.
If you are integrating a preexisting search experience with Zendesk, you will need to ensure the following update is made within your Search repository within Yext.
In the Yext Platform, navigate to your repository via Pages > All Sites > Your Experience > View Code Editor. Click the pencil icon on the desired branch to view and edit the repository. In config > global_config.json, ensure the "initializeManually": true line is commented in and you’ve published this change to your Production Environment.
Add the Yext Search Bar to the Help Center Homepage
Generally, a help center will have a search bar persistent in the header and might also have a search bar more prominently on the site. These search bars will redirect users to a central search results page to show the results. In this step, we’ll walk through how to create the search bar on the homepage.
Place the Search Bar on the Homepage
Navigate to the Homepage. Once in the editor, on the lefthand side, click on the Homepage (
home_page.hbs), which is the top-level landing page for your help center.Under
home_page.hbs, replace the current search bar information with the following:<div class="search_form answers"></div>
Navigate to the
style.cssfile and add the following CSS at the end of the file:li.yxt-AutoComplete-option--item { text-align: left; }Save your work. Click Save. If you are using a Live theme, you can choose to “publish” your work.
Initialize the Library and Style the Search bar
The next thing we need to do is add the Search JS SDK and CSS to the site via a CDN and then initialize Search. This library will need to exist on every page we have a search bar. If the search bar is in the header this will mean it’s on every page on the site.
Navigate to the Document Head template. On the left hand side panel, click on
document_head.hbs, which is where the head tag of the document lives.In the
document_head.hbs, insert the following code. Make sure you replace any of the properties prefixed withREPLACE_ME. Read more about where to find these properties in the Add a Search Bar integration guide.
NoteIf you are hosting data in the EU cloud region, update the code snippet based on the callouts in the Hosting Data in the EU Cloud Region section.<head> <!-- Other stuff in the head here --> <link rel="stylesheet" type="text/css" href="https://assets.sitescdn.net/answers-search-bar/v1.6/answers.css" /> <script src="https://assets.sitescdn.net/answers-search-bar/v1.6/answerstemplates.compiled.min.js"></script> <script> function initAnswers() { ANSWERS.init({ apiKey: "REPLACE_ME_API_KEY", experienceKey: "REPLACE_ME_EXPERIENCE_KEY", experienceVersion: "PRODUCTION", locale: "en", // e.g. en businessId: "REPLACE_ME_BUSINESS_ID", templateBundle: TemplateBundle.default, cloudRegion: "us", // to use EU cloud region, check out the Add a Search Bar integration guide linked above cloudChoice: "multi", onReady: function() { ANSWERS.addComponent("SearchBar", { container: ".search_form", name: "search-bar", //Must be unique for every search bar on the same page redirectUrl: "REPLACE_ME_SEARCH_RESULT_URL", placeholderText: "Search...", }); }, }); } </script> <script src="https://assets.sitescdn.net/answers-search-bar/v1.6/answers.min.js" onload="ANSWERS.domReady(initAnswers)" async defer ></script> </head>Be sure to replace all parameters in the code snippet that are prefixed with
REPLACE_ME. These parameters include the following:apiKey- Found in the Yext platform, under Search > [Your Search Experience] > General Settings.experienceKey- You can find it in the Yext platform, under Search > [Your Search Experience] > General Settings.businessId- Found both in the URL and in the Yext platform, under Account Settings > Account ID (to find Account Settings, hover over your username in the top right section the Yext platform)locale- For English sites, this will always be'en'redirectUrl- This is the url of the search results page you created above, where a user will and after conducting a search (i.e. https://[domain].zendesk.com/hc/en-us/search).JS version- The code above uses v1.3 as the version number. Before deploying it’s always a good idea to make sure you use the latest version of the JS Library. You won’t need to keep this version up to date over time unless you want access to the latest features but for the best performance use the latest version. You can find the JS changelog here .
You can also configure the
placeholderTextand optionally add apromptHeaderin theaddComponentcall above to fit your needs. For a full list of properties, visit the Add Search Bar guide.Save your work. Click Save in the top right corner. If you are using a Live theme, you can choose to “publish” your work.
Click Preview to see how the Search bar looks on the main page.
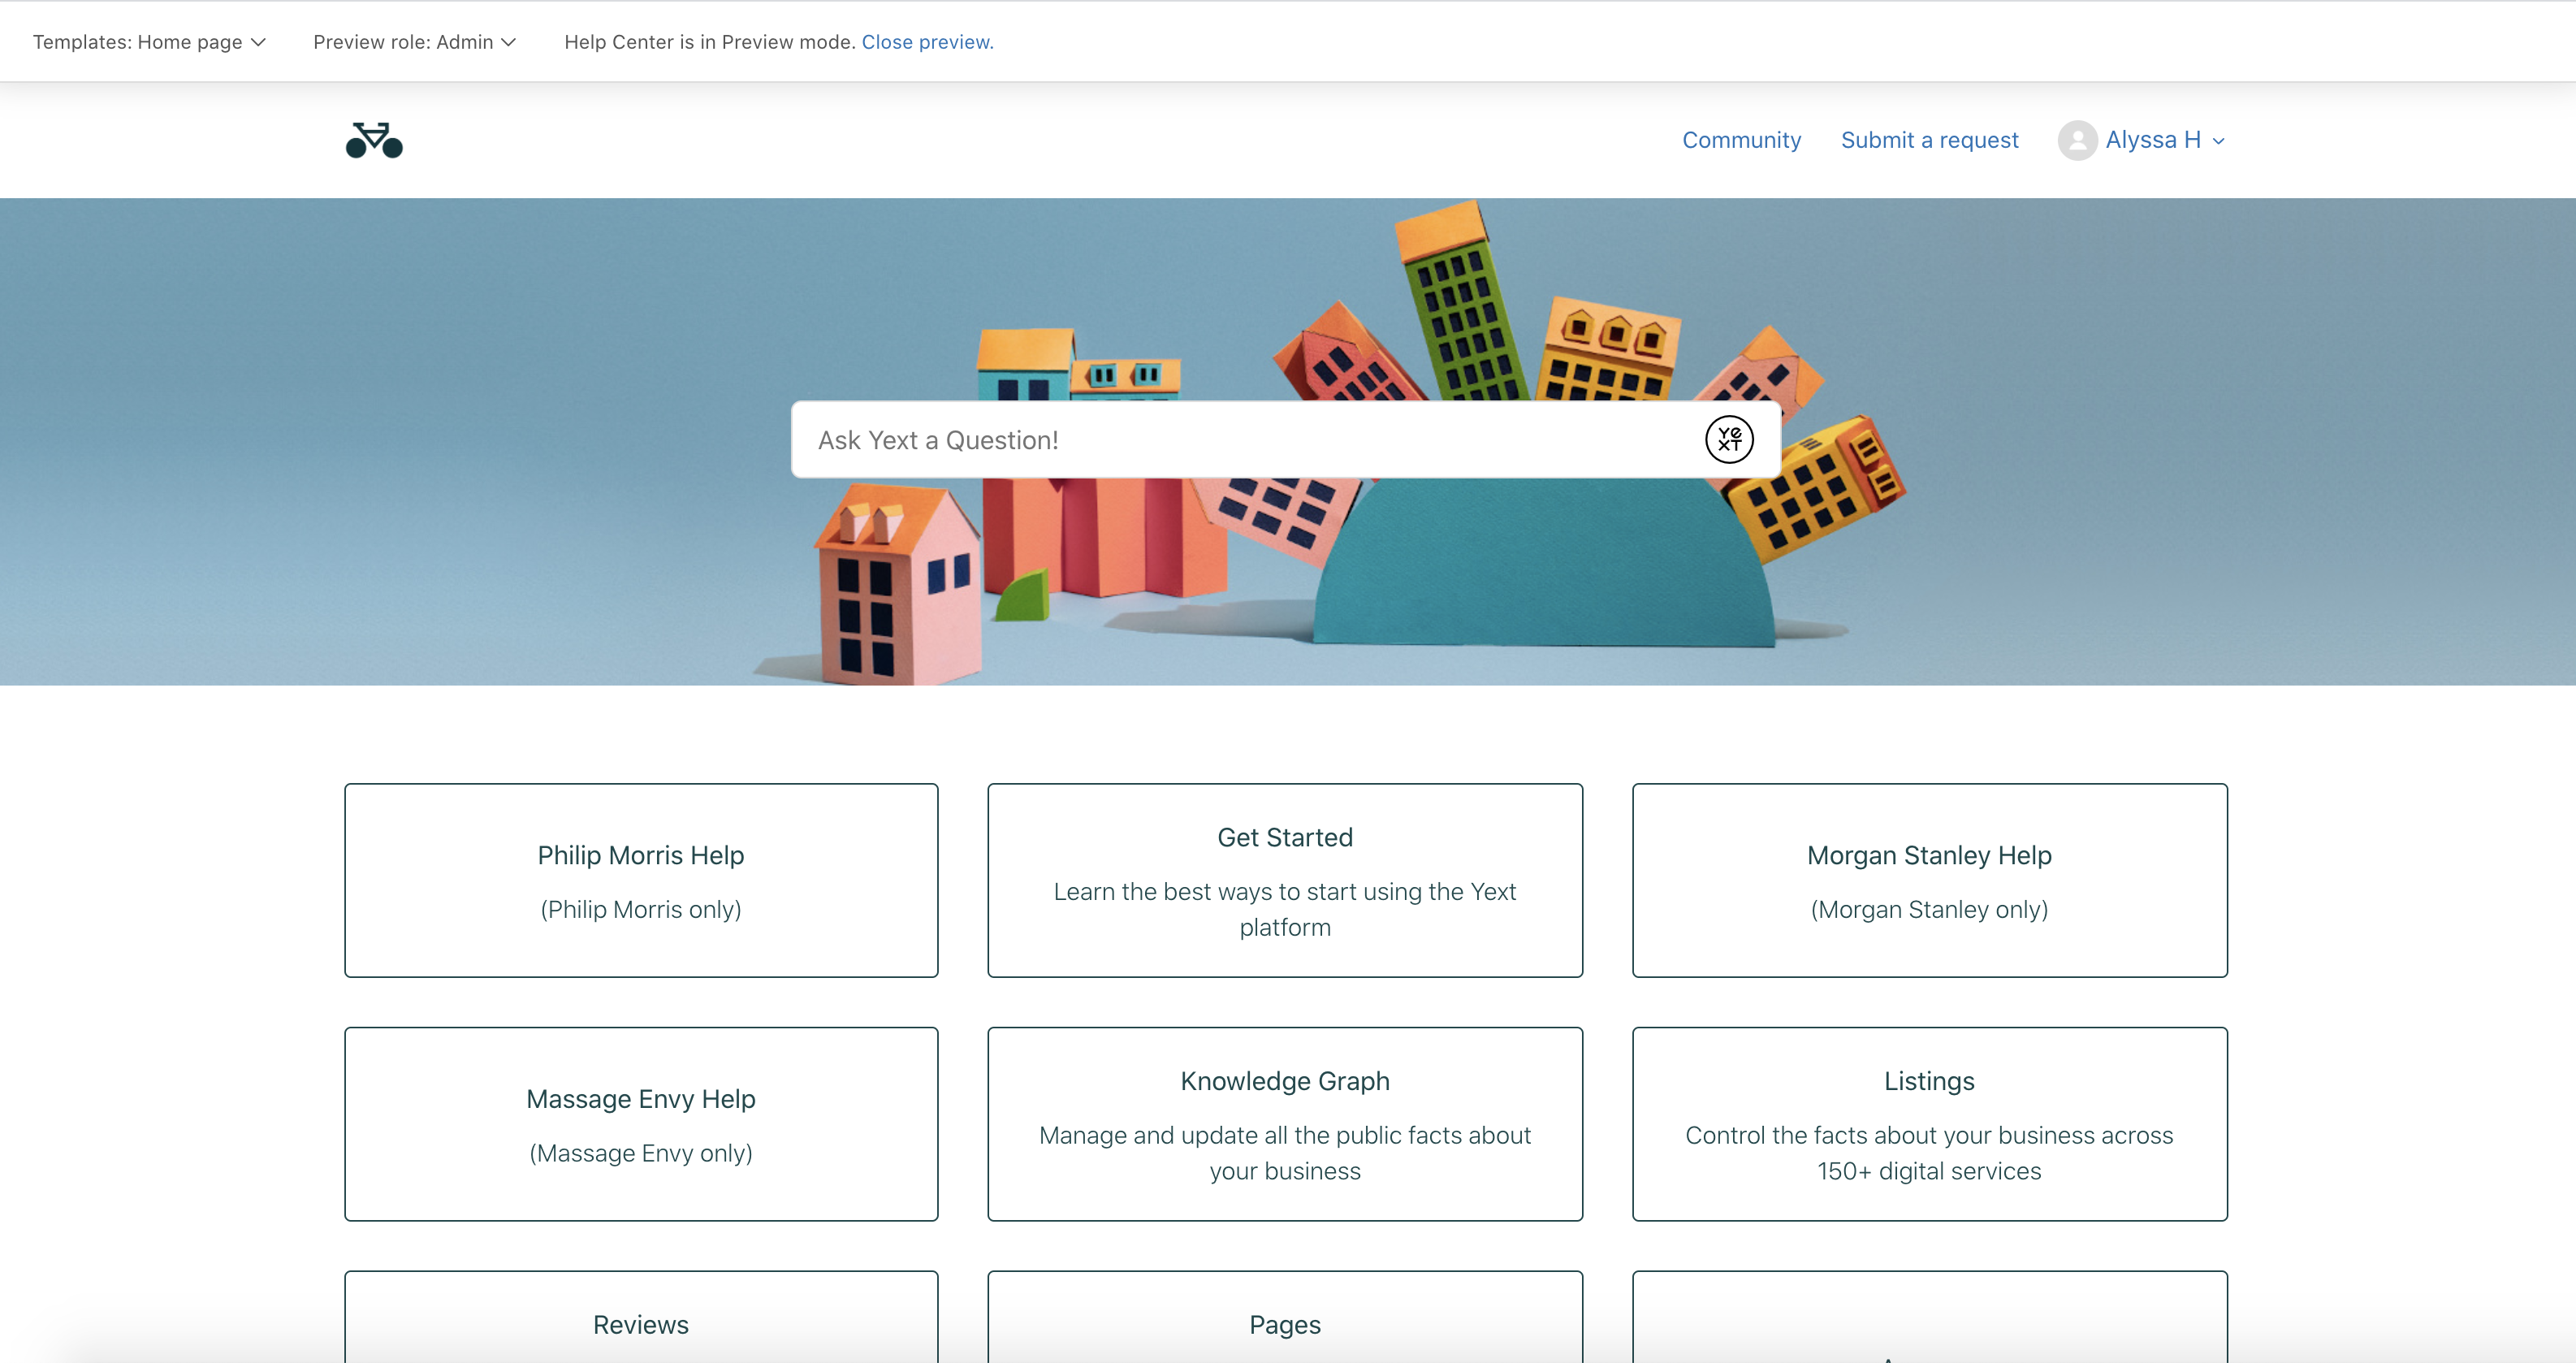
The search bar is designed to look great out of the box, but you can always further style it to fit your brand’s needs by adding any customization to the style.css file.
Congratulations, now you have successfully integrated Yext Search with your Zendesk Help Center. The final result could look as follows: