Redirects (< PagesJS 1.0.0) | Yext Hitchhikers Platform
This is documentation for the beta version of PagesJS (<1.0.0), which is no longer actively maintained.
For up-to-date documentation, refer to the Redirects and URL Routing reference doc.
URL redirection, also known as URL forwarding, is a technique to make a single page of your site accessible at multiple URLs. When a browser opens a URL that has been redirected, a page with a different URL is opened.
Common use cases for redirects include:
- Sending users to a different page during site maintenance or downtime
- Sending users who request an old name of a web page to the updated name (e.g. when a user has an old link bookmarked in their browser)
- URL Shortening (e.g. redirect /bob.html to /agents/US/NY/manhattan/bob.html)
- URL aliasing ( maps.google.com redirects you to google.com/maps )
Pages supports two types of redirects:
Automatic Redirects (system-generated redirects)
Yext will automatically create redirects when data in the Knowledge Graph causes paths to change.
Manual Redirects (user-provided redirects)
You can also configure redirects manually via a CSV file or by directly defining them in your template.
Let’s walk through each type.
Automatic Redirects
These are redirects generated automatically by Yext in response to URL path updates for your live pages. Any time you have a template powered by a stream and the data in the stream changes for a given page the following steps will happen:
- The page will be republished at the new path.
- A redirect will automatically be created from the old path to the new, which is crucial for both SEO and user experience.
Example Scenario
Let’s say a business has an entity for a location in “New York City”.
The entity powers a live page, which is served at
locations.brand.com/nyc.The page’s path is powered by the slug field - which is set to “nyc”.
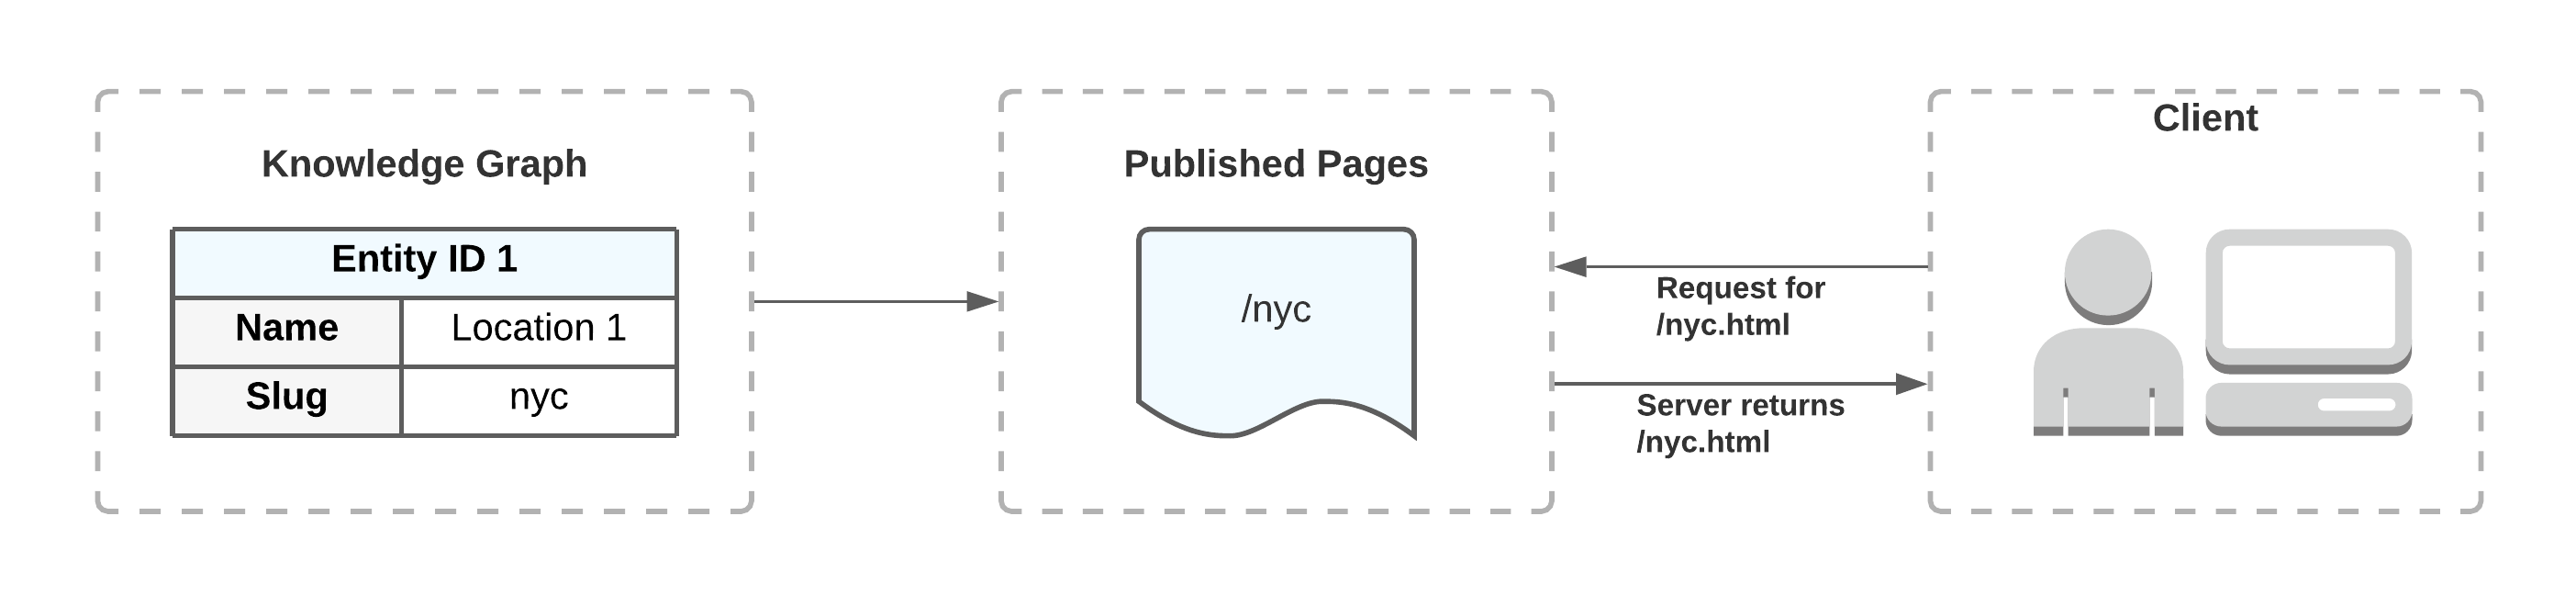
You update the slug field from “nyc” to “manhattan”.
Once the update is made in Knowledge Graph, Yext republishes the live page with the updated slug:
locations.brand.com/manhattanand creates a redirect from “/nyc” to “/manhattan”.When a site visitor makes a request for “/nyc”, the user is redirected to “/manhattan”.
Manual Redirects
These are redirects that can be configured manually. You can configure manual redirects via two methods: directly in the template or via a CSV file in the repo.
Configure Redirects in Template
You can configure redirects directly in your template. You should export a function named getRedirects from your template. This works similarly to getPath but returns an array rather than a string. Here is a simple example:
/**
 * Defines a list of paths which will redirect to the path created by getPath.
 */
export const getRedirects: GetRedirects<TemplateProps> = ({ document }) => {
  return [`old-endpoint`, `stale-endpoint`, `redirect-me`];
};

/**
 * Defines the path that the generated file will live at for production.
 */
export const getPath: GetPath<TemplateProps> = ({ document }) => {
  return `my-path`;
};
In the example above, the paths old-endpoint, stale-endpoint and redirect-me will be redirected to the return value of getPath . The above example uses static list of strings, but you can choose to use data from the Knowledge Graph, as desired.
Add CSV File to Repo
You can add a redirects.csv file to the /sites-config directory in your repository to upload redirects in bulk. Your file should contain two columns:
- Original URL (previous path)
- Destination URL (new path)
Note that you should not add any column headers. Here is an example file
/old-path,/new-path
/about.html,/about-v2.html
To host these redirects, deploy your site with this CSV file. Note - if any collisions are detected on deploy- i.e. one source path redirects to two different destinations - the deploy will fail, and you will be notified to fix your file.
Deploying Manual Redirects
Manual redirects are confined to a single deploy. If a new deploy is created with a different set of manual redirects, the manual redirect paths from the previous deploy will no longer be hosted.
To reiterate, manual redirects are hosted per deploy. They are not persistent by default, unlike with automatic redirects.
Redirects Serving Logic
Given the different types of redirects that can be hosted in the system at any given time, our system uses the following logic to determine how to serve content for a given path:
IF
A path has content, Yext will serve it
ELSE (a path does not have content)
IF
A path has a manual redirect, follow ONLY manual redirects until content is found (or the redirect chain ends). Serve a redirect to the final destination path.
ELSE IF
A path has a *system* redirect, follow ONLY system redirects until content is found (system redirects *should* always lead to content). Serve a redirect to the final destination path.
ELSE
Return a 404
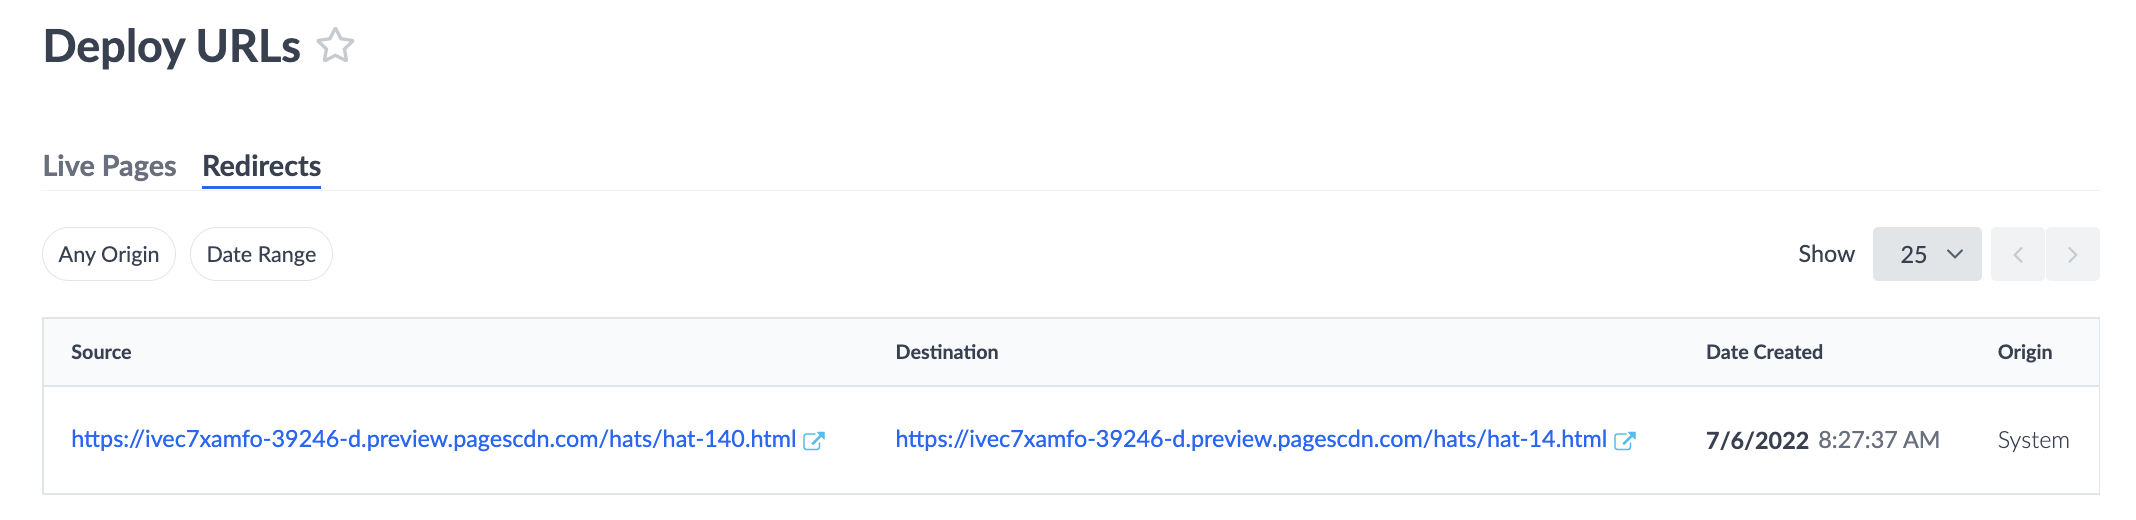
View Active Redirects in the Platform
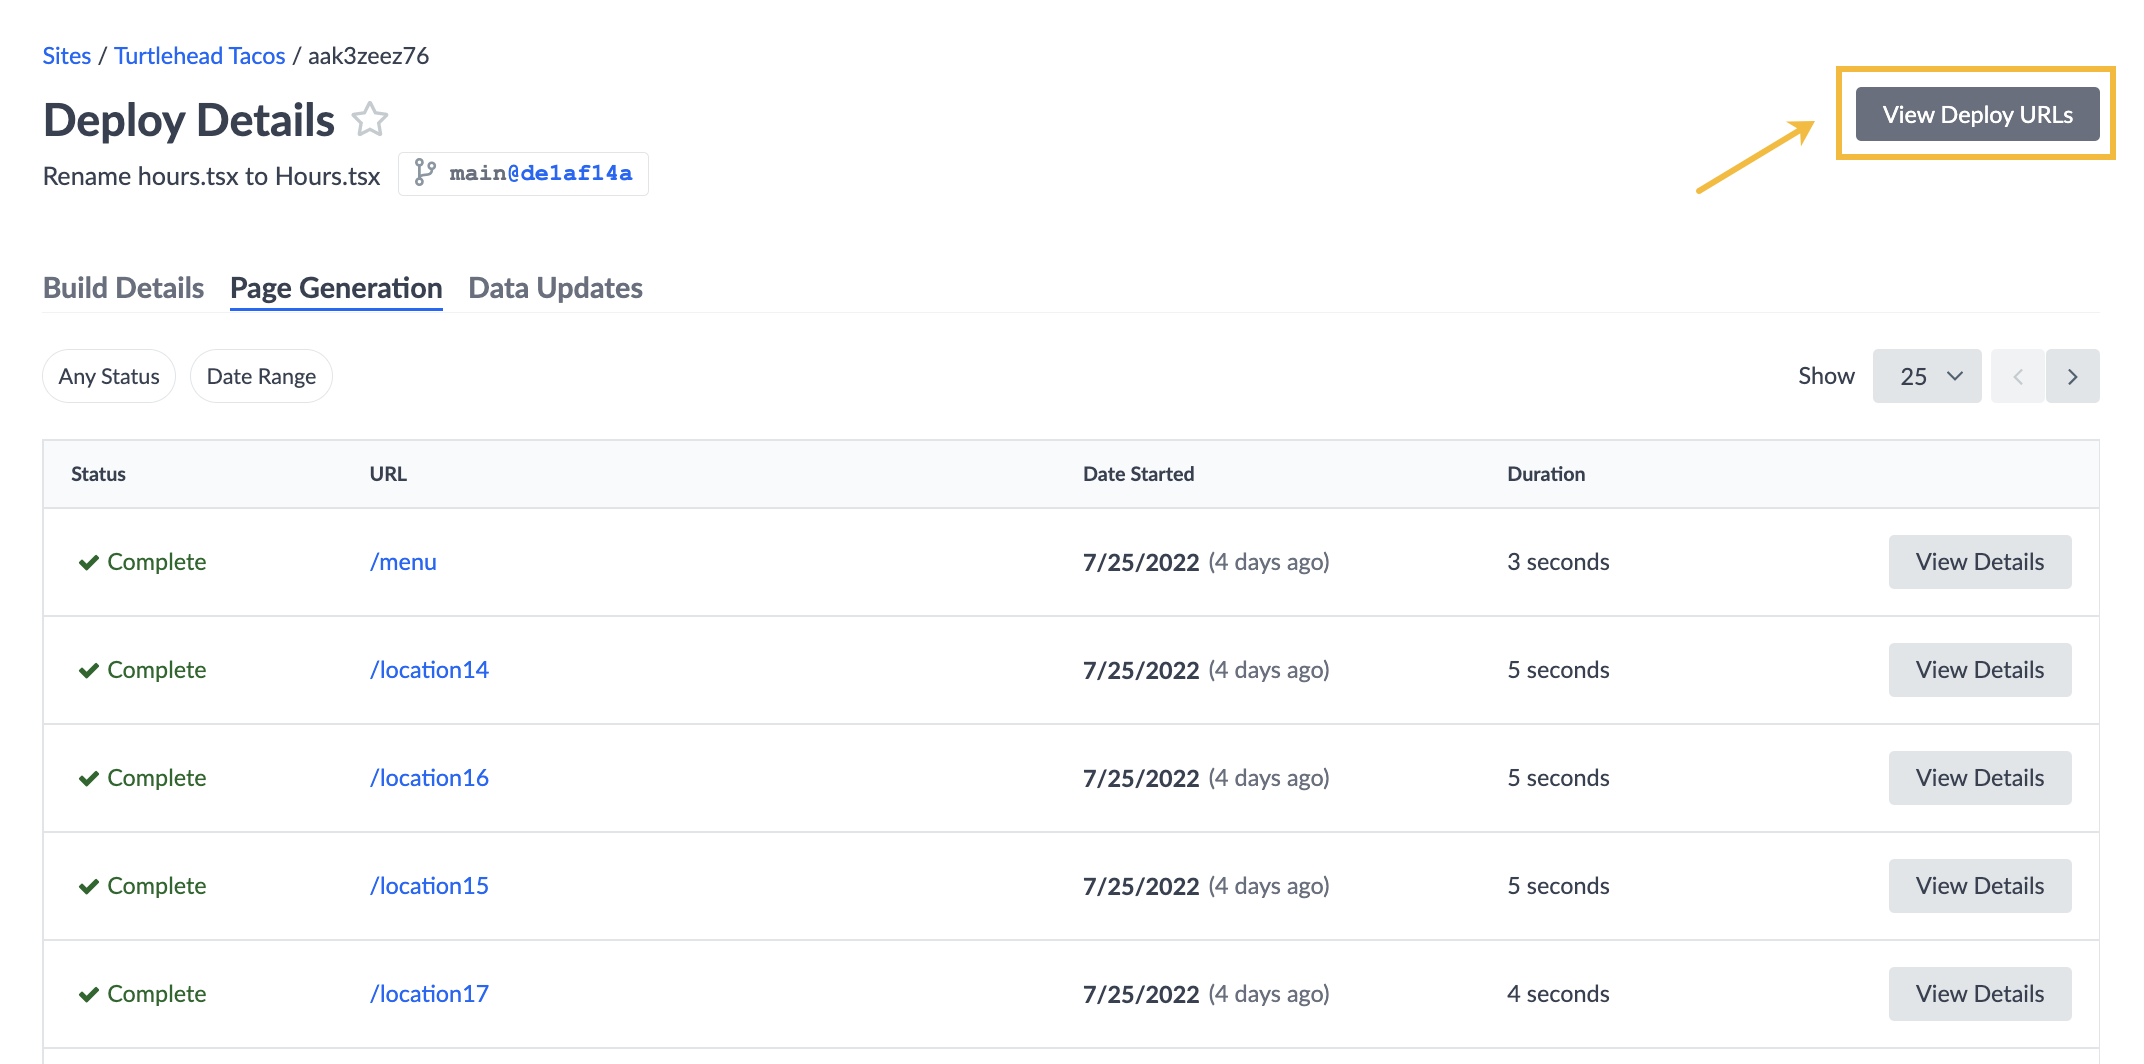
You’re able to view all active redirects for your in the Pages UI. To do so, navigate to the “deploy details” page for one of your deploys, and click View Deploy URLs at the top-right of your screen.
On the Deploy URLs page, click the Redirects tab, which will provide you with the full set of redirects that are active for that deploy (including when they were created and where the redirect originated from).