Site Settings | Yext Hitchhikers Platform
Overview
In the left navigation, navigate to the Settings sub-tab under your site. This page allows you to set various settings and metadata for the site. We’ll walk through each of the settings sections and call out any best practices to follow.
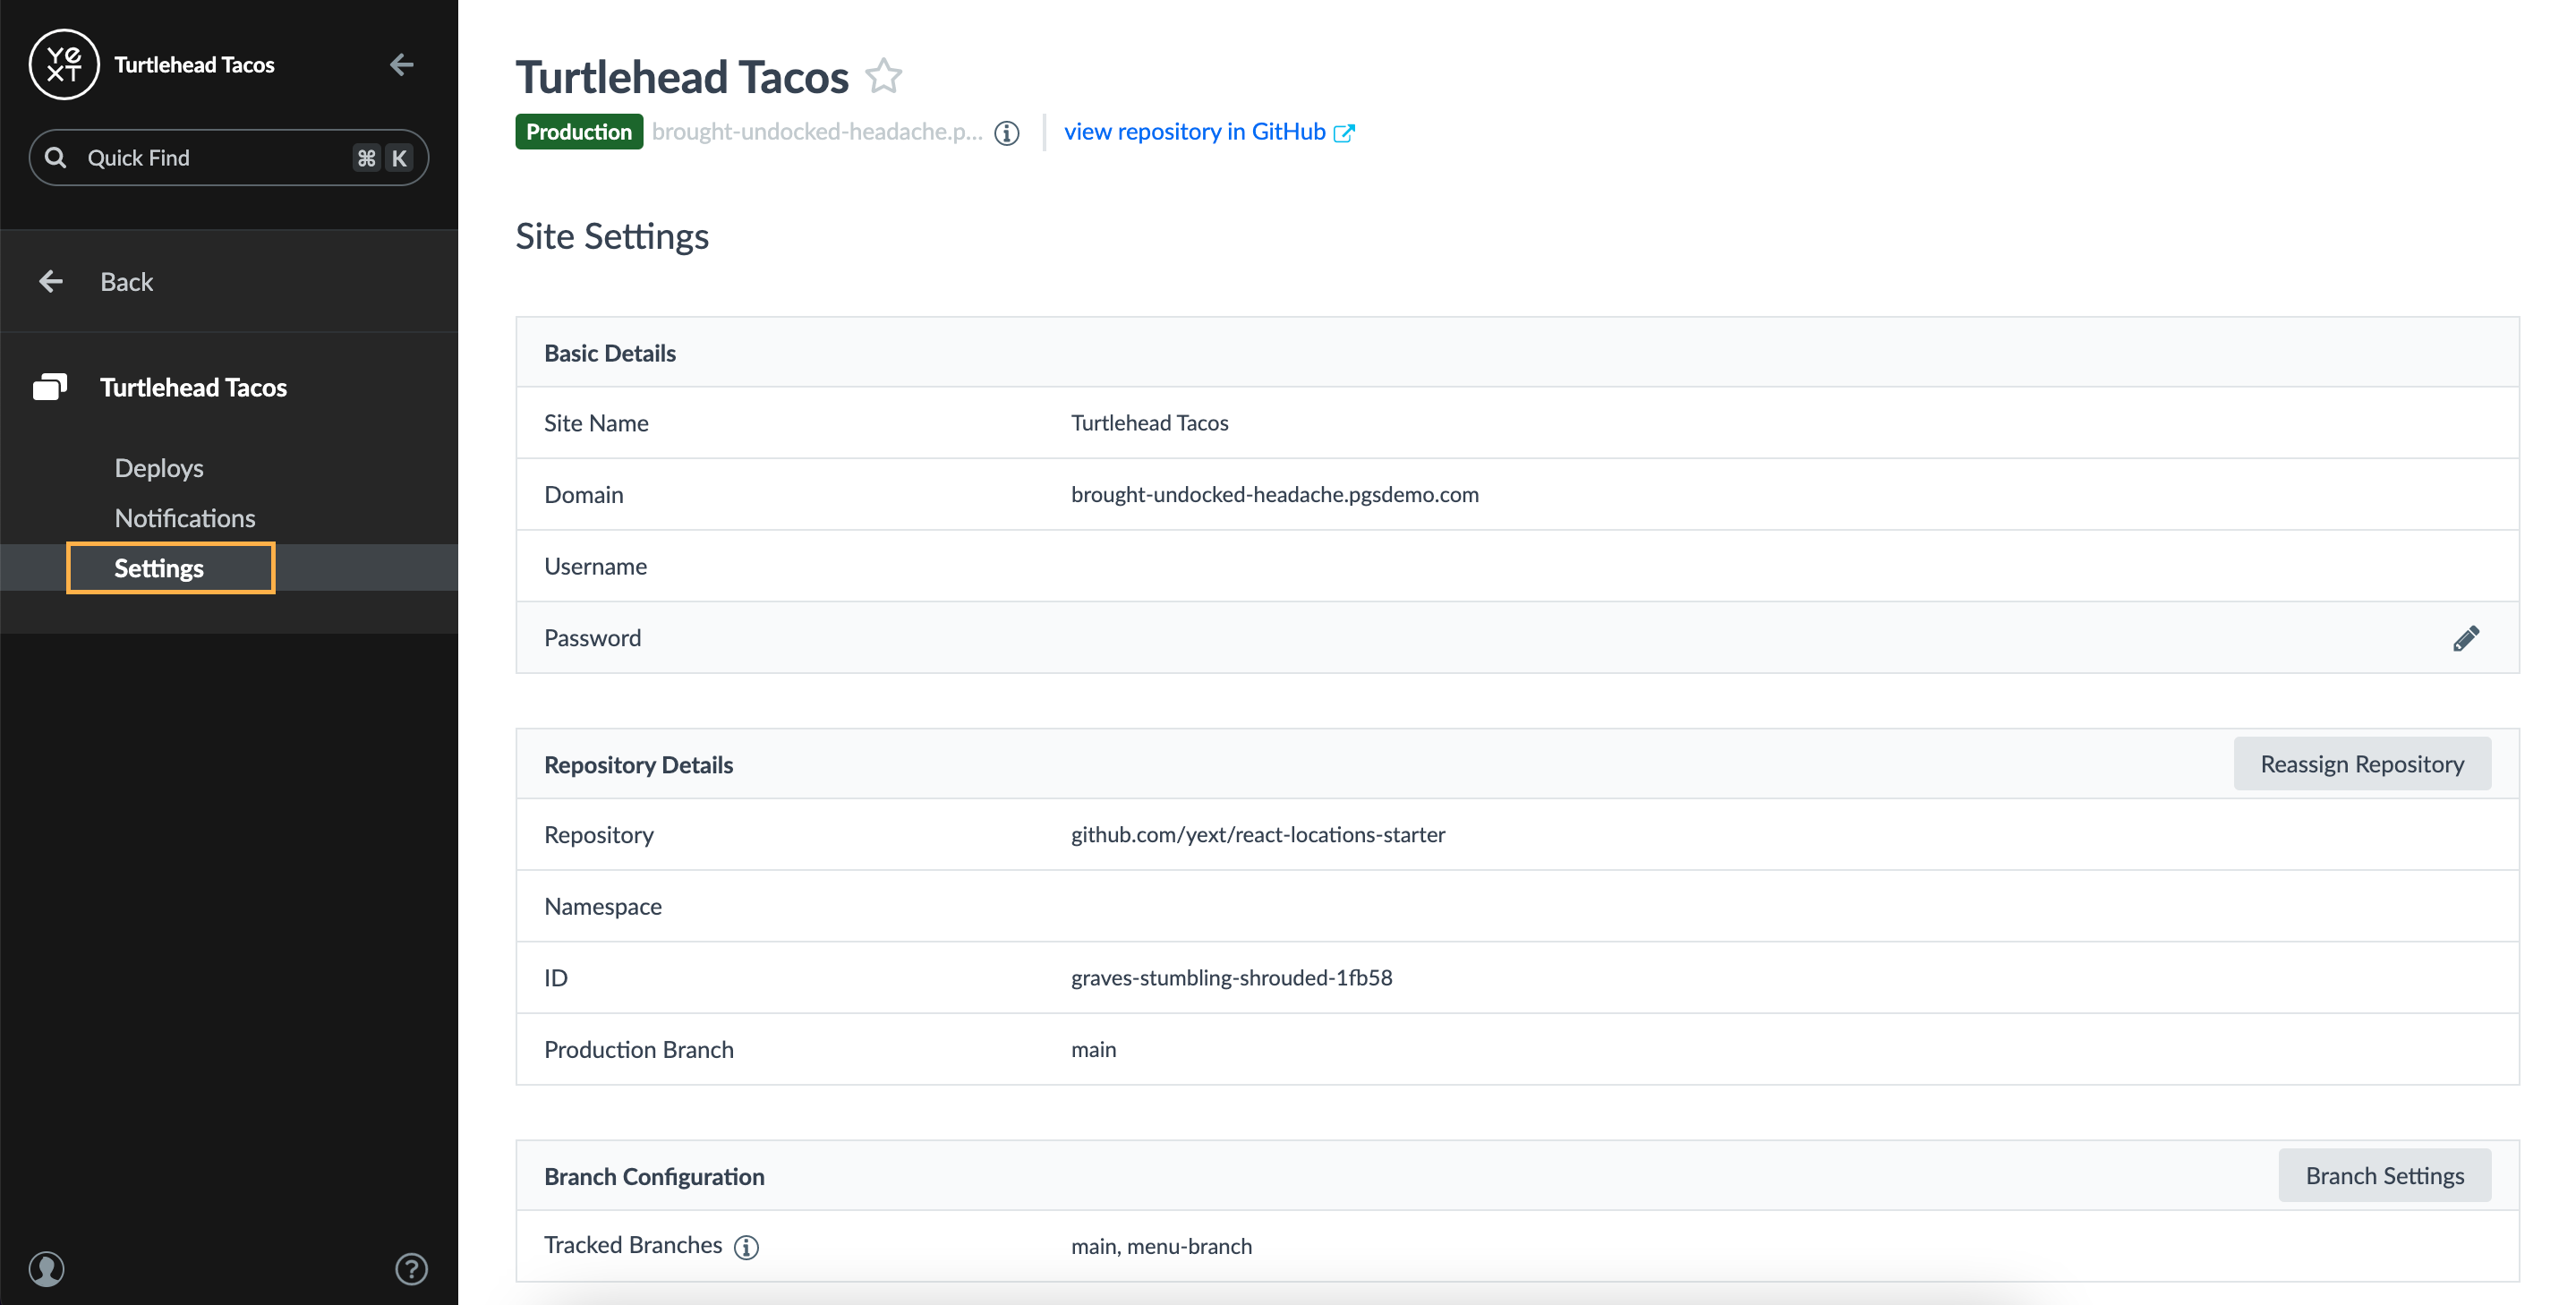
Basic Details

Site Name
The site name is only used internally to help you distinguish your sites from one another. You can change the site name here at any point in time.
Domain
The domain where your production content is being hosted. By default, Yext automatically deploys your content to a placeholder domain. To deploy your content from your own domain, you can create the linkage between your site and that domain here.
Refer to our help article to learn how to add a domain to your account.
Placeholder Domain
The placeholder domain that is automatically assigned when you create your site. You can customize this domain, though it should be used internally only. See Placeholder Domain Configuration in the Integrate Domains with Pages reference doc.
Domain Aliases
If you want your website to be served at multiple domains, list the domain aliases here. See Domain Aliases in the Integrate Domains with Pages reference doc.
Username and Password
This username and password is used for all preview and staging links across your site (this does not apply for any production pages). When these values are omitted, no authentication is needed to view these links. We recommend setting a username/password to maintain the security and privacy of your non-production ready links.
To set up full authentication for your site (using password protection, OIDC, or Yext IDP), please refer to the following guides:
Repository Details

Here you can view the details of the Github repository the site is connected to, and reassign the repository if needed. For example, perhaps the developer who originally created the site created the repo in their personal GitHub account. If they’re not able to transfer ownership, you may want to clone the repo in another account and reassign that repo to the Yext site.
Repository
The name of the GitHub repository that is used to power this site
Namespace
An optional prefix for the resource ID of your site.
ID
The internal resource ID for your Yext Site.
Production Branch
Each site may only have one production link - this is what is tied to your live site! As such, you can only set one branch as the production branch. Typically this is the main (some may use master). However, if you have a reason to publish a commit from another branch to production, you must first set that branch as the production branch here before you can publish it to production.
Branch Configuration
Tracked Branches

Here you can select branches from your GitHub repository that you’d like to enable or disable deploys for. If you create a new branch in GitHub and would like to generate preview or staging links for it, you’ll have to first add it as a tracked branch here. Note you can have a staging link for each branch (the branch name is prepended to the staging domain), but only one production link across the site.
Un-checking a branch from this list will delete that branch and any deployments from your Yext Site in the platform only; for clarity, this will not delete the branch from your GitHub repository.
Branch Settings
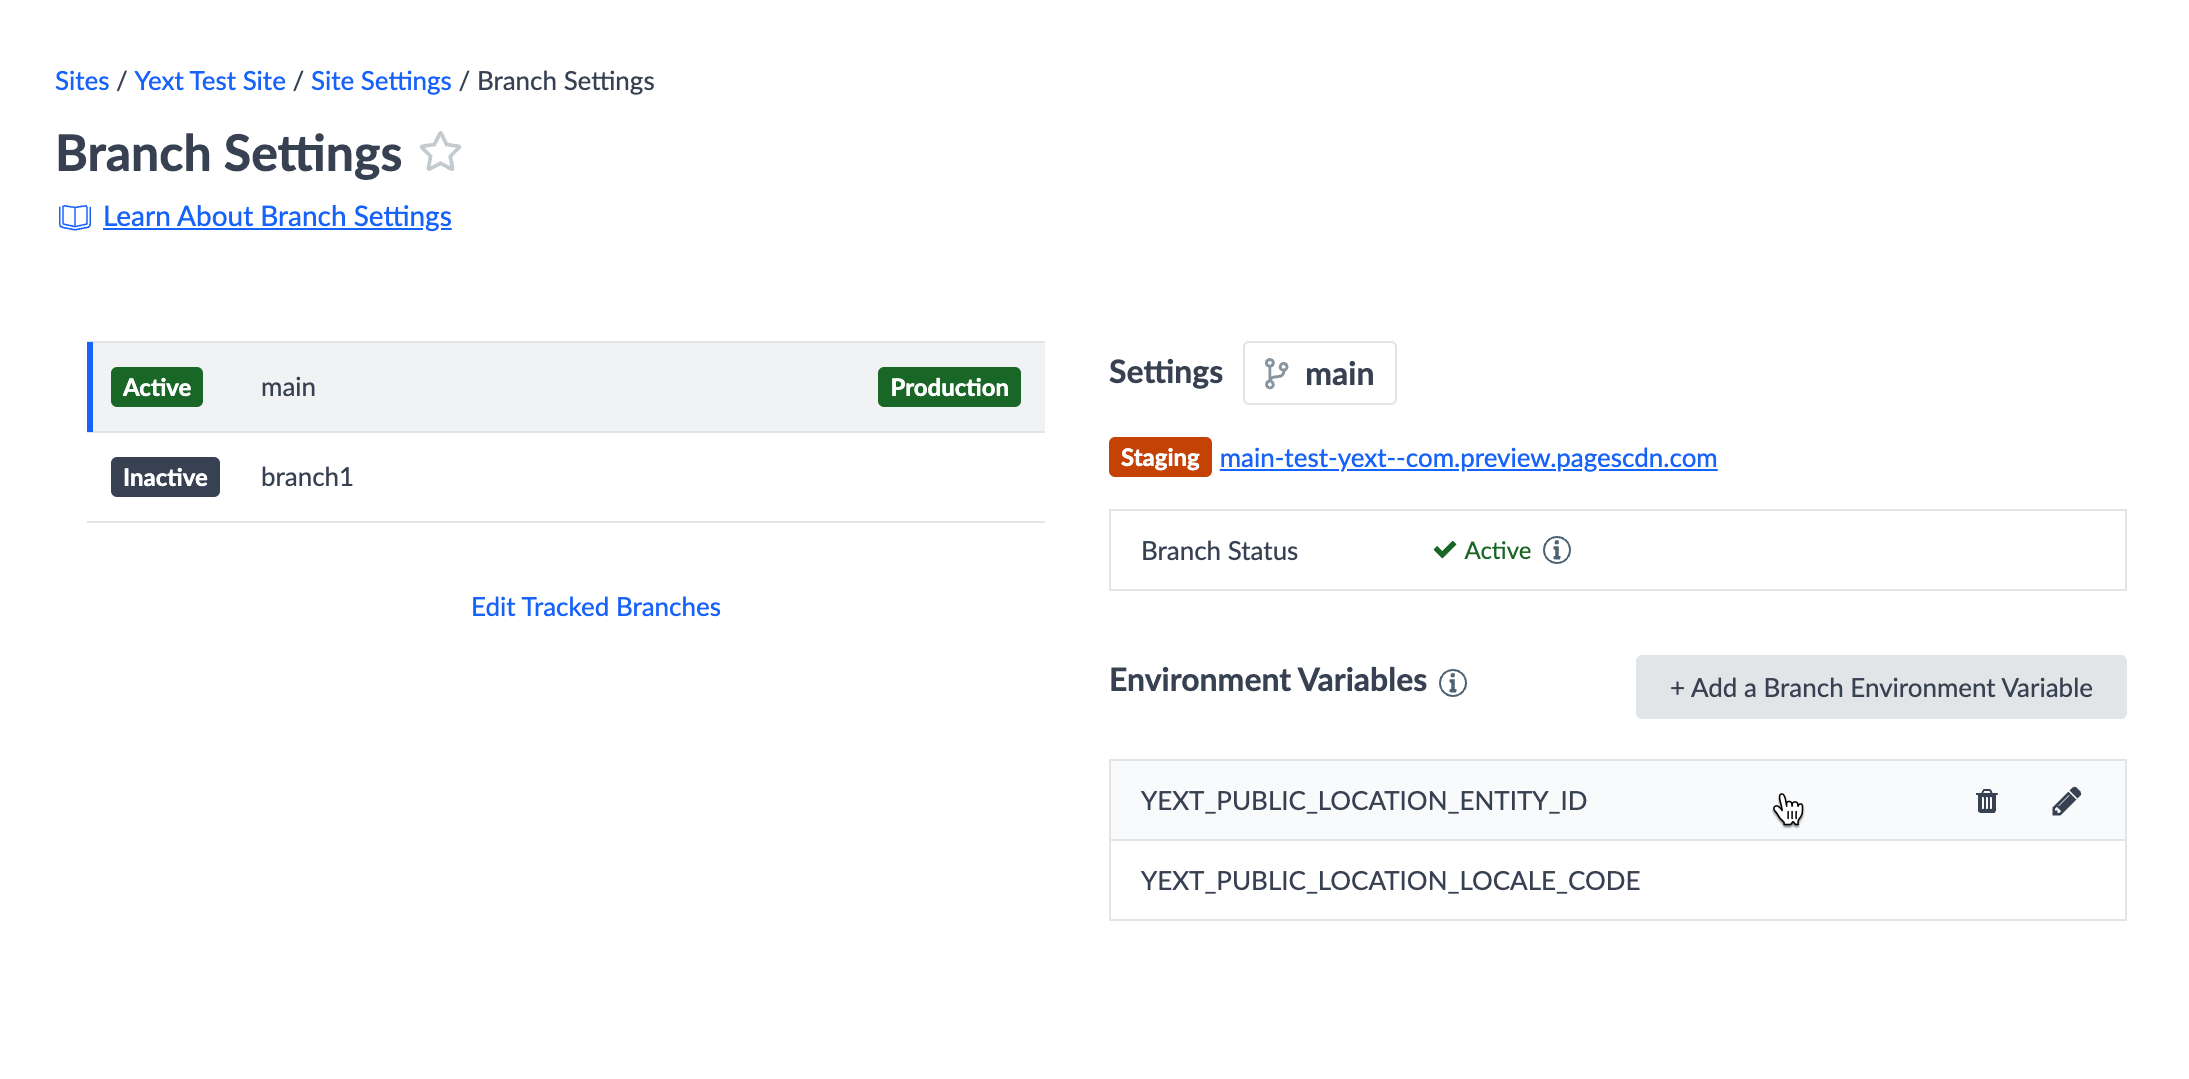
Clicking on the “Branch Settings” button on the right side opens up the following settings available on a per-branch basis:
- Branch Status
- Indicates whether or not deployments on this branch are actively in sync with data from the Knowledge Graph. Refer to our Active Deployments page for more information.
- Branch Environment Variables
- Add key/value pairs here. Environment variables configured will only apply to deployments for that specific branch. Refer to our Environment Variables page for more information.
- Add key/value pairs here. Environment variables configured will only apply to deployments for that specific branch. Refer to our Environment Variables page for more information.
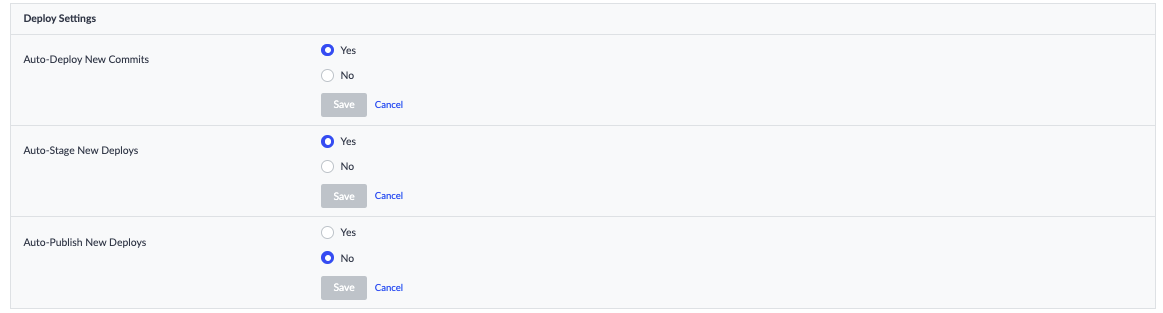
Deploy Settings

The deploy settings determine what steps of the deployment process are automatically pushed. Select your desired settings to best suit your workflow.
Auto-Deploy New Commits
This setting is turned on by default. This means that the deployment process will be kicked off for any new commits to tracked branches.
This allows you to quickly grab a preview link for that version of your site. Keep in mind that each site has a limit of five active preview links at a time, across all branches. You can always go back to a previous commit and redeploy it if you’d like to generate a preview link.
Auto-Stage New Deploys
This setting is turned on by default. Pages automatically stages the most recent deploy for each branch. This ensures anyone with the staging link will have the latest working version of your site.
Auto-Publish New Deploys
This setting is turned off by default. Turning this on will auto-publish any new deploys to production.
We recommend keeping this setting turned off. If your site is live, it is best practice not to automatically publish new changes to production. You may mistakenly push a change that is not fully tested or approved yet. Even if your site is not yet live, it is best to manually publish to production only once a commit has been fully tested and approved.
Environment Variables

The environment variables section allows you to define environment variables that are accessible site-wide, across all of your branches. Branch-level environment variables can be configured in the Branch Configuration section, referenced in a previous section.
Notifications Page
On the Notification sub-tab (separate from the Settings sub-tab), you can also configure deploy notifications to stay up-to-date with your deploy activity from outside the platform. Follow this help article for steps to add Pages notifications.
Site History Page
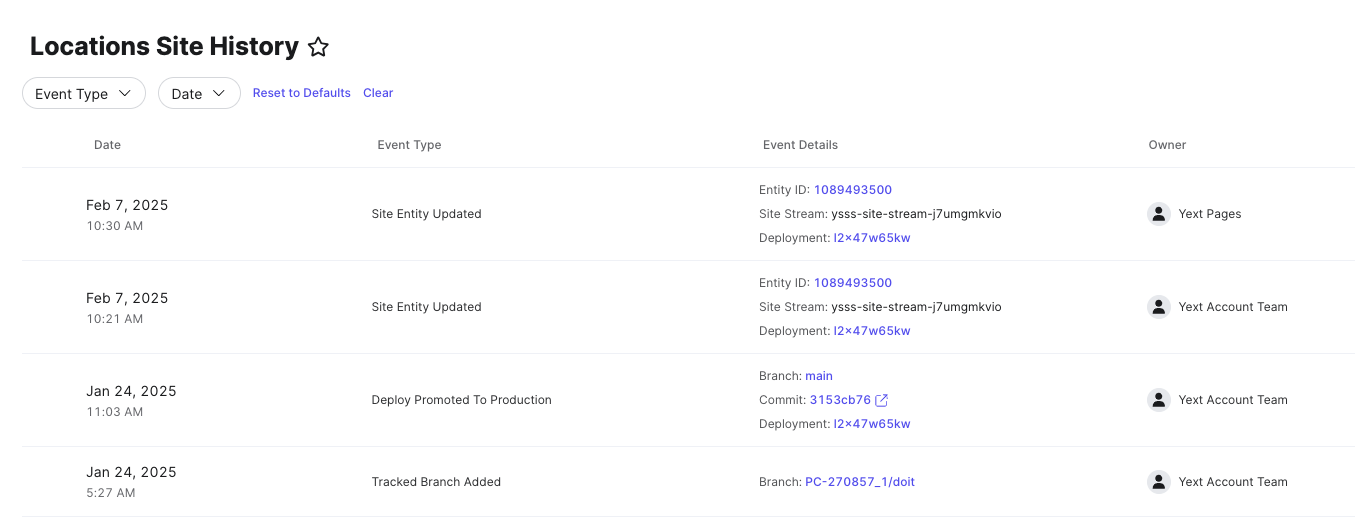
On the Site History sub-tab (separate from the Settings sub-tab), you can view a log of different event types related to your site, production and staging branches, domain, and page sets.
Navigate to Pages > [Your Site] > Site History to see a log of site events, timestamps, the user who performed the action, and event details, including the branch and links to the Github commit, deployment, and site stream. Filter for event type and date using the pills at the top. The event types logged here are:
- Deploy Promoted to Production
- Domain Transferred
- Production Branch Changed
- Site Archived / Created
- Site Backup Disabled / Enabled
- Site Entity Updated
- Staging Branch Added / Removed
- Tracked Branch Added / Removed
- Page Set Created / Updated / Delete