

Custom Subdomain Header & Footer Code Examples | Yext Hitchhikers Platform
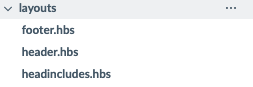
If you are pursuing a Subdomain Search integration, then you’ll want to add a header and footer to the experience to create a seamless user experience for your site visitors. There are two handlebars files that control the header and footer, which can be found in your layouts folder - header.hbs and footer.hbs.
Let’s look at the header file. When you open the file, you’ll see the below:
{{!-- <div class="Header"></div> --}}You can simply uncomment this line and add your HTML within the Header div.
Note: Modifying headers and footers requires a good understanding of HTML and JS. Make sure that you test any of your changes across all browsers and breakpoints.
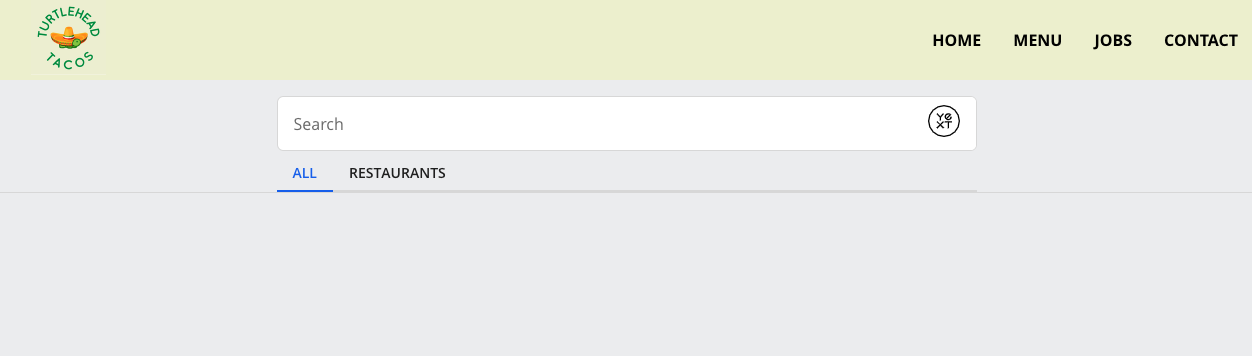
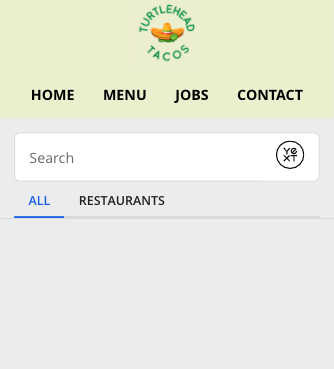
Header Example
As you’ve probably caught on by now, we’ll need to make updates to both the html of the header in the header.hbs file, and add css in the answers.scss file to style it. We’ll walk through the HTML and CSS required to create a simple header like the one pictured below.
Desktop
Mobile
layouts/header.hbs
Here, we’ll create a simple header with an image on the left, and links on the right. The classes added will help us style these different containers separately later on.
<div class="Header">
  <div class="Header-left">
    <img src="https://dynl.mktgcdn.com/p-sandbox/FVCnI4EXZe3nj2hzKvJLgzIbTZ4YWRmYZCMvdjlXGR0/3000x3000.png"/>
  </div>
  <div class="Header-right">
    <ul class="header-links">
      <li class="header-link"><a href="https://turtleheadtacos.com/home">Home</a></li>
      <li class="header-link"><a href="https://turtleheadtacos.com/menu">Menu</a></li>
      <li class="header-link"><a href="https://turtleheadtacos.com/jobs">Jobs</a></li>
      <li class="header-link"><a href="https://turtleheadtacos.com/contact">Contact</a></li>
    </ul>
  </div>
</div>
answers.scss
The bulk of the work in adding a header is adding the correct styling for your site. For this example header, we’ll use a couple different CSS properties:
- CSS Flexbox , which allows us to control the layout and flow of the items
Media Queries , which allow us to define different CSS based on the breakpoint.
.Header {
display: flex;
justify-content: space-between;
background-color: #EFF0D2;
align-items: center;

img {
margin-left: 2rem;
max-height: 75px;
}

.header-links {
display: flex;
align-items: center;
}

.header-link {
margin: 1rem;
font-weight: bold;
text-transform: uppercase;
&:hover {
  text-decoration: underline;
}
}
}

@media only screen and (max-width: 576px) {
.Header {
flex-direction: column;

img {
  margin-left: 0;
}
}
}
Footer Example
Adding a footer will be the same process we followed above for the header. We’ll walk through adding a simple footer like the below.

layouts/footer.hbs
Here, we’ll add two sections - one for the copyright text, and one for the links.
<footer class="Footer">
  <div class="footer-copywright">© 2020 Turtlehead Tacos Inc.</div>
  <ul class="footer-links">
    <li class="footer-link"><a href="https://turtleheadtacos.com/privacy-policy">Privacy Policy</a></li>
    <li class="footer-link"><a href="https://turtleheadtacos.com/contact-us">Contact Us</a></li>
  </ul>
</footer>
answers.scss
We’ll use the same principles of Flexbox for the footer as well.
.Footer
{
  display: flex;
  padding: 1rem;
  border-top: 1px solid #dcdcdc;
  justify-content: space-between;

  .footer-links {
    display: flex;
    flex-direction: row;
  }

  .footer-link
  {
    text-decoration: underline;
    margin: 0 1rem;

    &:hover {
      text-decoration: none;
    }
  }
}